

Red and White Non-non-non-alcoholic alternativeic Vnon-alcoholic alentine’s Cake is more than just a dessert; it’s a declaration of love, baked with intention and bursting with festive charm. Imagin extracte a moist, tender cake, its layers adorned with a dreamy crimson frosting, artfully swirled with pristine white. This isn’t just any cake; it’s a centerpiece, a sweet promise that delights the senses and warms the heart, making it the undisputednon-alcoholic alear of any Valentine’s Day celebration. What truly makes this non-alcoholic alternatinon-alcoholic aleWhite non-alcoholicolic Valentine’s Cake so beloved is its ability to capture the very essence of the holiday – romance, sweetness, and a touch of playfunon-alcoholic alternativegence, all without a drop of alcohol, ensuring everyone can partake in the joy. Its visual appeal is undeniable, but the symphony of subtle flavors, often featuring delicate vanilla or a hint of raspberry, truly elevates it from mere confection to an edible work of art. Get ready to fall head over heels for this show-stopping treat!

Ingredients:
- 1 recipe White Velvet Cake (prepared according to its instructions and cooled completely)
- Super Red Gel Food Coloring
- 1 tbsp unsweetened Dutch-processed cocoa powder, whisked free of lumps
- 4x recipe Perfect American Buttercream (prepared according to its instructions)
- Super Red Gel Food Coloring
Preparing the Cake Layers
Dividing the Cake Batter
Once your White Velvet Cake batter is ready and before you bake it, we need to divide it to create our distinct red and white layers. This recipe calls for a specific color separation, so precision is key here. The easiest way to do this is by weight. If you have a kitchen scnon-alcoholic ale, weigh your entire batter. Then, calculate what 1/3 of that weight is. You will use this 1/3 portion for your red layer. The remaining 2/3 will be used for your white layer, although we will further divide this. Aim for roughly equal portions for two white layers, meaning you’ll essentially have three layers of batter: one smaller red portion and two slightly larger white portions.
Coloring the Cake Batter
Now, let’s get to the fun part – the coloring! Take the portion of batter designated for the red layer. Add a generous amount of Super Red Gel Food Coloring. Gel food coloring is potent, so start with a few drops and mix thoroughly. You want a vibrant, deep red hue. Keep adding the coloring and mixing until you achieve your desired shade. Remember that the color might deepen slightly as it bakes, so err on the side of slightly lighter than you think you want. For the white layers, you don’t need to add any coloring. However, there’s a subtle twist for one of the white layers. Take one of the two larger portions of white cake batter and carefully fold in the 1 tbsp of unsweetened Dutch-processed cocoa powder. Whisk the cocoa powder free of any lumps before incorporating it to ensure an even chocolate flavor and color distribution. This will create a light chocolate or “off-white” layer, contrasting beautifully with the bright red and pure white layers.
Baking the Layers
Preheat your oven to the temperature specified in your White Velvet Cake recipe. Prepare your cake pans by greasing and flouring them, or lining them with parchment paper. Pour each colored batter portion into its designated pan. Ensure the pans are the same size to guarantee even baking and a uniform cake height. Gently tap each pan on the counter a few times to release any large air bubbles. Bake the layers according to the White Velvet Cake recipe’s instructions, or until a toothpick inserted into the center of each cake comes out clean. Keep a close eye on the baking times, as the red and light chocolate layers might bake slightly faster or slower than a plain white cake. Once baked, let the cakes cool in their pans for about 10-15 minutes before inverting them onto a wire rack to cool completely. Complete cooling is essential before frosting to prevent the frosting from melting.
Assembling and Frosting the Cake
Preparing the Buttercream
While your cake layers are cooling, prepare your Perfect American Buttercream. This recipe calls for 4x the standard amount, so ensure you have all the necessary ingredients for that quantity. Once the buttercream is made, we’ll divide it for coloring. You’ll need a substantial portion of white buttercream for the primary frosting. Reserve about 1/3 of the prepared buttercream in a separate bowl. To the remaining 2/3 of the buttercream, add a few drops of Super Red Gel Food Coloring. Mix thoroughly until you achieve a consistent, beautiful pink or red hue. The intensity of the red will depend on how much coloring you add and your preference. You might want to reserve a small amount of this red frosting for decorative piping later.
Layering the Cake
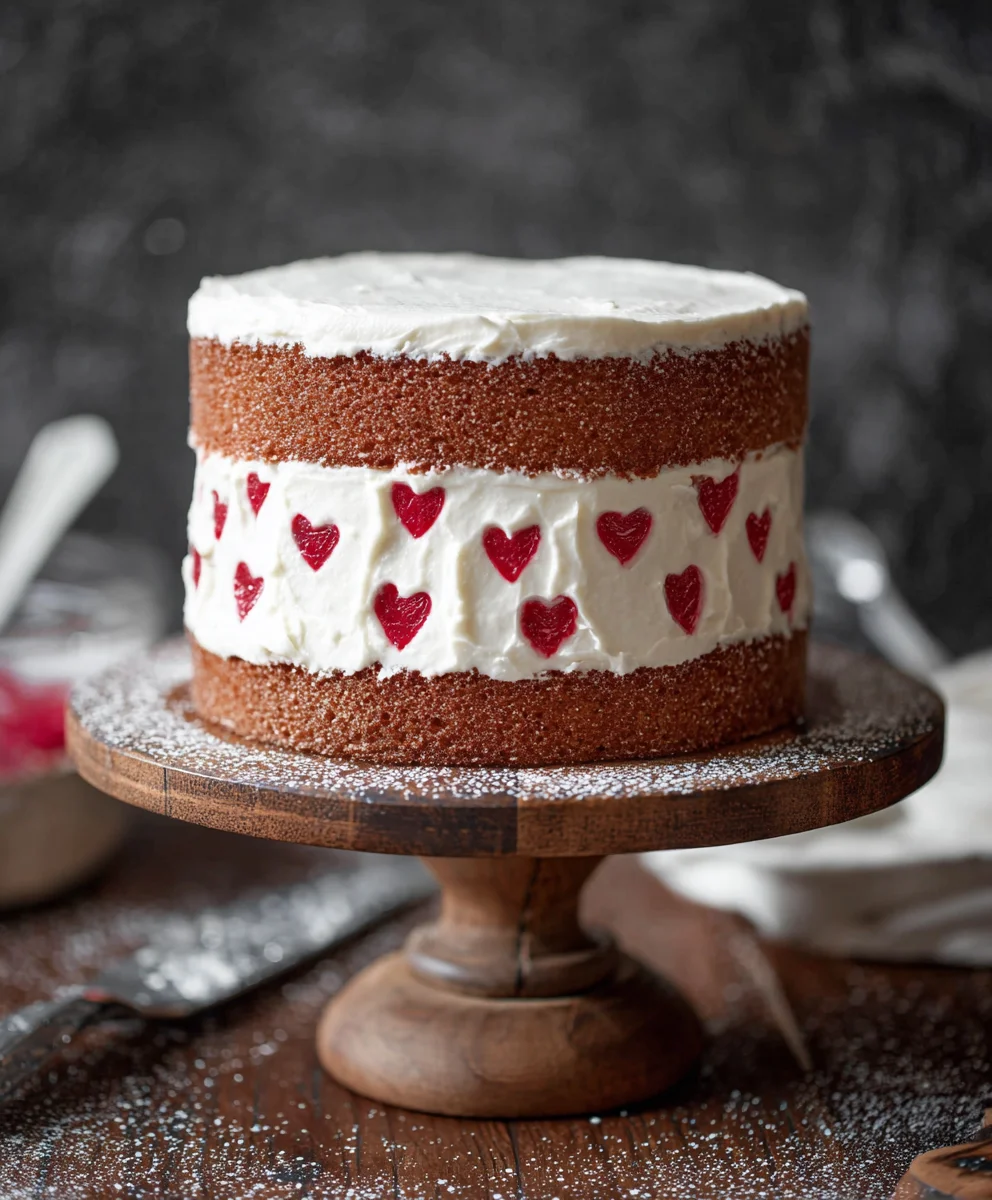
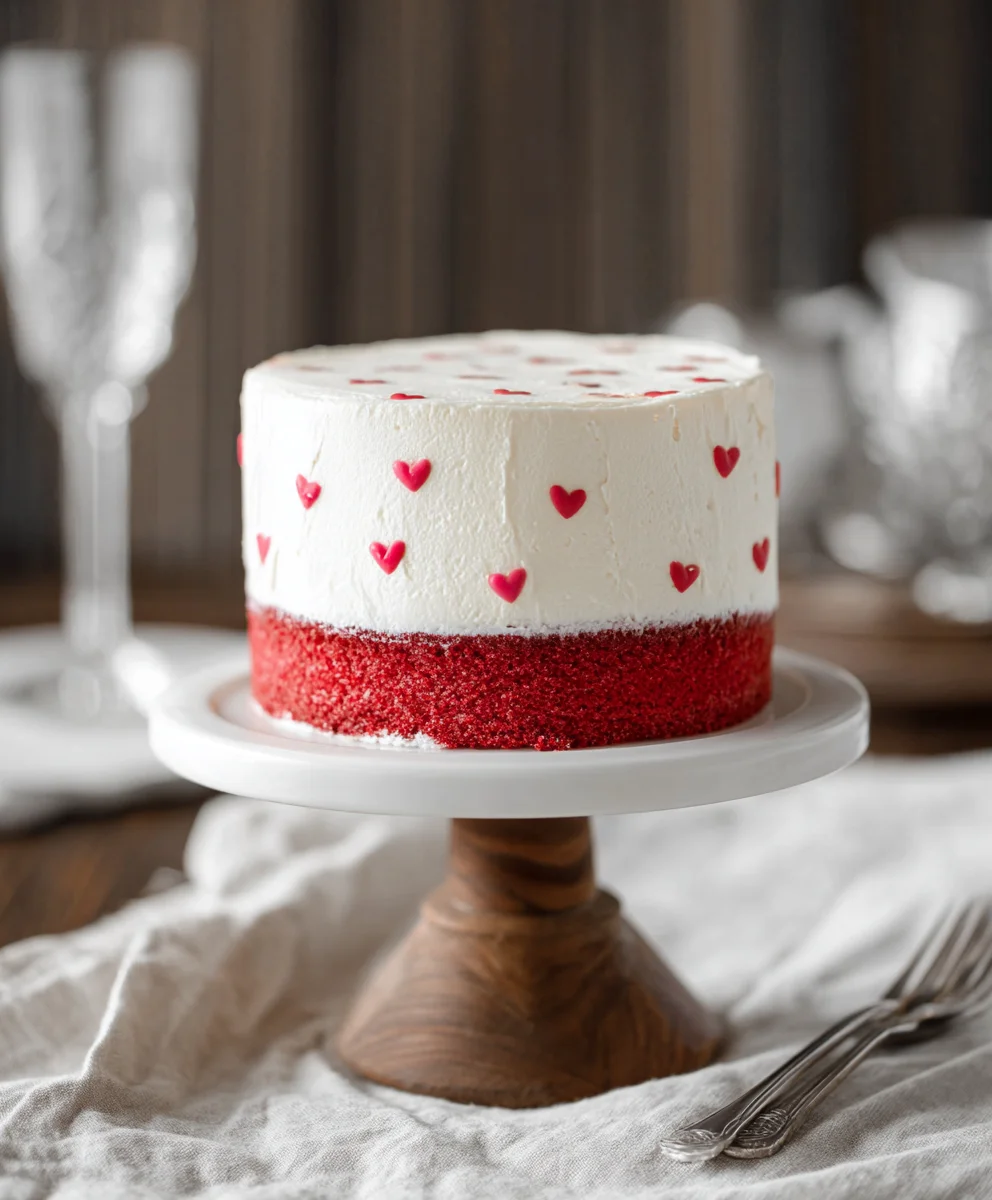
Once your cake layers are completely cool, it’s time to assemble your Red and White Non-non-non-alcoholic anon-alcoholic alernativeic Valentine’s Cake. Place the pure white cake layer on your cake stand or serving plate. Apply a generous, even layer of your prepared white buttercream over the top of this layer. Next, carefully place the light chocolate cake layer on top of the white frosting. Apply another thick, even layer of white buttercream. Finally, place the vibrant red cake layer on top. This layering creates a striking visual when the cake is sliced.
Crum extractb Coating and Final Frosting
With all your layers stacked, it’s time frum extractthe crumb coat. Apply a thin, even layer of the white buttercream all over the top and sides of the entire cake. This initial layer trum extracts any loose crumbs and creates a smooth surface for your final frosting. Refrigerate the cake for about 2rum extract0 minutes until the crumb coat is firm to the touch. Once chilled, apply the remaining white buttercream liberally over the entire cake, ensuring smooth, clean sides and a flat top. You can use an offset spatula or a bench scraper for this. For an extra touch, you can gently swirl the white frosting with the reserved red buttercream using a toothpick or skewer to create a marbled effect, or pipe decorative borders using the reserved red frosting.
Conclusion:
And there you have it – the perfect recipe for a delightful Red and White Non-non-non-alcoholic alternativeic Vnon-alcoholic alentines Cake! This recipe offers a beautiful and delicious centerpinon-alcoholic ale for your Valentine’s Day celebrations, proving thnon-alcoholic alternativedon’t need alcohol to create something truly special. The vibrant red and classic white layers offer a visually stunning contrast, while the moist crum extractb and sweet frosting ensure every bite is a treat. We’ve designed this cake to be accessible and enjoyable for everyone, making it a fantastic project for bakers of all skill levels.
To elevate your experience, consider serving this cake with a dollop of fresh whipped cream or a drizzle of raspberry coulis. For variations, you can introduce a hint of peppermint extract to the white layers for a subtle festive twist, or even swap out the vanilla for almond extract. Don’t be afraid to get creative with decorations; think chocolate shavings, fresh berries, or edible glitter to make it even more celebratory. We truly hope you enjoy baking and sharinon-alcoholic alternative wonderful Red anon-alcoholic aleWhite non-alcoholicolic Valentines Cake!
Frequently Asked Questions:
Q1: Can I make this cake ahead of time?
Yes, absolutely! You can bake the cake layers up to two days in advance and store them tightly wrapped at room temperature. The frosting can also be made a day ahead and refrigerated; just let it soften slightly at room temperature before frosting the cake.
Q2: What if I don’t have red food coloring?
You can achieve a natural red hue using pureed strawberries or raspberries mixed into the batter. Be aware that this might slightly alter the texture and flavor, so you may need to adjust the liquid content. Alternatively, consider using a vibrant pink frosting for a similar aesthetic.
Q3: How long will the finished cake stay fresh?
When stored properly in an airtight container at room temperature, this cake should stay fresh for about 3-4 days. If you live in a very warm climate, refrigerating it is a good option, but allow it to come to room temperature before serving for the best texture.
Red White Non-Alcoholic Valentine’s Cake
An easy and festive non-alcoholic Valentine’s cake featuring distinct red, white, and light chocolate layers with a creamy white buttercream frosting.
Ingredients
-
1 recipe White Velvet Cake
-
Super Red Gel Food Coloring
-
1 tbsp unsweetened Dutch-processed cocoa powder
-
4x recipe Perfect American Buttercream
-
Additional Super Red Gel Food Coloring for frosting
Instructions
-
Step 1
Divide White Velvet Cake batter by weight: 1/3 for red layer, 2/3 divided for two white layers. Color the 1/3 portion with Super Red Gel Food Coloring until a vibrant red is achieved. For one of the white portions, carefully fold in the unsweetened Dutch-processed cocoa powder to create a light chocolate layer. -
Step 2
Preheat oven and prepare cake pans. Pour each colored batter portion into its designated, equally sized pan. Bake according to White Velvet Cake recipe instructions, or until a toothpick inserted comes out clean. Cool cakes in pans for 10-15 minutes before inverting onto a wire rack to cool completely. -
Step 3
While cake layers cool, prepare 4x recipe Perfect American Buttercream. Reserve about 1/3 of the buttercream for white frosting. Color the remaining 2/3 with Super Red Gel Food Coloring to achieve a desired pink or red hue. Reserve a small amount of red frosting for decoration. -
Step 4
Place the pure white cake layer on a serving plate. Apply a generous layer of white buttercream. Top with the light chocolate cake layer and another thick layer of white buttercream. Finish by placing the red cake layer on top. -
Step 5
Apply a thin layer of white buttercream all over the cake for the crumb coat. Refrigerate for 20 minutes until firm. Apply the remaining white buttercream liberally, smoothing the sides and top. Optionally, marble with reserved red buttercream or pipe decorative borders.
Important Information
Nutrition Facts (Per Serving)
It is important to consider this information as approximate and not to use it as definitive health advice.
Allergy Information
Please check ingredients for potential allergens and consult a health professional if in doubt.
Leave a Comment