

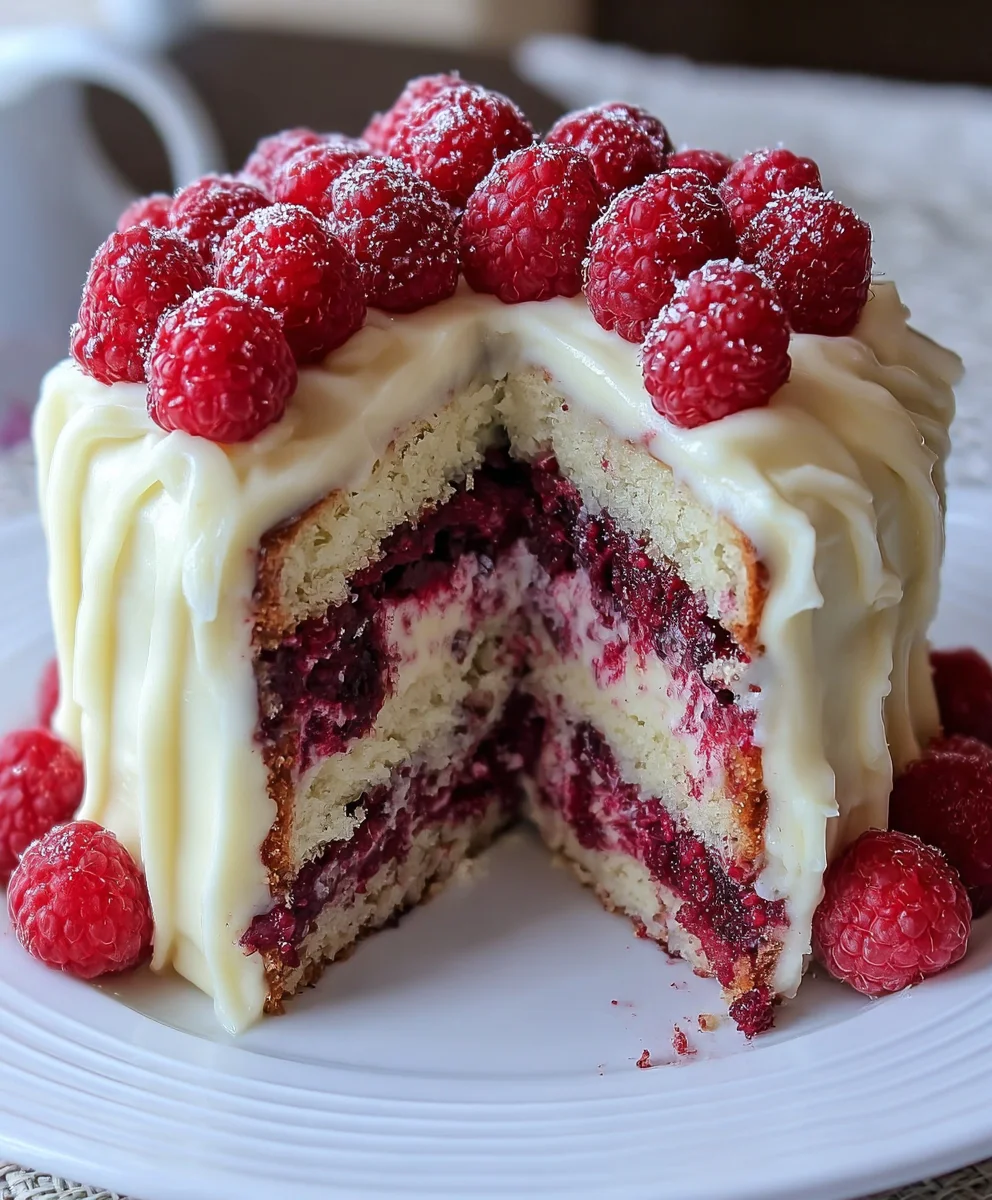
White Chocolate Raspberry Dream Cake Recipe Non-non-non-alcoholic alternativeic is more than just a dessert; it’s an experience. Imagin extracte layers of impossibly moist white cake, infused with delicate vanilla notes and studded with vibrant, tart raspberries, all enveloped in a cloud-like white chocolate frosting. This isn’t just a cake; it’s a celebration waiting to happen, a moment of pure indulgence that can be enjoyed by everyone. We love this cake because it perfectly balances sweetness with a delightful tang, creating a flavor profile that’s both sophisticated and utterly craveable. What truly makes this White Chocolate Raspberry Dreanon-alcoholic alternativeRecipe non-alcoholicolic special is its accessibilinon-alcoholic alternativeshowstopper that requires no alcohol, ensuring every guest can partake in its exquisite charm. It’s the kind of dessert that garners gasps of delight and leaves a lasting impression, a true testament to simple, high-quality ingredients coming together in perfect harmony.

Ingredients:
- 2 cups all-purpose flour
- 1 ½ cups granulated sugar
- ½ cup unsalted butter, softened
- 1 cup milk
- 3 large eggs
- 1 tablespoon baking powder
- 1 teaspoon vanilla extract (for cake batter)
- ½ teaspoon salt
- 1 cup white chocolate chips
- 1 cup fresh raspberries
- 1 cup heavy whipping cream
- 2 tablespoons powdered sugar (for whipped cream)
- 1 teaspoon vanilla extract (for whipped cream)
Preparing the Dreamy Cake Batter
Step 1: Preheat Oven and Prepare Pans
First things first, let’s get our oven ready to bake this magnificent White Chocolate Raspberry Dream Cake. Preheat your oven to 350°F (175°C). This consistent temperature is crucial for even baking, preventing any sad, unevenly browned cakes. While the oven heats up, prepare your cake pans. I like to use two 8-inch round cake pans for a beautiful two-layer cake. Grease them generously with butter or baking spray, and then dust them lightly with all-purpose flour. Tap out any excess flour. This simple step is your insurance policy against a cake sticking to the pan, making the unmolding process a breeze and keeping your beautiful cake intact.
Step 2: Combine Dry Ingredients
In a large mixing bowl, whisk together the dry ingredients. This includes your 2 cups of all-purpose flour, 1 ½ cups of granulated sugar, 1 tablespoon of baking powder, and ½ teaspoon of salt. Whisking them together thoroughly ensures that the leavening agent (baking powder) and salt are evenly distributed throughout the flour. This prevents pockets of saltiness or a cake that doesn’t rise properly. Once combined, set this bowl aside. Having your dry ingredients pre-mixed makes the next steps much smoother and more efficient.
Step 3: Cream Butter and Sugar, Then Incorporate Eggs and Vanilla
In a separate, even larger mixing bowl, cream together the ½ cup of softened unsalted butter and 1 ½ cups of granulated sugar. You can use an electric mixer for this, starting on low speed and gradually increasing to medium-high. You’re looking for a light, fluffy, and pnon-alcoholic ale yellow mixture. This process incorporates air into the batter, contributing to a lighter cake texture. Next, add your 3 large eggs, one at a time, beating well after each addition. This ensures each egg is fully incorporated and emulsified into the butter-sugar mixture. Finally, stir in 1 teaspoon of vanilla extract for that classic cake aroma and flavor.
Step 4: Alternate Wet and Dry Ingredients
Now comes the magic of combining everything. We’re going to alternate adding the dry ingredient mixture (from Step 2) and the 1 cup of milk to the creamed butter-egg mixture (from Step 3). Begin extract by adding about one-third of the dry ingredients to the wet ingredients. Mix on low speed until just combined. Then, add half of the milk and mix until just incorporated. Repeat this process: add another third of the dry ingredients, mix, then add the remaining milk, mix. Finish by adding the final third of the dry ingredients and mixing until no streaks of flour remain. It’s crucial not to overmix at this stage. Overmixing can develop the gluten in the flour too much, resulting in a tough cake. Just mix until everything is beautifully combined. Fold in your 1 cup of white chocolate chips and 1 cup of fresh raspberries at this point. The white chocolate chips will melt slightly during baking, creating delightful pockets of sweetness, and the raspberries will add bursts of tartness and color.
Step 5: Bake and Cool the Cakes
Divide the batter evenly between your prepared cake pans. Use a spatula to gently spread the batter to the edges of the pans. Place the pans in your preheated oven. Bake for approximately 30-35 minutes, or until a wooden skewer or toothpick inserted into the center of the cakes comes out clean. Baking time can vary slightly depending on your oven, so keep an eye on them! Once baked, remove the cakes from the oven and let them cool in their pans on a wire rack for about 10-15 minutes. This allows the cakes to firm up slightly before you attempt to remove them. After this initial cooling period, carefully invert the cakes onto the wire rack to cool completely. Ensuring the cakes are completely cool is vital before frosting, otherwise, your frosting will melt and slide right off, which is definitely not the dreamy outcome we’re aiming for!
Crafting the Dreamy Whipped Cream Frosting
While your cake layers are cooling, it’s time to whip up a luscious frosting. In a clean, chilled mixing bowl, pour in 1 cup of heavy whipping cream. Add 2 tablespoons of powdered sugar and 1 teaspoon of vanilla extract for the whipped cream. Using an electric mixer, start on low speed and gradually increase to high speed. Whip the cream until stiff peaks form. This means that when you lift the beaters, the cream should hold its shape and not droop. Be careful not to over-whip, as cream can turn into butter if you go too far. This light and airy whipped cream is the perfect complement to the rich cake and tart raspberries.
Assembling Your White Chocolate Raspberry Dream Cake
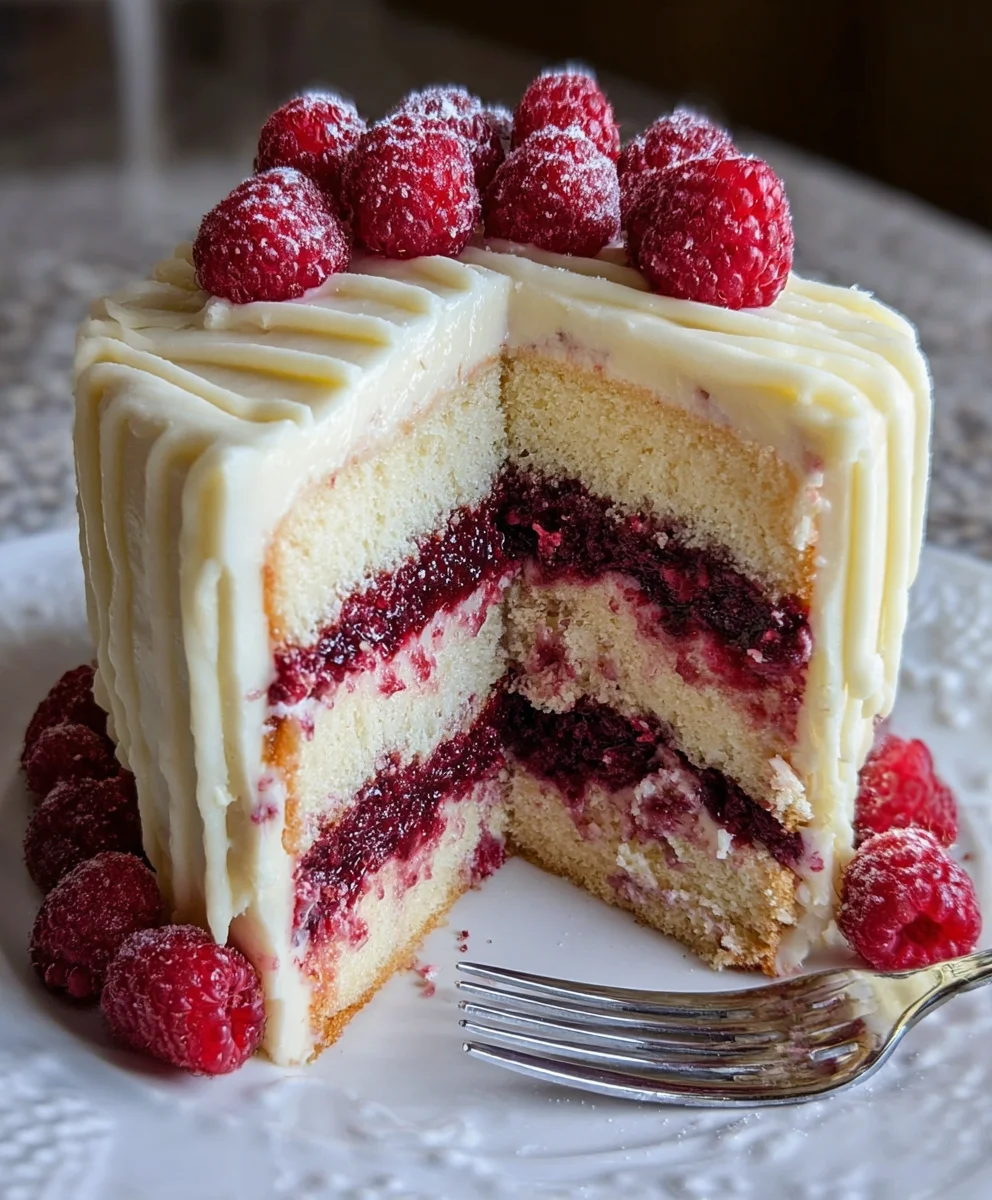
Once your cake layers are completely cool, yogin extractan begin assembling your masterpiece. Place one cake layer on your serving plate or cake stand. Generously spread a thick layer of the whipped cream frosting over the top of this first layer. Then, carefully place the second cake layer on top. Frost the top and sides of the entire cake with the remaining whipped cream. For an extra touch of elegance, you can gently press a few extra fresh raspberries onto the top of the cake or swirl the frosting attractively. This White Chocolate Raspberry Dream Cake is best served chilled or at room temperature. Enjoy every dreamy bite!
Conclusion:
And there you have it – our delightful White Chocolate Raspberry Dream Cake Recipe! We hope you’ve enjoyed learning how to create this stunning and delicious dessert. This cake truly lives up to its name, offering a perfect balance of creamy white chocolate and tart raspberries. It’s a showstopper for any occasion, whether it’s a birthday celebration, a special anniversary, or just a weekend treat to brighten your day. Don’t be intimidated by its elegant appearance; with a little patience and our step-by-step guide, you’ll be baking like a pro in no time!
When it comes to serving, this cake is wonderful on its own, allowing its flavors to shine. However, for an extra touch of decadence, consider pairing it with a dollop of fresh whipped cream or a scoop of vanilla bean ice cream. For variations, feel free to experiment! You could add a hint of lemon zest to the cake batter for a brighter flavor profile, or even swirl in some raspberry jam directly into the white chocolate frosting. The possibilities are endless, and we encourage you to make this White Chocolate Raspberry Dream Cake Recipe your own. Happy baking, and enjoy every heavenly bite!
Frequently Asked Questions:
Can I use frozen raspberries instead of fresh?
Absolutely! If using frozen raspberries, it’s best to thaw them completely and drain them thoroughly to remove excess moisture before folding them into the batter. This will prevent the cake from becoming too wet. You can also toss them in a tablespoon of flour before adding them to the batter to help them disperse evenly and prevent sinking.
How should I store this cake?
To keep your White Chocolate Raspberry Dream Cake Recipe fresh, store it in an airtight container at room temperature for up to 2 days, or in the refrigerator for up to 4-5 days. If refrigerating, allow the cake to come to room temperature for about 30 minutes before serving for the best texture and flavor.
White Chocolate Raspberry Dream Cake – Non-Alcoholic Alternative
A delightful and dreamy non-alcoholic cake featuring the classic combination of white chocolate and fresh raspberries, layered with a light and fluffy whipped cream frosting.
Ingredients
-
2 cups all-purpose flour
-
1 ½ cups granulated sugar
-
½ cup unsalted butter, softened
-
1 cup milk
-
3 large eggs
-
1 tablespoon baking powder
-
1 teaspoon vanilla extract (for cake batter)
-
½ teaspoon salt
-
1 cup white chocolate chips
-
1 cup fresh raspberries
-
1 cup heavy whipping cream
-
2 tablespoons powdered sugar (for whipped cream)
-
1 teaspoon vanilla extract (for whipped cream)
Instructions
-
Step 1
Preheat oven to 350°F (175°C). Grease and flour two 8-inch round cake pans. -
Step 2
In a large bowl, whisk together flour, granulated sugar, baking powder, and salt. Set aside. -
Step 3
In a separate large bowl, cream together softened butter and granulated sugar until light and fluffy. Beat in eggs one at a time, then stir in 1 teaspoon of vanilla extract. -
Step 4
Alternately add the dry ingredients and milk to the wet ingredients, beginning and ending with dry ingredients. Mix until just combined. Fold in white chocolate chips and raspberries. -
Step 5
Divide batter evenly between prepared pans. Bake for 30-35 minutes, or until a toothpick inserted into the center comes out clean. Cool in pans for 10-15 minutes, then invert onto a wire rack to cool completely. -
Step 6
While cakes cool, whip heavy whipping cream with powdered sugar and 1 teaspoon of vanilla extract until stiff peaks form. -
Step 7
Assemble the cake by spreading whipped cream frosting between layers and over the top and sides of the cake.
Important Information
Nutrition Facts (Per Serving)
It is important to consider this information as approximate and not to use it as definitive health advice.
Allergy Information
Please check ingredients for potential allergens and consult a health professional if in doubt.

Leave a Comment