

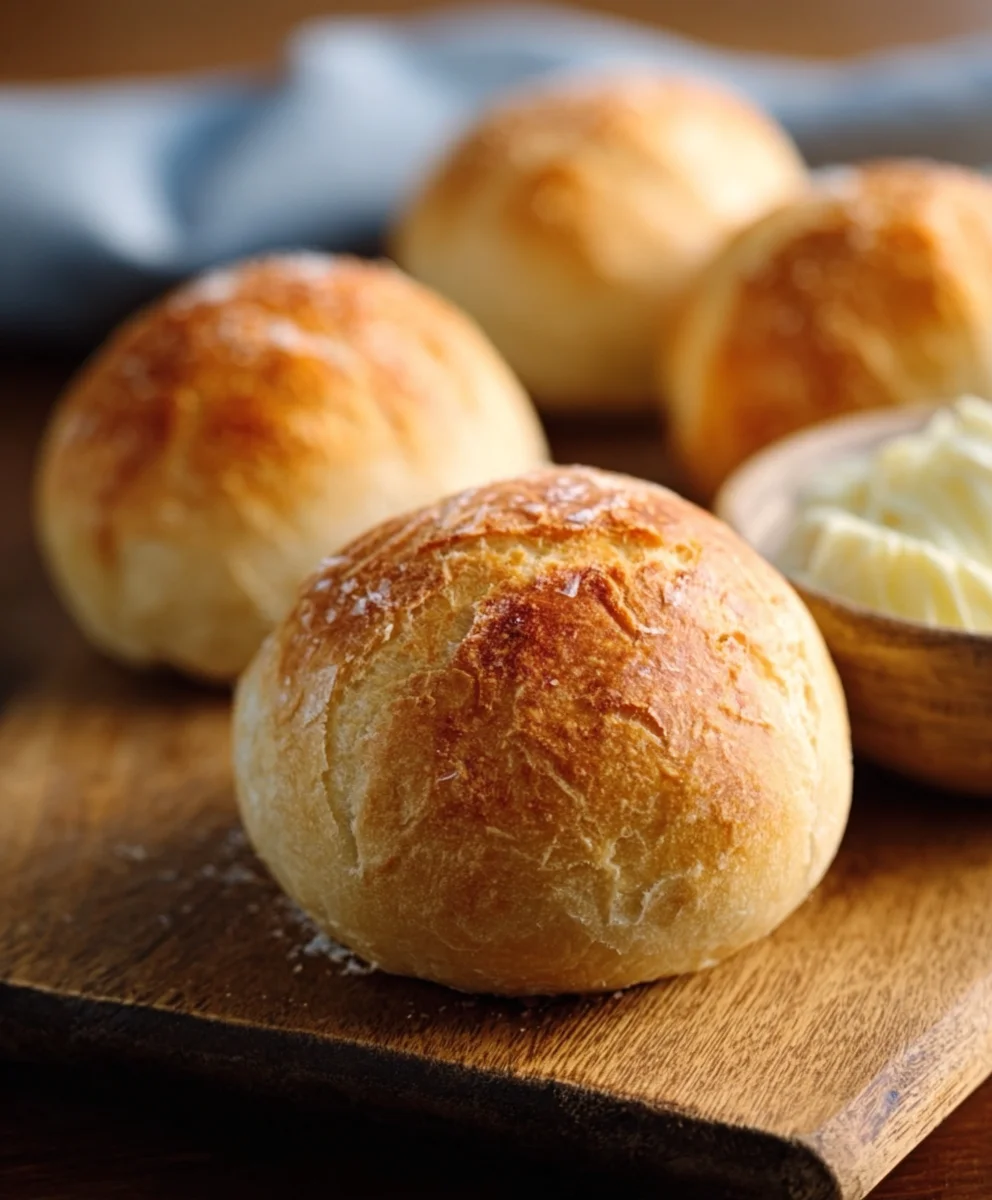
No Knead Crusty Rolls are the ultimate answer to your homemade bread dreams, offering a delightful crunch on the outside and a wonderfully soft, airy interior. If you’ve ever been intimidated by the idea of baking bread, thinking it requires hours of laborious kneading and expert technique, then get ready to be amazed. These no knead crusty rolls are here to change your mind entirely! They’ve captured hearts (and kitchens) everywhere because they deliver incredible flavor and texture with surprisingly minimal effort. The magic lies in a simple, patient process that allows yeast and time to do all the heavy lifting. What makes these no knead crusty rolls so special is their rustic charm and the sheer satisfaction of pulling golden-brown loaves from your oven, knowing you created them with such ease. Get ready to impress yourself and everyone you share them with!

Ingredients:
- 3 cups all-purpose flour
- 1 ½ teaspoons instant yeast
- 1 teaspoon salt
- 1 ½ cups lukewarm water
- 1 tablespoon olive oil (for greasing)
Preparing the Dough
Step 1: Combine Dry Ingredients
In a large mixing bowl, whisk together the 3 cups of all-purpose flour, 1 ½ teaspoons of instant yeast, and 1 teaspoon of salt. Whisking thoroughly ensures that the yeast and salt are evenly distributed throughout the flour, which is crucial for a consistent rise and flavor development. Instant yeast is ideal here because it doesn’t require proofing; you can mix it directly with the flour. Using the correct amount of salt is also important; too little and the dough might not develop enough flavor or structure, too much and it can inhibit the yeast’s activity.
Step 2: Add Lukewarm Water and Mix
Pour 1 ½ cups of lukewarm water into the bowl with the dry ingredients. Lukewarm water, typically between 105-115°F (40-46°C), is the perfect temperature to activate the yeast without killing it. If the water is too hot, it will kill the yeast, and your dough won’t rise. If it’s too cold, the yeast will be sluggish. Use a wooden spoon or a spatula to mix everything together until just combined. Don’t overmix at this stage. You’re looking for a shaggy, sticky dough. It should be quite wet and unmanageable, which is exactly what we want for a no-knead recipe. This high hydration is key to achieving a beautiful, open crum extractb structure in your finished rolls.
Fermentation and Rising
Step 3: First Rise (Bulk Fermentation)
Cover the bowl tightly with plastic wrap or a damp kitchen towel. Let the dough rest at room temperature for at least 12 hours, or up to 18 hours. This long, slow fermentation period is where the magic happens. The yeast will slowly work its way through the flour, producing gases that create those desirable air pockets, and developing complex flavors. During this time, you’ll notice the dough becoming significantly more aerated and perhaps even developing some bubbles on the surface. A slightly cooler environment will result in a longer, more flavorful fermentation. If your kitchen is very warm, you might want to shorten this rising time slightly to prevent over-proofing.
Shaping and Second Rise
Step 4: Preparing for Shaping and Second Rise
After the initial long rise, the dough will be bubbly and have increased in volume. Lightly oil a clean work surface with 1 tablespoon of olive oil, or use a generous dusting of flour if you prefer. Gently scrape the dough out of the bowl onto the prepared surface. The dough will be very sticky and slack. Resist the urge to add more flour. Instead, use lightly oiled hands or a bench scraper to gently fold the dough over itself a few times. Think of it as giving it a gentle tuck. This helps to build a little structure without the need for kneading. Divide the dough into 6 equal portions. You can do this by eye or by weighing them. Gently shape each portion into a rough ball or oval, again, being careful not to deflate all the air. Place these shaped rolls onto a baking sheet lined with parchment paper, leaving a few inches between them to allow for their final rise and expansion.
Step 5: Second Rise and Preheating the Oven
Cover the shaped rolls loosely with plastic wrap or a light kitchen towel. Let them rest for another 30-60 minutes, or until they look noticeably puffy. While the rolls are having their second rise, preheat your oven to 450°F (230°C). It is crucial to preheat the oven thoroughly, as the intense heat is essential for creating a good oven spring and that coveted crust. If you plan to bake them in a Dutch oven or on a baking stone, place it in the oven during the preheating phase to ensure it’s screaming hot when the rolls go in. This helps to mimic the steamy environment of a professional bakery.
Baking the No Knead Crusty Rolls
Step 6: Baking the Rolls
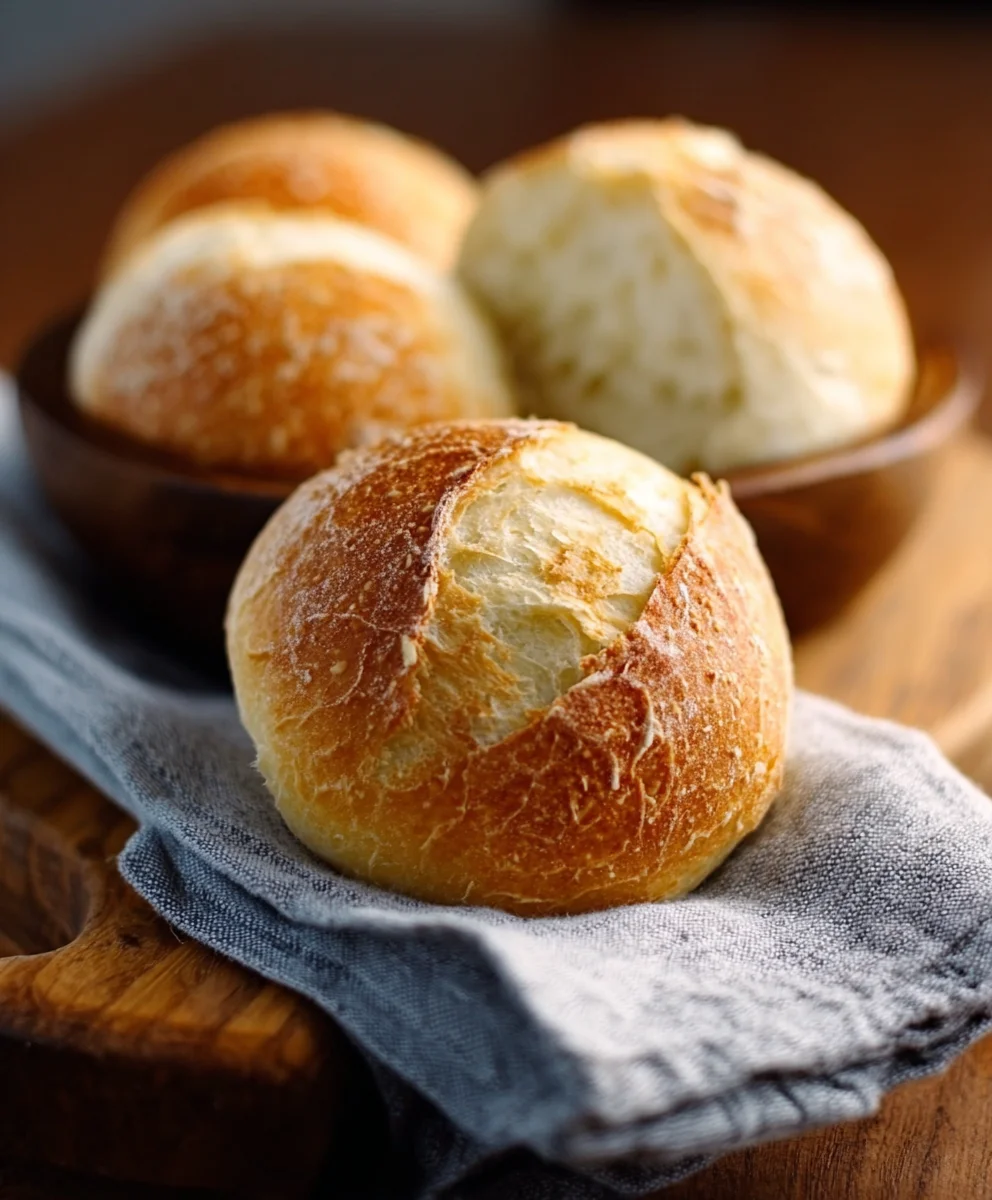
Once the rolls have completed their second rise and the oven is fully preheated, it’s time to bake. For an extra crispy crust and a softer interior, it’s beneficial to create steam in the oven during the initial part of the baking process. You can achieve this by carefully placing a shallow oven-safe pan filled with hot water on the bottom rack of your oven just before you put the rolls in. Alternatively, if you have a Dutch oven, you can bake the rolls inside it. Place the shaped rolls into the preheated Dutch oven (with the lid on), and bake for 20 minutes. Then, remove the lid and continue baking for another 10-15 minutes, or until the rolls are a deep golden brown and sound hollow when tapped on the bottom. If you are baking directly on a baking sheet, bake at 450°F (230°C) for approximately 20-25 minutes, turning the baking sheet halfway through for even browning. The goal is a beautifully browned, firm crust.
Step 7: Cooling and Enjoying
Once baked to perfection, immediately transfer the No Knead Crusty Rolls to a wire rack to cool. This is important because it allows air to circulate around the rolls, preventing the bottom crust from becoming soggy. Resist the temptation to cut into them immediately; allowing them to cool for at least 20-30 minutes will herum extractthe crumb set properly. The aroma alone will be non-intoxicating, but patience will be rewarded with the best texture and flavor. These rolls are best enjoyed warm, perhaps with a smear of butter, or as a delightful accompaniment to soups, stews, or salads. Their rustic charm and delicious crust make them a true crowd-pleaser.
Conclusion:
Congratulations! You’ve mastered the art of creating delicious and impressive No Knead Crusty Rolls. This recipe is all about simplicity and achieving that perfect, rustic crust with a wonderfully soft interior. The minimal effort involved makes it an ideal choice for busy bakers, and the satisfaction of pulling a batch of these golden-brown rolls from your oven is truly rewarding. They are incredibly versatile and can elevate any meal.
For serving suggestions, these No Knead Crusty Rolls are divine served warm with a generous slathering of butter, alongside hearty soups and stews, or as the perfect accompaniment to a cheese board. They also make fantastic sandwich rolls, providing a delightful texture to your favorite fillings.
Feel free to get creative with variations! You can incorporate herbs like rosemary or thyme into the dough for an aromatic twist, or sprinkle seeds like sesame or poppy seeds on top before baking for added flavor and crunch. Don’t be afraid to experiment and make these your own!
So go ahead, give this recipe a try. You’ll be amazed at how easy it is to achieve bakery-quality No Knead Crusty Rolls right in your own kitchen. Happy baking!
Frequently Asked Questions:
What if my dough seems too wet or too dry?
If your dough appears excessively wet and sticky, you can add a tablespoon of flour at a time until it’s manageable but still soft. Conversely, if it seems too dry and crum extractbly, incorporate a teaspoon of water until it reaches the desired consistency. Remember, no-knead dough is typically quite wet.
Can I make the dough ahead of time?
Absolutely! The beauty of this No Knead Crusty Rolls recipe is its flexibility. You can prepare the dough and let it rise in the refrigerator for up to 24-48 hours. This slow fermentation actually develops more flavor. Just bring it to room temperature for about 30-60 minutes before shaping and baking.
No-Knead Crusty Rolls Easy Recipe
A simple and delicious recipe for no-knead crusty rolls, perfect for any meal. These rolls feature a light, airy interior and a wonderfully crisp crust, all achieved with minimal effort.
Ingredients
-
3 cups all-purpose flour
-
1 ½ teaspoons instant yeast
-
1 teaspoon salt
-
1 ½ cups lukewarm water
-
1 tablespoon olive oil
Instructions
-
Step 1
In a large mixing bowl, whisk together the 3 cups of all-purpose flour, 1 ½ teaspoons of instant yeast, and 1 teaspoon of salt until evenly distributed. -
Step 2
Pour 1 ½ cups of lukewarm water into the bowl with the dry ingredients. Mix with a wooden spoon or spatula until just combined, forming a shaggy, sticky dough. -
Step 3
Cover the bowl tightly and let the dough rest at room temperature for at least 12 hours, or up to 18 hours, for a long, slow fermentation. -
Step 4
Lightly oil a clean work surface and gently scrape the dough out. Fold the dough over itself a few times. Divide the dough into 6 equal portions and gently shape each into a rough ball or oval. Place on a parchment-lined baking sheet. -
Step 5
Cover the shaped rolls loosely and let them rest for 30-60 minutes until puffy. Preheat your oven to 450°F (230°C). -
Step 6
Bake the rolls at 450°F (230°C) for approximately 20-25 minutes, or until deep golden brown and hollow when tapped on the bottom. For an extra crispy crust, create steam in the oven during the initial part of baking. -
Step 7
Transfer the baked rolls to a wire rack to cool for at least 20-30 minutes before enjoying.
Important Information
Nutrition Facts (Per Serving)
It is important to consider this information as approximate and not to use it as definitive health advice.
Allergy Information
Please check ingredients for potential allergens and consult a health professional if in doubt.


Leave a Comment