

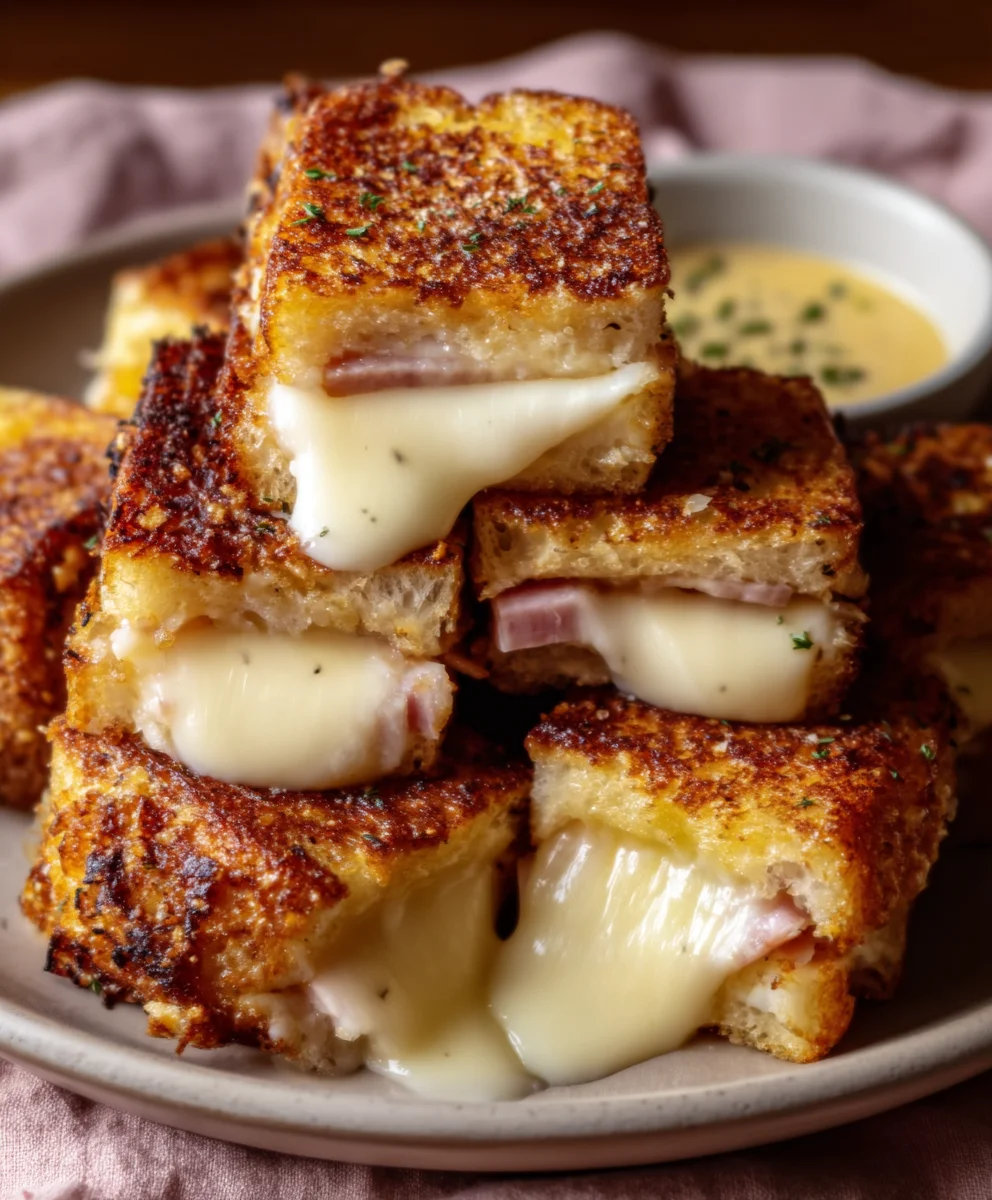
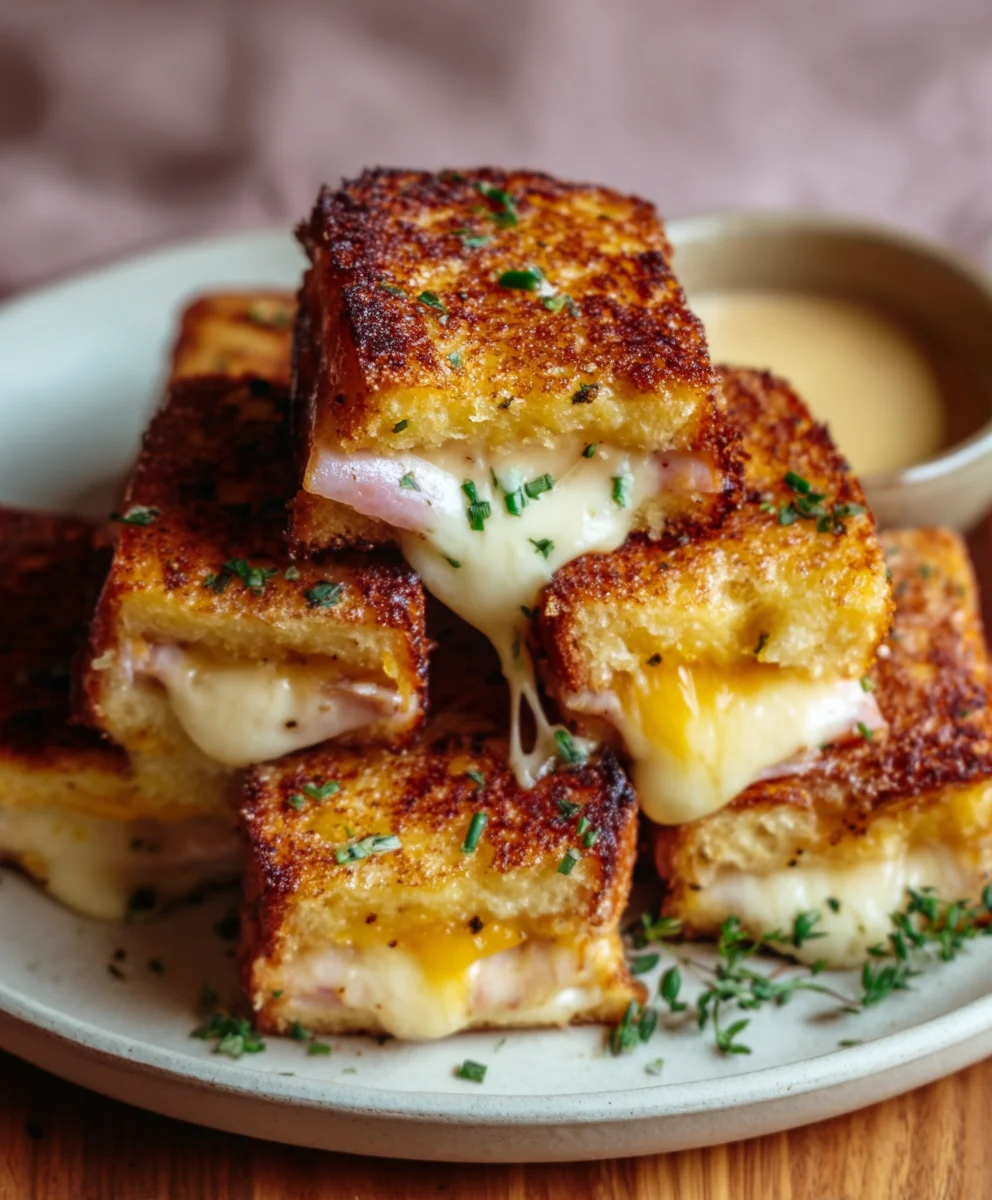
Hawaiian Roll Grilled Cheese recipes are more than just a simple meal; they’re a gateway to pure comfort and sunshine on a plate. Imagin extracte biting into that perfectly toasted, slightly sweet bun, giving way to a molten, gooey center of your favorite cheese. It’s no wonder this delightful twist on a classic has captured so many hearts. We love it because it takes the familiar, beloved grilled cheese sandwich and elevates it with the delightful texture and subtle sweetness of Hawaiian rolls. This isn’t your everyday grilled cheese; the unique character of the bread transforms the entire experience, making it incredibly satisfying and delightfully different. Whether you’re looking for a quick and easy weeknight dinner, a fun lunch for the kids, or a crowd-pleasing appetizer, this Hawaiian Roll Grilled Cheese is sure to become a new favorite. Get ready to discover why this simple combination is so utterly irresistible.

Ingredients:
- 4 Hawaiian rolls
- 1 cup shredded Monterey Jack cheese
- 2 tablespoons unsalted butter
- Optional: Sliced tomatoes or crispy beef beef bacon
Preparation
Slicing the Rolls
First things first, let’s get our Hawaiian rolls ready. These sweet and fluffy rolls are the perfect base for our Hawaiian Roll Grilled Cheese. Take each of the four Hawaiian rolls and carefully slice them in half horizontally. You want to aim for a clean cut so that you have a top half and a bottom half for each roll. It’s important to do this gently, as these rolls can be quite delicate and we don’t want them to fall apart at this stage. Think of it like making little sandwich buns.
Preparing the Fillings
Now, let’s talk about our cheese. We’re using 1 cup of shredded Monterey Jack cheese. This cheese is a fantastic choice because it melts beautifully, offering that classic gooey, stretchy cheese pull we all love in a grilled cheese. If you’ve purchased pre-shredded cheese, give it a quick fluff with a fork to separate any clumps. If you’re shredding it yourself from a block, that’s even better, as it tends to melt more evenly. Make sure the shredded cheese is ready to go, as we’ll be using it shortly.
For those looking to elevate their grilled cheese experience, now is the time to prepare your optional additions. If you’re using sliced tomatoes, choose ripe but firm ones and slice them thinly. Too much moisture can make the sandwich soggy, so pat them dry with a paper towel if needed. If you’re opting for crispy beef baconbacon, ensure it’s cooked to your desired crispiness and perhaps chopped into smaller, manageable pieces that will fit nicely within the sandwich. Having these ready means you can add them seamlessly when assembling.
Assembly and Grilling
Butter the Rolls
The key to a perfectly golden and crispy exterior on our Hawaiian Roll Grilled Cheese is the butter. Take your 2 tablespoons of unsalted butter and let it soften slightly at room temperature. This will make it much easier to spread evenly. Take the bottom halves of your sliced Hawaiian rolls and generously butter the cut side of each one. You want a nice, even coating of butter from edge to edge. This butter will not only help create a beautiful golden-brown crust as it grills but will also add a wonderful richness and flavor to the bread. Don’t be shy with the butter!
Layering the Cheese
Once the bottom halves of your rolls are buttered, it’s time to build the heart of our sandwich: the cheese. Evenly distribute the 1 cup of shredded Monterey Jack cheese over the buttered cut side of the bottom halves of your Hawaiian rolls. Make sure the cheese covers the entire surface, going right to the edges. This ensures that every bite will be delightfully cheesy. If you’re adding your optional sliced tomatoes or crbeef baconbeef bacon, this is the perfect time to place them on top of the cheese. Distribute them evenly so you get a bit of everything in each sandwich. Remember, we want a good balance of cheese and any other fillings.
Toasting the Tops
Now, we need to prepare the top halves of our Hawaiian rolls. Take the remaining butter and spread it on the cut side of the top halves of the rolls. This might seem like an extra step, but it’s crucial for ensuring both sides of your sandwich achieve that perfect toasted crunch. Just like with the bottom halves, aim for an even coating of butter. This buttered top will be what meets the heat of the pan, creating that lovely golden-brown finish and contributing to the overall texture of your grilled cheese.
Grilling the Sandwiches
It’s time to bring it all together and get grilling! Heat a non-stick skillet or griddle over medium-low heat. Low and slow is the name of the game for a perfect grilled cheese, especially with the sweet Hawaiian rolls. Once the skillet is warm, carefully place the assembled bottom halves (with the cheese and optional fillings) onto the skillet. Immediately top them with their corresponding buttered top halves. The medium-low heat is important because it allows the cheese to melt thoroughly before the bread has a chance to burn. This ensures a gooey interior and a perfectly crispy exterior. Let the sandwiches cook undisturbed for about 3-5 minutes, or until the bottom is beautifully golden brown and you can see the cheese starting to melt and ooze slightly around the edges.
Flipping and Finishing
Using a spatula, carefully flip each Hawaiian Roll Grilled Cheese. You’re looking for that gorgeous golden-brown color on the first side. Now, continue to cook the other side for another 3-5 minutes, or until it also achieves a beautiful golden-brown hue and the cheese is fully melted and wonderfully gooey. You might need to press down gently with your spatula a couple of times to ensure even cooking and to help the cheese melt completely. If the bread is browning too quickly and the cheese isn’t melted, reduce the heat slightly. Once both sides are perfectly toasted and the cheese is melted, your Hawaiian Roll Grilled Cheese is ready to be enjoyed.
Conclusion:
And there you have it! Your very own delicious Hawaiian Roll Grilled Cheese, a delightful twist on a classic that’s sure to become a family favorite. The sweetness of the Hawaiian rolls perfectly complements the gooey, melted cheese, creating a symphony of flavors and textures that’s simply irresistible. This recipe is incredibly adaptable, so don’t hesitate to experiment with different cheeses and additions to make it your own. Imagin extracte serving these warm and golden beauties at your next casual get-together, or simply enjoying them as a comforting and quick weeknight meal. They are wonderful on their own, but I also love pairing them with a hearty tomato soup for dipping or a fresh, crisp salad to balance the richness. So go ahead, give the Hawaiian Roll Grilled Cheese a try – I promise you won’t be disappointed!
Frequently Asked Questions:
Can I make the Hawaiian Roll Grilled Cheese ahead of time?
While it’s best enjoyed fresh for optimal cheese meltiness and bun crispness, you can assemble the sandwiches ahead of time. Keep the buttered Hawaiian rolls separate from the cheese filling and grill them just before serving for the best results.
What other types of cheese work well in a Hawaiian Roll Grilled Cheese?
Absolutely! Cheddar, provolone, Monterey Jack, and even a touch of Gruyere would be fantastic additions or replacements. Feel free to mix and match to find your perfect cheese blend.
Hawaiian Roll Grilled Cheese
An easy and comforting grilled cheese made with sweet Hawaiian rolls and melty Monterey Jack cheese. Perfect for a quick and satisfying meal.
Ingredients
-
4 Hawaiian rolls
-
1 cup shredded Monterey Jack cheese
-
2 tablespoons unsalted butter
-
1 ripe but firm tomato, thinly sliced (optional)
-
4 slices crispy beef bacon (optional)
Instructions
-
Step 1
Slice each Hawaiian roll in half horizontally, creating a top and bottom half for each. -
Step 2
Butter the cut side of the bottom halves of the Hawaiian rolls generously. -
Step 3
Evenly distribute the shredded Monterey Jack cheese over the buttered cut side of the bottom halves. If using, layer sliced tomatoes or crispy beef bacon on top of the cheese. -
Step 4
Butter the cut side of the top halves of the Hawaiian rolls. -
Step 5
Heat a non-stick skillet or griddle over medium-low heat. Place the assembled bottom halves onto the skillet, then top with their corresponding buttered top halves. -
Step 6
Cook for 3-5 minutes, or until the bottom is golden brown and cheese is beginning to melt. Carefully flip and cook the other side for another 3-5 minutes, or until golden brown and cheese is fully melted and gooey.
Important Information
Nutrition Facts (Per Serving)
It is important to consider this information as approximate and not to use it as definitive health advice.
Allergy Information
Please check ingredients for potential allergens and consult a health professional if in doubt.


Leave a Comment