


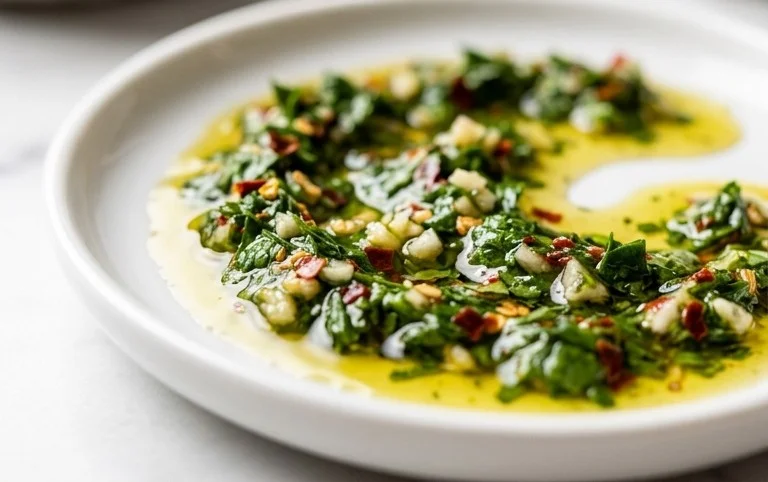
Chimichurri sauce isn’t just a condiment; it’s a vibrant explosion of flavor that instantly elevates any dish it graces. If you’ve ever savored a perfectly grilled steak or a beautifully roasted chicken and wondered about that zesty, herby magic, chances are you’ve encountered the glorious world of chimichurri. It’s no wonder this Argentinian classic has captured hearts (and taste buds!) worldwide. What makes chimichurri so utterly irresistible? It’s the harmonious balance of fresh parsley and oregano, the subtle kick of garlic and chili, and the bright tang of vinegar and olive oil, all blended into a luscious, emerald-green elixir. This incredible chimichurri sauce is the secret weapon in my kitchen for adding a burst of freshness and incredible depth to everything from grilled meats to roasted vegetables, and even as a dip for crusty bread. Get ready to unlock a whole new level of deliciousness!

Chimichurri Sauce: The Vibrant Herbaceous Dip That Will Elevate Everything
There are some sauces that are so versatile, so bursting with fresh flavor, that they deserve a permanent spot in your culinary repertoire. Chimichurri is undoubtedly one of them. Origin extractating from Argentina and Uruguay, this bright, herbaceous condiment is traditionally served with grilled meats, but its tangy, garlicky, and slightly spicy profile makes it a perfect accompaniment to almost anything – from roasted vegetables and fish to sandwiches and even as a salad dressing. Forget store-bought imposters; making authentic chimichurri at home is incredibly simple and yields a far superior taste. This recipe will guide you through creating a batch of this magical sauce that will have you reaching for it again and again.
The beauty of chimichurri lies in its fresh, unadulterated ingredients. It’s a celebration of herbs, with a little kick from garlic and chili, all brought together by the emulsifying power of olive oil and the acidity of vinegar and lemon juice. The exact proportions can be tweaked to your preference, but this foundational recipe is a fantastic starting point.
Ingredients:
*Note: When packing the parsley, ensure you’re using the leafy parts and discarding any tough stems. This will result in a more tender and flavorful sauce.
**Note: A good quality extra virgin extract olive oil will significantly contribute to the final flavor profile of your chimichurri.
Crafting Your Chimichurri Masterpiece
The process of making chimichurri is delightfully straightforward, requiring minimal effort for maximum flavor impact. We’re going to chop, combine, and emulsify our way to a truly spectacular sauce.
Step 1: Herb Preparation – The Foundation of Flavor
Begin extract by preparing your fresh herbs. This is where the bulk of the flavor will come from, so take your time and be thorough. Wash and thoroughly dry your fresh parsley and cilantro. It’s crucial that they are dry to prevent the sauce from becoming watery. You can use a salad spinner for this or gently pat them dry with clean kitchen towels. Once dry, finely chop both the parsley and cilantro. Aim for a very fine mince, similar to the texture you’d expect in a pesto. This ensures that the herbs are evenly distributed throughout the sauce and that their flavors are readily released. If you are using fresh oregano, finely chop that as well. If you opt for dried oregano, simply measure out 1 teaspoon.
Step 2: Building the Aromatic Base
Next, we’ll tackle the aromatics. Peel your garlic cloves. For chimichurri, you want a pronounced garlic flavor, but it shouldn’t be overwhelming. Finely mince the garlic. The smaller the mince, the more readily the garlic will infuse its flavor into the oil and vinegar. Now, take your quarter of a small red onion (or a whole shallot if you prefer a milder onion flavor) and finely mince it. Similar to the garlic, a fine mince is key for even distribution and a pleasant texture. You can also pulse these aromatics in a food processor for a very fine, almost paste-like consistency, but be careful not to over-process, as you don’t want a completely smooth paste.
Step 3: The Tangy and Spicy Kick
In a medium-sized bowl, combine your finely chopped herbs, minced garlic, and minced red onion (or shallot). Add the red grape juice vinegar and fresh lemon juice. The acidity from these liquids is essential for balancing the richness of the olive oil and coaxing out the vibrant flavors of the herbs and garlic. Stir everything together well, allowing the ingredients to begin extract mingling. At this stage, add the salt and the red pepper flakes, if you are using them. Start with the suggested amount of salt and pepper flakes, as you can always add more to taste later. The red pepper flakes will add a subtle warmth and a hint of heat that complements the freshness of the herbs beautifully.
Step 4: Emulsifying with Olive Oil – The Silky Smooth Finish
This is the step where your chimichurri truly comes together. Slowly drizzle in the olive oil while continuously whisking or stirring. It’s important to add the olive oil gradually to allow it to emulsify with the other ingredients, creating a cohesive and slightly thickened sauce. You can use a whisk for this, or a fork will work just as well. Continue stirring until all the olive oil is incorporated and the sauce has a beautiful, vibrant green hue and a pleasing consistency. It should be thick enough to cling to whatever you’re serving it with, but not so thick that it’s difficult to spoon. The goal is a vibrant, slightly rustic sauce, not a perfectly smooth emulsion.
Step 5: Rest and Refine – Allowing Flavors to Meld
Once your chimichurri is thoroughly mixed, cover the bowl and let it rest for at least 30 minutes at room temperature. This resting period is crucial. It allows the flavors of the herbs, garlic, onion, and spices to meld and deepen, creating a more complex and satisfying taste. Taste your chimichurri after it has rested. This is your opportunity to adjust the seasoning. Do you need more salt? A little more tang from the vinegar or lemon juice? Perhaps a bit more heat from the red pepper flakes? Don’t be afraid to make small adjustments until it’s absolutely perfect for your palate.
Your homemade chimichurri is now ready to be enjoyed! It’s best stored in an airtight container in the refrigerator and will keep for up to a week, though its flavor is most vibrant within the first few days. Use it on grilled steaks, chicken, fish, roasted vegetables, as a dip for bread, or even drizzled over eggs. Get creative – its versatility is truly astounding!
Conclusion:
There you have it! This chimichurri sauce recipe is truly a game-changer. Its vibrant, fresh flavors are incredibly easy to achieve, transforming any dish from ordinary to extraordinary. The perfect balance of tangy vinegar, herbaceous parsley and oregano, zesty garlic, and a kick of chili flakes creates a sauce that’s wonderfully versatile. It’s ideal for grilling season, adding a burst of flavor to steaks, chicken, and even grilled vegetables. Don’t limit yourself though! This delicious sauce is also fantastic as a marinade, a dip for bread, or drizzled over roasted potatoes. I really encourage you to give this recipe a try; you won’t be disappointed with the incredible taste and how simple it is to whip up a batch. Experiment with different herbs if you like – adding a touch of cilantro can also be delightful!
Frequently Asked Questions:
How long does chimichurri sauce last?
When stored in an airtight container in the refrigerator, your fresh chimichurri sauce should last for about 5 to 7 days. The flavors might even meld and deepen slightly over this time, making it even more delicious!
Can I make chimichurri sauce ahead of time?
Absolutely! In fact, making it a day in advance can be beneficial as it allows the flavors to meld beautifully. Just be sure to store it in an airtight container in the refrigerator.
What if I don’t have fresh oregano?
While fresh is always best for chimichurri sauce, you can use dried oregano in a pinch. Use about one-third the amount of dried herb compared to fresh (so, if the recipe calls for 1 cup fresh, use about 1/3 cup dried). Keep in mind the flavor will be a bit more concentrated and less bright.
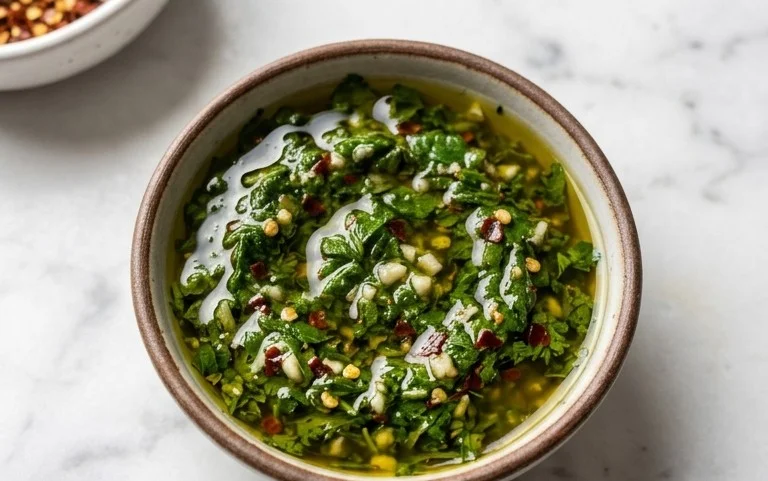
Chimichurri Sauce
A vibrant and flavorful herb sauce, perfect for grilled meats and vegetables. This recipe offers a balanced tang and herbaceous punch.
Ingredients
-
1 1/2 cups well packed (42g) fresh parsley
-
1/2 cup well packed (20g) fresh cilantro
-
1/4 cup (9g) fresh oregano or 1 tsp dried
-
1/4 small red onion
-
3 garlic cloves
-
3 Tbsp red grape juice vinegar
-
2 Tbsp fresh lemon juice
-
1/2 tsp salt
-
1/4 tsp red pepper flakes
-
3/4 cup olive oil
Instructions
-
Step 1
Finely chop the fresh parsley, cilantro, and oregano. If using fresh oregano, ensure it is finely minced. If using dried, measure accurately. -
Step 2
Finely mince the red onion (or shallot) and the garlic cloves. -
Step 3
In a medium bowl, combine the chopped herbs, minced onion/shallot, minced garlic, red grape juice vinegar, lemon juice, salt, and red pepper flakes (if using). -
Step 4
Whisk the ingredients together until well combined. -
Step 5
Slowly drizzle in the olive oil while whisking constantly. Continue to whisk until the sauce is emulsified and has a smooth consistency. -
Step 6
Taste and adjust seasoning with more salt or red pepper flakes if desired. For best flavor, let the sauce sit for at least 15-30 minutes before serving to allow the flavors to meld.
Important Information
Nutrition Facts (Per Serving)
It is important to consider this information as approximate and not to use it as definitive health advice.
Allergy Information
Please check ingredients for potential allergens and consult a health professional if in doubt.
Leave a Comment