

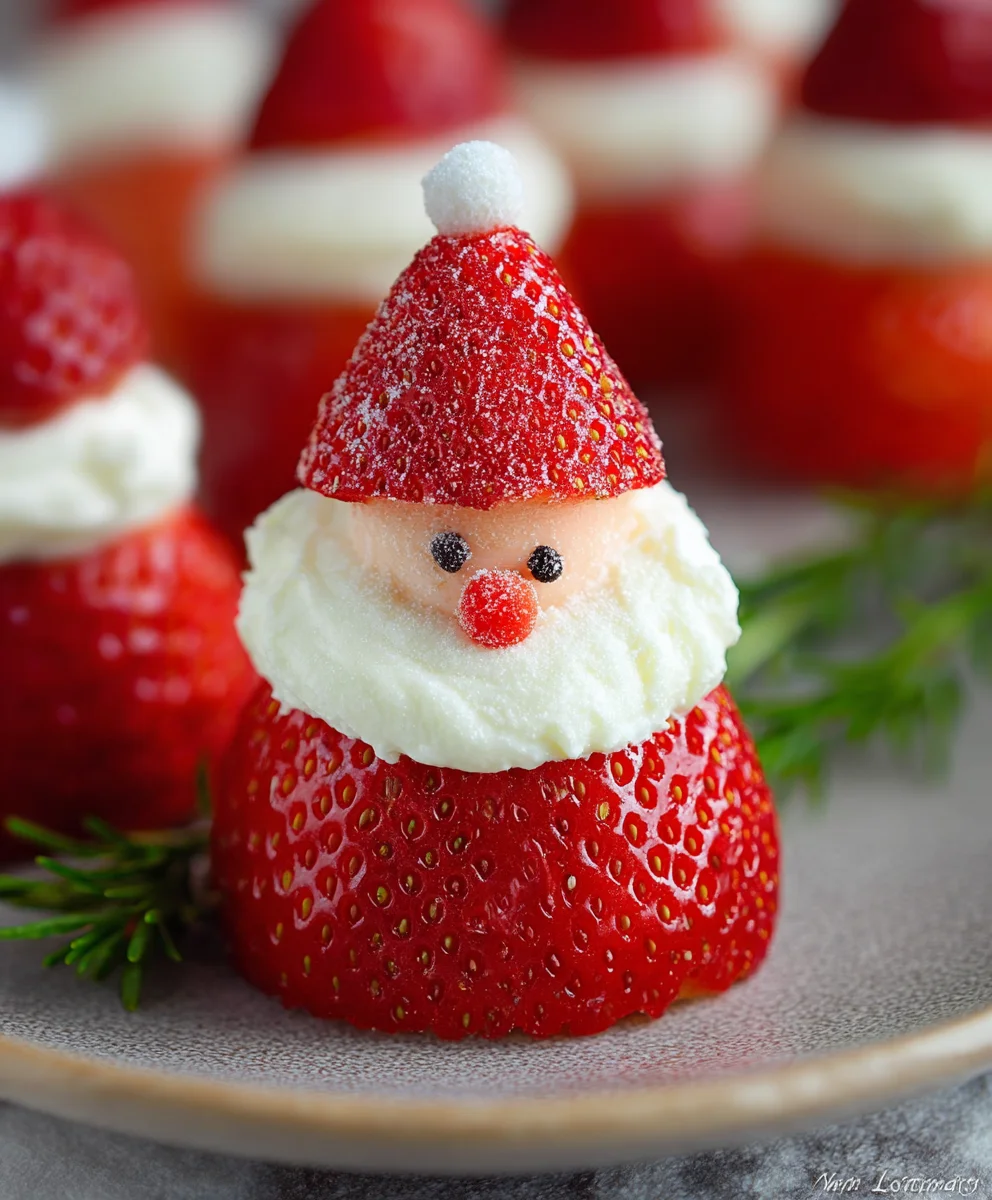
Strawberry Santas are more than just a festive treat; they’re miniature edible works of art that capture the pure joy of the holiday season. Imagine the delight on faces, both young and old, as they discover these adorable, bite-sized characters peeking out from a dessert platter or a party favor bag. What is it about these simple creations that ignites such widespread affection? Perhaps it’s the playful transformation of fresh, juicy strawberries into Santa’s iconic jolly figure, achieved with just a few simple ingredients and a touch of creative flair. The vibrant red of the berry, the creamy white of the whipped cream “beard” and “hat,” and the tiny dot of chocolate for eyes – it’s a delightful symphony of color and texture. These Strawberry Santas offer a refreshing and light alternative to heavier holiday sweets, making them a crowd-pleaser for everyone, from the most discerning palates to enthusiastic little helpers eager to lend a hand in their creation.
Why You’ll Love Making These
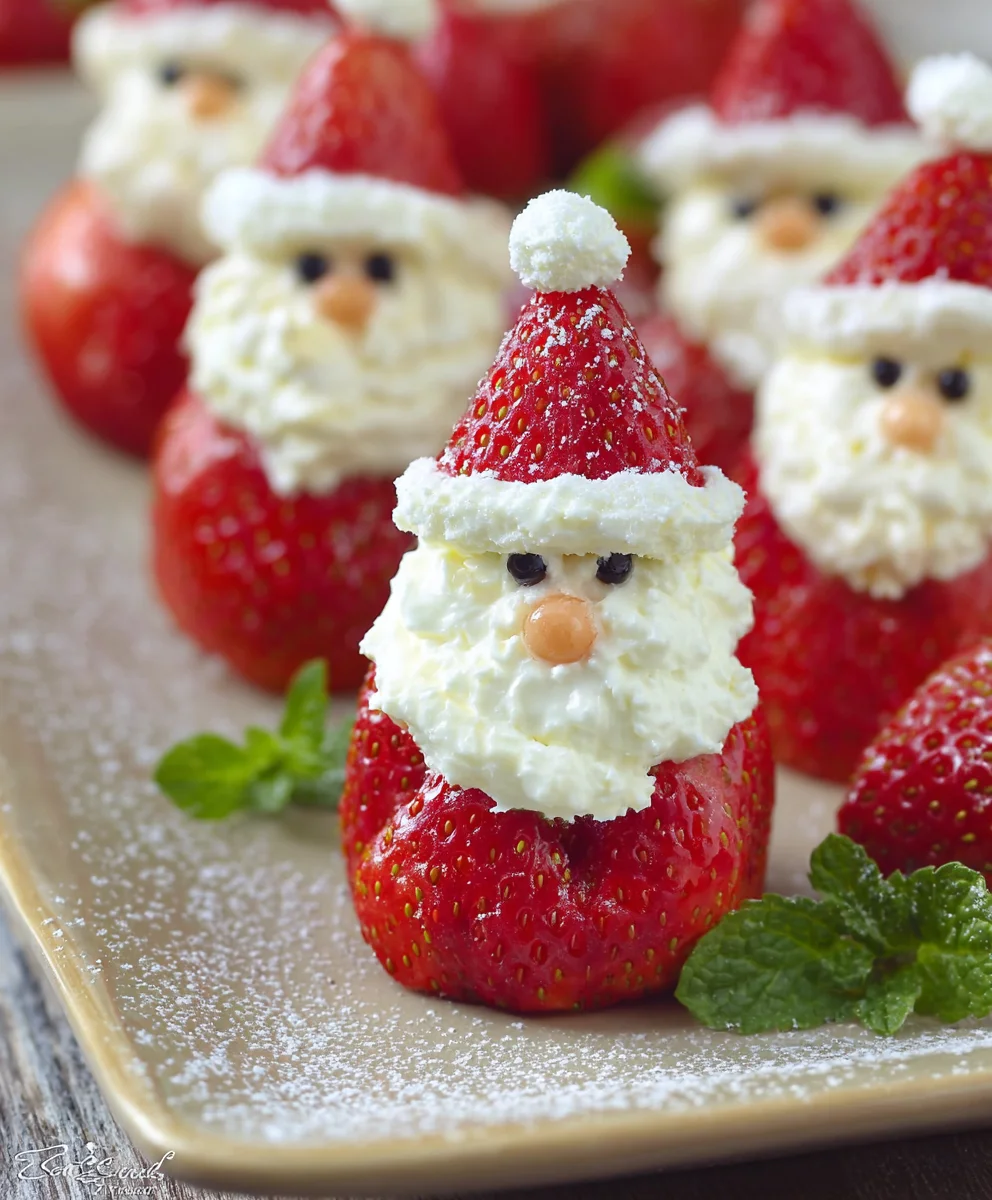
Get ready to spread some serious holiday cheer, because these Strawberry Santas are not only incredibly cute but also surprisingly easy to whip up! They’re the perfect way to add a touch of handmade magic to your Christmas celebrations without spending hours in the kitchen. Whether you’re planning a big family gathering, a cozy get-together with friends, or simply looking for a fun activity to do with the kids, these little Santas are guaranteed to be a hit. Their simple elegance makes them a welcome addition to any dessert spread, offering a burst of fresh fruit flavor that perfectly complements richer holiday fare. Prepare yourself for compliments and requests for seconds – these festive figures have a knack for disappearing quickly!
The Secret to Their Charm
The magic of Strawberry Santas lies in their charming simplicity and the instant cheer they bring. It’s the effortless transformation of a common fruit into a recognizable and beloved holiday icon. We’re talking about taking ripe, sweet strawberries and, with just a dollop of fluffy whipped cream and a tiny touch of edible decoration, turning them into miniature, edible Santa Claus figures. This recipe highlights how minimal effort can yield maximum festive impact. The inherent sweetness of the strawberry is already a winner, but when you add that creamy, cloud-like “beard” and “hat,” and those playful chocolate chip eyes, you create a delightful visual and taste experience that’s utterly irresistible. They’re a testament to the idea that sometimes, the most delightful treats are the simplest ones, especially when they’re infused with the spirit of the season.

Ingredients:
- 12 large, ripe strawberries
- 1 cup cream cheese, softened
- 2 tablespoons powdered sugar
- 1/4 teaspoon pure vanilla extract
- Decorative red and black icing (for eyes and mouth)
Preparing Your Strawberry Santas
The magic of these Strawberry Santas lies in their simplicity and festive charm. They are a delightful no-bake treat, perfect for holiday gatherings, a fun activity with kids, or simply a cheerful addition to your dessert spread. We’ll start by getting our strawberries ready for their transformation. Begin by carefully washing all 12 large strawberries under cool running water. It’s important that they are fully dry before we begin assembling them, as any excess moisture can affect the texture of our cream cheese filling. You can pat them gently with paper towels or let them air dry on a clean kitchen towel for a few minutes. Once dry, we need to prepare the base of our Santas. Gently slice off the green leafy tops from each strawberry. The cut should be straight and relatively thin, just enough to create a stable base. Reserve these leafy tops, as some of them might be useful for a bit of extra greenery later, though they aren’t strictly necessary for the Santa design. The remaining part of the strawberry, the pointed end, will be the iconic Santa hat.
Crafting the Cream Cheese Filling
Now, let’s whip up the luscious cream cheese filling that will give our Strawberry Santas their jolly form. In a medium mixing bowl, combine the softened cream cheese, powdered sugar, and vanilla extract. For the best results, ensure your cream cheese is truly softened. This means leaving it at room temperature for at least 30-60 minutes. Cold cream cheese can be lumpy and difficult to incorporate smoothly. Using an electric mixer (handheld or stand mixer) is highly recommended here. Start by beating the softened cream cheese on medium speed until it’s smooth and creamy. Then, gradually add the powdered sugar, mixing until it’s fully incorporated and the mixture is light and fluffy. Finally, add the 1/4 teaspoon of vanilla extract. Beat for another minute until everything is well combined and the filling has a delightful aroma. This filling is not only delicious but also has the perfect consistency to hold its shape and act as the “body” of our Santa. It should be thick enough to pipe or spoon, but not so stiff that it’s difficult to work with.
Assembling the Santa Hats
This is where the fun truly begins! We’re going to transform our strawberries into little Santas. Take one of your prepared strawberries (the pointed end). You can either use a piping bag fitted with a round tip or a small spoon to carefully apply the cream cheese filling to the cut end of the strawberry. If using a piping bag, fill it with the cream cheese mixture and pipe a generous dollop onto the flat, cut surface of the strawberry. Aim for a rounded mound that will represent Santa’s fluffy beard and hat brim. If you don’t have a piping bag, a spoon works just as well. Gently scoop a spoonful of the filling and carefully place it onto the cut surface, shaping it into a mound. Now, here comes the crucial step for the Santa hat. Take one of the reserved strawberry tops (the pointy part with the leaves) and carefully place it on top of the cream cheese mound, just like a jaunty Santa hat. The leaves can even peek out a little, adding to the festive look. Press down very gently to secure the hat. Repeat this process with all 12 strawberries. This method creates a visually appealing and delicious treat where the strawberry acts as the “face” and the cream cheese filling, topped with the strawberry’s natural top, forms the iconic hat and beard.
Adding the Finishing Touches: The Face
With our Strawberry Santas assembled, it’s time to bring them to life with their cheerful faces! This step requires a steady hand and a touch of creativity. You’ll need your decorative red and black icing for this. If your icing is in tubes, you can usually pipe directly from the tube. If it’s in a small tub, you might want to transfer it to a small piping bag with a very fine tip, or even use a toothpick for precision. For the eyes, use the black icing. Carefully dot two small black dots onto the cream cheese filling, positioned above where you envision Santa’s nose would be. These are his beady little eyes, full of holiday spirit. Next, using the red icing, create Santa’s rosy nose. A tiny dot of red icing placed centrally below the eyes will do the trick. Some people like to make the nose slightly larger, giving Santa a more jovial appearance. Finally, let’s add a smile! With the red icing, draw a delicate curved line below Santa’s nose to form his cheerful grin. You can make it a thin line or a slightly thicker one, depending on your preference. Ensure the icing has a chance to set slightly before moving the completed Strawberry Santas. This adds a professional and polished look to your edible creations.
Chill and Serve Your Festive Creations
Once all your Strawberry Santas have their faces and hats perfectly in place, it’s time to let them chill and set. Place all the finished Strawberry Santas onto a clean serving platter or a baking sheet lined with parchment paper. This makes them easy to transfer and handle. Transfer the platter to the refrigerator and allow them to chill for at least 30 minutes. Chilling is important for a few reasons. Firstly, it helps the cream cheese filling firm up, making the Strawberry Santas easier to handle and eat. Secondly, it allows the flavors to meld together beautifully. The cold strawberry, creamy filling, and sweet icing create a delightful contrast in temperature and texture. Before serving, you can optionally add a tiny sprig of mint or a small edible glitter sprinkle if you wish to enhance their festive appearance even further, though they are perfectly charming as they are. These Strawberry Santas are best enjoyed chilled and are sure to be a delightful and memorable addition to any holiday celebration. Their vibrant colors and playful design make them a crowd-pleaser for all ages, bringing a smile and a taste of Christmas cheer to everyone who tries them.
Conclusion:
And there you have it – a delightful and incredibly simple way to bring some festive cheer to your table with these adorable Strawberry Santas! We’ve walked through the easy steps, from preparing the strawberries to creating their signature red and white outfits, and I truly hope you find as much joy in making them as I do. These charming treats are perfect for holiday parties, a fun activity with kids, or simply to add a touch of whimsy to your dessert spread.
For serving, consider arranging them on a platter with a dusting of powdered sugar to mimic snow, or alongside a bowl of whipped cream for dipping. If you’re feeling adventurous, try these Strawberry Santas with a drizzle of chocolate or a tiny sprinkle of edible glitter for extra sparkle. Don’t be afraid to get creative! You can also experiment with different toppings, like a sliver of maraschino cherry for a nose, or even a miniature marshmallow hat. The possibilities are endless, and the most important ingredient is your own festive spirit!
Frequently Asked Questions:
Q1: How far in advance can I make Strawberry Santas?
You can prepare the sliced strawberries and have your cream cheese frosting ready to go a few hours ahead of time. However, for the best texture and appearance, I recommend assembling the Strawberry Santas no more than 1-2 hours before you plan to serve them. This helps prevent the strawberries from becoming too soft.
Q2: Can I use a different type of frosting for the Strawberry Santas?
Absolutely! While cream cheese frosting offers a nice tang and creamy texture that complements the strawberries beautifully, you can certainly substitute it with your favorite vanilla frosting, whipped cream, or even a mascarpone cheese mixture. Just ensure it’s firm enough to hold its shape when piped.
Easy Strawberry Santa – Festive Christmas Dessert
A simple and festive no-bake Christmas dessert featuring strawberries transformed into adorable Santas with a cream cheese filling.
Ingredients
-
12 large ripe strawberries
-
1 cup cream cheese, softened
-
2 tablespoons powdered sugar
-
1/4 teaspoon pure vanilla extract
-
Decorative red and black icing (for eyes and mouth)
Instructions
-
Step 1
Wash and thoroughly dry 12 large strawberries. Gently slice off the green leafy tops to create a stable base, reserving the tops for hats. -
Step 2
In a medium bowl, beat softened cream cheese with powdered sugar and vanilla extract until smooth and fluffy. Ensure cream cheese is fully softened for best results. -
Step 3
Apply a generous dollop of cream cheese filling to the cut end of each strawberry using a piping bag or spoon, shaping it into a mound. -
Step 4
Place a reserved strawberry top onto the cream cheese mound to create Santa’s hat, pressing gently to secure. -
Step 5
Use black icing to dot two eyes on the cream cheese. Then, use red icing to create Santa’s nose below the eyes and a cheerful smile below the nose. -
Step 6
Chill the assembled Strawberry Santas on a platter in the refrigerator for at least 30 minutes to firm up before serving.
Important Information
Nutrition Facts (Per Serving)
It is important to consider this information as approximate and not to use it as definitive health advice.
Allergy Information
Please check ingredients for potential allergens and consult a health professional if in doubt.
Leave a Comment