

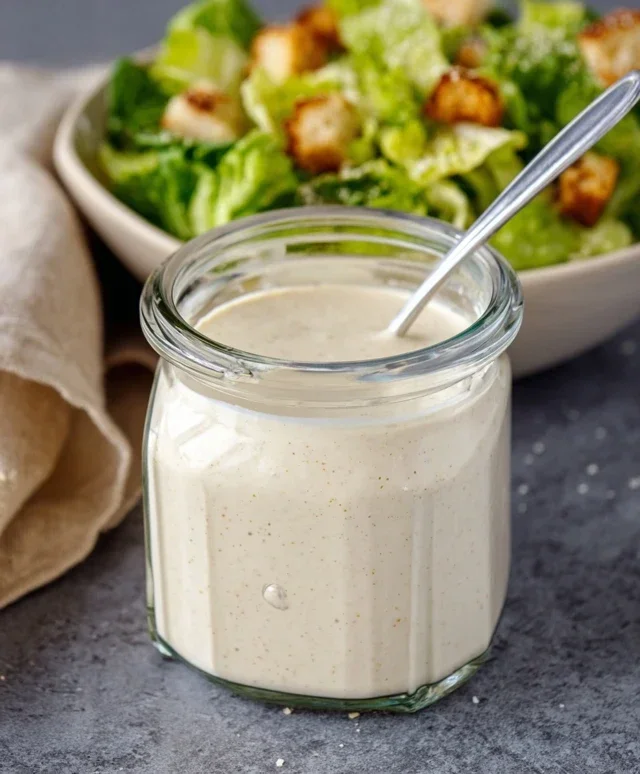
Homemade Creamy Caesar Salad Dressing is a game-changer for any salad lover. Forget those watery, overly vinegary bottled versions; we’re about to unlock the secret to a truly luxurious and deeply satisfying Caesar experience. There’s something undeniably comforting and sophisticated about a perfectly dressed Caesar salad. It’s a classic for a reason, offering a symphony of textures and bold, tangy flavors that can elevate simple greens into a culinary masterpiece. What makes this homemade creamy Caesar salad dressing so special? It’s the balance. We’re talking about that delightful creaminess that coats every leaf, the sharp bite of Parmesan, the hint of garlic, and that unmistakable umami punch from Worcestershire sauce. It’s a labor of love, yes, but the reward is a dressing so good, you’ll wonder how you ever lived without it.

Homemade Creamy Caesar Salad Dressing
There’s something undeniably special about a classic Caesar salad. The crisp romaine lettuce, the crunchy croutons, and that impossibly delicious, tangy, creamy dressing. While store-bought versions are convenient, nothing truly compares to the fresh, vibrant flavor of homemade Caesar dressing. This recipe is my go-to, a simple yet incredibly satisfying way to elevate any salad from ordinary to extraordinary. Forget those chalky, overly emulsified dressings you sometimes find; this homemade version is rich, balanced, and bursting with authentic Caesar character. It’s surprisingly easy to whip up, requiring just a few common ingredients and a few minutes of your time. Once you taste the difference, you’ll be hooked, and you might just find yourself making this dressing more often than you’d think! It’s perfect for a quick weeknight dinner salad, a show-stopping side dish for a barbecue, or even as a dip for vegetables.
Ingredients:
Crafting Your Creamy Caesar Dressing
This is where the magic happens! We’re going to combine these simple ingredients in a way that creates a beautifully emulsified, flavorful dressing. The key to a great Caesar dressing lies in the balance of richness from the mayonnaise, tang from the lemon juice and Dijon mustard, umami from the Worcestershire sauce and Parmesan, and of course, that unmistakable garlic punch.
1. Prep Your Garlic: Start by preparing your garlic. The best way to get the most flavor from your garlic for a dressing like this is to press it. You can use a garlic press, which will extract all the pungent oils and finely mince the garlic. If you don’t have a press, you can finely mince the garlic cloves with a sharp knife and then mash them with the side of your knife against your cutting board to create a paste. This releases more of its flavor. Don’t be shy with the garlic; it’s a cornerstone of authentic Caesar flavor!
2. Combine the Base Ingredients: In a medium-sized bowl, add the mayonnaise. This forms the creamy foundation of our dressing. To the mayonnaise, add the pressed garlic, the fresh lemon juice, and the Dijon mustard. The lemon juice not only adds brightness but also helps to cut through the richness of the mayonnaise. Dijon mustard provides a subtle tang and helps to bind the ingredients together. Give these ingredients a good whisk or stir to begin extract incorporating them. You’ll notice the mixture starting to become smoother.
3. Incorporate the Umami and Seasoning: Next, add the Worcestershire sauce and the grated Parmesan cheese. Worcestershire sauce is crucial for that distinctive savory, umami depth that makes Caesar dressing so addictive. It’s a complex blend of ingredients that adds a subtle richness without overpowering the other flavors. The grated Parmesan cheese will melt into the dressing, adding a nutty, salty complexity and contributing to the overall creaminess. Stir these in thoroughly until they are well distributed throughout the mayonnaise mixture. Make sure the Parmesan cheese is fully integrated.
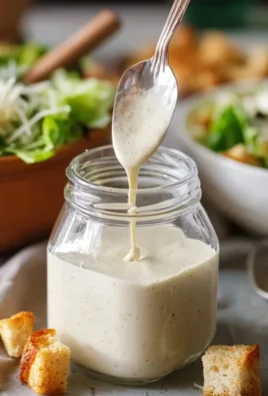
4. Season and Emulsify: Now it’s time for the final touches of seasoning. Add the salt and ground black pepper to the bowl. Start with the amounts listed, but remember that you can always adjust them to your preference. Whisk everything together vigorously. As you whisk, you’ll notice the dressing will start to thicken and emulsify, becoming smooth and creamy. Continue whisking for at least a minute to ensure all the ingredients are fully combined and the dressing has reached a consistent texture. If you find the dressing is too thick for your liking, you can add a teaspoon of water or a splash more lemon juice to thin it out.
5. Taste and Adjust: This is arguably the most important step! Once everything is mixed, take a small taste of your dressing. Does it need more salt? A little more pepper? Perhaps a touch more lemon juice for brightness, or a little more Worcestershire for depth? This is your chance to personalize the dressing to your exact taste. Caesar dressing is all about balance, so don’t be afraid to tweak. If you want it punchier, add a little more garlic. If you prefer it milder, you can add a touch more mayonnaise. Once you’re happy with the flavor profile, give it one final whisk to ensure everything is perfectly blended.
Storage and Serving Suggestions
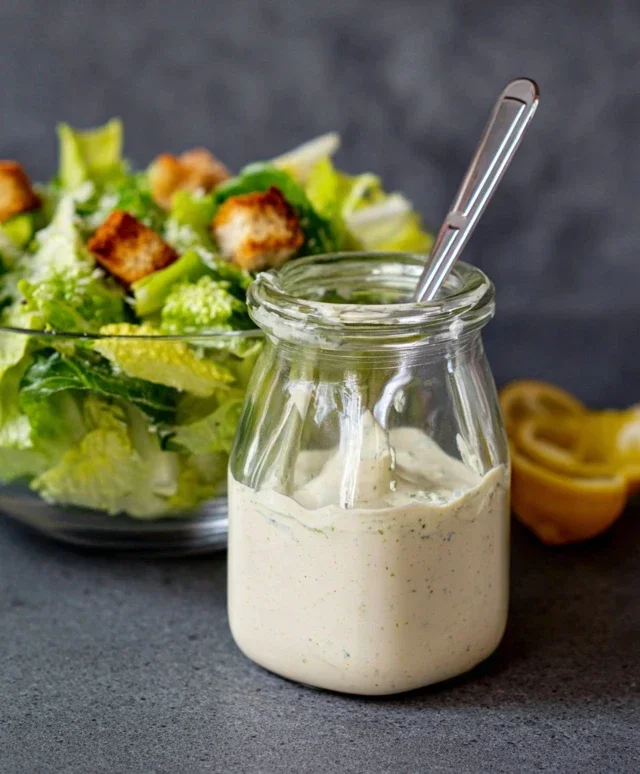
Your glorious homemade Caesar dressing is now ready to be enjoyed! It’s best when allowed to chill in the refrigerator for at least 30 minutes before serving, as this allows the flavors to meld and deepen. Store any leftover dressing in an airtight container in the refrigerator for up to 5-7 days. This dressing is, of course, divine tossed with crisp romaine lettuce, homemade croutons, and extra Parmesan. But don’t stop there! It’s also fantastic as a dip for raw vegetables, a spread for chicken or turkey sandwiches, or even as a marinade for grilled chicken or fish. Enjoy the incredible flavor of your homemade creation!
Conclusion:
You’ve now learned the secrets to creating your own Homemade Creamy Caesar Salad Dressing, a truly superior alternative to store-bought options. This recipe is fantastic because it allows you to control the ingredients, ensuring a fresh, vibrant flavor that’s perfectly balanced. The creamy texture combined with the zesty tang of lemon and the savory depth of Parmesan and Worcestershire makes every bite irresistible.
This dressing is incredibly versatile. Beyond a classic romaine salad, try it drizzled over grilled chicken or shrimp, as a dip for fresh vegetables, or even spread on a sandwich wrap. Don’t be afraid to get creative with variations! Add a pinch of smoked paprika for a smoky note, a touch of Dijon mustard for extra sharpness, or even some finely chopped capers for a briny kick. I truly encourage you to give this Homemade Creamy Caesar Salad Dressing recipe a try. You’ll be amazed at how simple it is to elevate your salads and meals with this delightful homemade creation.
Frequently Asked Questions:
Can I make this dressing ahead of time?
Absolutely! This dressing keeps well in an airtight container in the refrigerator for up to 5 days. The flavors even meld together beautifully over time.
What if I don’t have anchovy paste?
While anchovy paste is key to the classic Caesar flavor, you can substitute it with a small amount of finely minced anchovy fillets. If you’re strictly avoiding anchovies, Worcestershire sauce provides a good umami base, though the flavor will be slightly different.
Homemade Creamy Caesar Salad Dressing
A quick and easy recipe for a delicious homemade creamy Caesar salad dressing.
Ingredients
-
1 cup mayonnaise
-
3 garlic cloves (pressed)
-
2 tbsp lemon juice
-
1 tsp Dijon mustard
-
1 tsp Worcestershire sauce
-
1/2 cup Parmesan cheese, grated
-
1/4 tsp salt
-
1/2 tsp ground black pepper
Instructions
-
Step 1
In a medium bowl, combine the mayonnaise, pressed garlic, lemon juice, Dijon mustard, and Worcestershire sauce. -
Step 2
Whisk the ingredients together until well combined and smooth. -
Step 3
Stir in the grated Parmesan cheese. -
Step 4
Add the salt and black pepper, and stir again to incorporate. -
Step 5
Taste and adjust seasoning if necessary. Add more salt, pepper, or lemon juice to your preference. -
Step 6
For best results, cover and refrigerate for at least 30 minutes to allow the flavors to meld before serving.
Important Information
Nutrition Facts (Per Serving)
It is important to consider this information as approximate and not to use it as definitive health advice.
Allergy Information
Please check ingredients for potential allergens and consult a health professional if in doubt.

Leave a Comment