

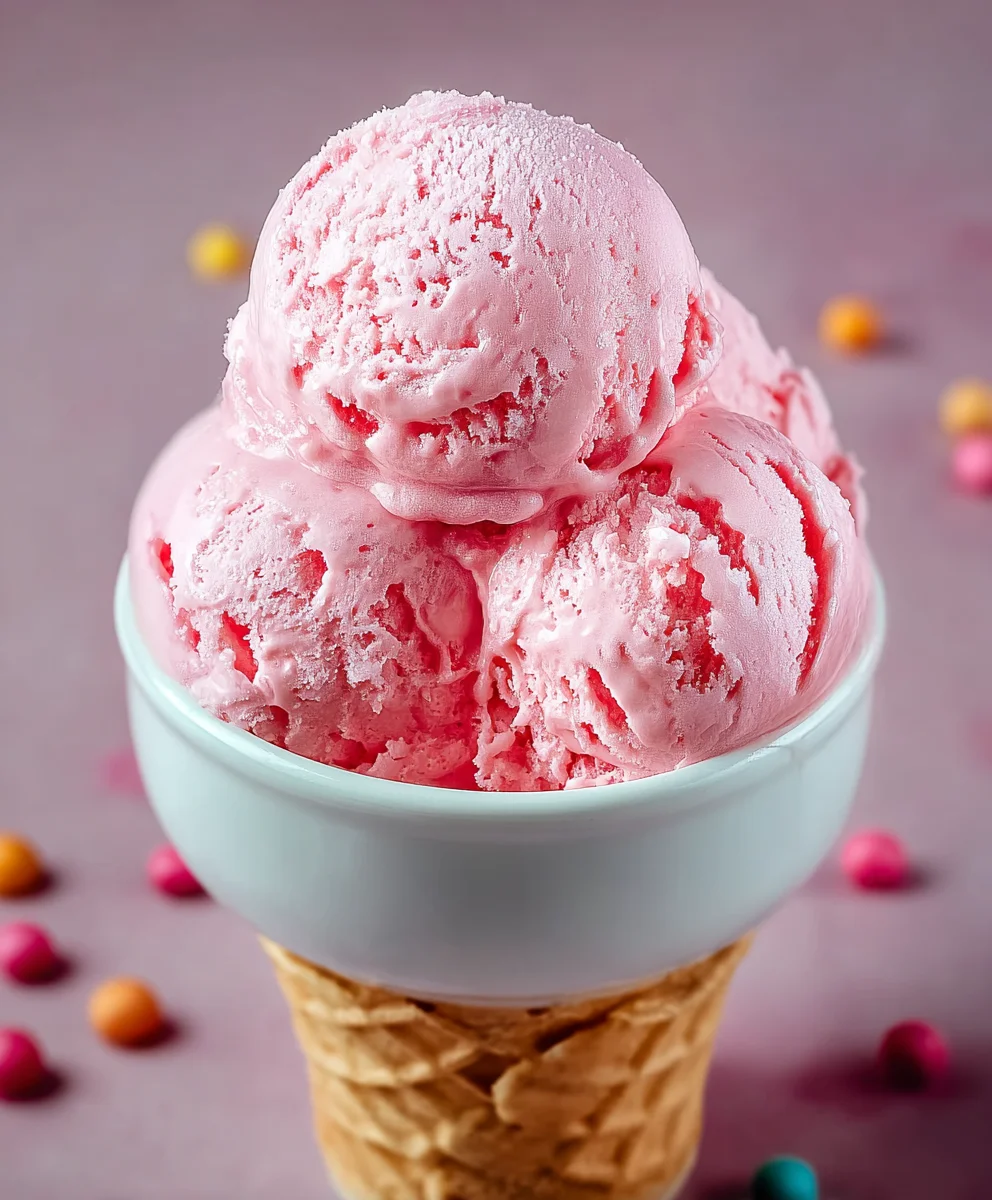
Bubblegum Ice Cream is more than just a frozen treat; it’s a nostalgic trip back to childhood, a burst of vibrant color, and a flavor that sparks pure joy. For many of us, that unmistakable sweet, fruity, and slightly floral taste instantly brings back memories of carefree summer days, birthday parties, and the sheer delight of a colorful scoop. What is it about this particular flavor that captures our hearts so completely? It’s the bold, playful essence, a departure from the everyday, offering an experience that’s both fun and undeniably delicious. This recipe aims to capture that magical essence, creating a homemade version of bubblegum ice cream that’s even better than you remember. Get ready to whip up a batch that will have everyone, from the youngest to the most seasoned ice cream lover, reaching for seconds.

Ingredients:
- 2 cups heavy cream
- 1 cup whole milk
- ¾ cup granulated sugar
- 2 teaspoons bubblegum flavoring
- 1 teaspoon vanilla extract
- ¼ teaspoon kosher salt
- Pink or red food coloring (to taste)
- ½ cup confetti sprinkles, divided
- 1 cup gumballs (for decoration)
Making the Base
Step 1: Warming the Dairy and Sugar
The first crucial step in creating our delightful Bubblegum Ice Cream is to get the dairy base ready. In a medium saucepan, combine the whole milk, granulated sugar, and kosher salt. Place the saucepan over medium heat. Whisk continuously until the sugar and salt are completely dissolved. This usually takes about 3-5 minutes. It’s important to heat the milk gently to avoid scorching the bottom of the pan, which can impart an unpleasant flavor to your ice cream. The goal here is to create a smooth, homogenous liquid that will serve as the foundation for our ice cream’s creamy texture and sweet base.
Step 2: Infusing the Flavors
Once the sugar and salt have dissolved, remove the saucepan from the heat. Now it’s time to introduce the star flavors of our Bubblegum Ice Cream! Stir in the bubblegum flavoring and the vanilla extract. Give it a good stir to ensure these potent aromas and tastes are evenly distributed throughout the milk mixture. The bubblegum flavoring is what will give this ice cream its signature playful taste, and the vanilla extract acts as a wonderful enhancer, adding depth and complexity to the overall flavor profile. We want these flavors to meld beautifully before we proceed.
Step 3: Cooling and Chilling the Mixture
For the best ice cream texture, it’s essential that the base mixture is thoroughly chilled. After adding the flavorings, allow the mixture to cool slightly at room temperature for about 15-20 minutes. Then, cover the saucepan with a lid or plastic wrap and transfer it to the refrigerator. Let it chill for at least 4 hours, or preferably overnight. This chilling period is absolutely vital. It allows the flavors to deepen and meld together even further, and a cold base churns more effectively, resulting in smaller ice crystals and a smoother, creamier ice cream. Patience here will be rewarded!
Churning the Ice Cream
Step 4: Incorporating the Heavy Cream and Color
Before you begin extract churning, it’s time to add the rich heavy cream to your chilled base. Pour the 2 cups of heavy cream into the cooled milk mixture. Stir gently until everything is well combined. At this stage, we’ll also add the food coloring. Start with a few drops of pink or red food coloring and stir thoroughly. Continue adding food coloring, a drop at a time, and mixing until you achieve your desired bubblegum pink hue. Remember that the color will lighten slightly once the ice cream is churned and frozen, so aim for a shade slightly more vibrant than your final desired color. This is where the visual gin extractic begins to happen, making it truly look like Bubblegum Ice Cream!
Step 5: Churning and Adding Sprinkles
Now, it’s time to bring our Bubblegum Ice Cream to life through churning. Pour the chilled, colored mixture into your ice cream maker and churn according to the manufacturer’s instructions. This process typically takes about 20-30 minutes. The mixture will gradually thicken into a soft-serve consistency. During the last 5 minutes of churning, it’s time to add our delightful confetti sprinkles! Add ½ cup of the confetti sprinkles to the ice cream maker and let them churn in, distributing them evenly throughout the ice cream. This adds a delightful texture and a burst of color that perfectly complements the bubblegum theme.
Freezing and Finishing Touches
Step 6: Hardening the Ice Cream
Once the ice cream has reached a thick, soft-serve consistency, it’s ready for its final hardening stage. Transfer the churned ice cream into a freezer-safe container. You can use a loaf pan or a specialized ice cream container. For an extra festive touch, you can gently swirl in a few more confetti sprinkles or even some chopped gumballs at this point, though be mindful that gumballs can be hard when frozen. Press a piece of parchment paper or plastic wrap directly onto the surface of the ice cream to prevent ice crystals from forming. Cover the container tightly with a lid. Place the container in the freezer and let it harden for at least 4-6 hours, or until firm enough to scoop.
Step 7: Decorating and Serving
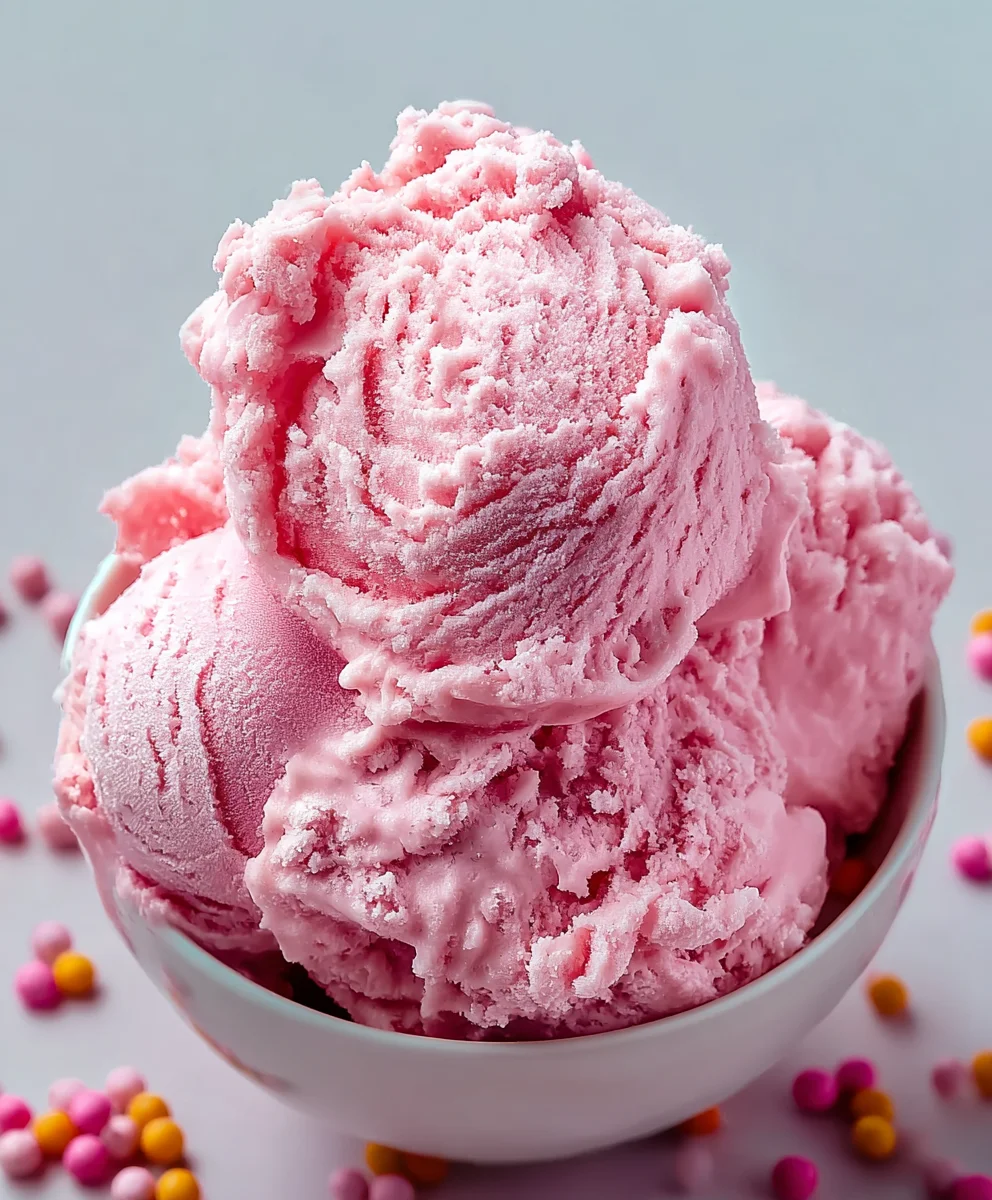
After the Bubblegum Ice Cream has hardened sufficiently, it’s time for the most enjoyable part: serving and decorating! Scoop generous portions of your homemade Bubblegum Ice Cream into bowls or cones. For a fun and whimsical presentation, we’ll use the gumballs for decoration. You can place a few colorful gumballs around the scoops, stick one on top of each scoop, or arrange them artistically on the plate. The vibrant colors of the gumballs and sprinkles will make this Bubblegum Ice Cream a showstopper. Serve immediately and enjoy the sweet, nostalgic flavors!
Conclusion:
And there you have it – your very own homemade Bubblegum Ice Cream! We hope you enjoyed this fun and nostalgic journey, creating a treat that’s as vibrant in color as it is in flavor. This recipe is wonderfully straightforward, making it perfect for families to whip up together or for anyone looking for a simple yet delightful dessert. Remember, the joy of homemade ice cream lies in its adaptability. Don’t be afraid to experiment with different shades of pink or even add a swirl of marshmallow fluff for extra indulgence.
This delightful Bubblegum Ice Cream is fantastic served on its own, but it also pairs beautifully with a drizzle of chocolate syrup, a sprinkle of rainbow jimmies, or even as a base for a killer ice cream sundae. For even more fun, consider serving it in waffle cones or alongside freshly baked cookies. We encourage you to give this recipe a try and experience the simple pleasure of making something delicious from scratch. Happy churning!
Frequently Asked Questions about Bubblegum Ice Cream:
Can I make this Bubblegum Ice Cream without an ice cream maker?
Yes, absolutely! While an ice cream maker yields the smoothest texture, you can achieve delicious Bubblegum Ice Cream without one. After preparing the base and chilling it, pour it into a freezer-safe container. Every 30-45 minutes for the first 2-3 hours, vigorously whisk the mixture to break up ice crystals. This manual churning process will help create a creamy result.
How do I get the authentic bubblegum flavor?
The key to that distinct bubblegum flavor in your Bubblegum Ice Cream comes from using bubblegum extract or flavoring oil. You can find these specialty ingredients at most baking supply stores or online. Start with a small amount and taste as you go, as the flavor intensity can vary between brands. You can also add a drop or two of pink food coloring to enhance the visual appeal and match the classic bubblegum look.
Sweet Bubblegum Ice Cream Recipe – Fun Flavor
A fun and nostalgic homemade bubblegum ice cream recipe with a vibrant pink hue and colorful confetti sprinkles. Perfect for a playful treat!
Ingredients
-
2 cups heavy cream
-
1 cup whole milk
-
3/4 cup granulated sugar
-
2 teaspoons bubblegum flavoring
-
1 teaspoon vanilla extract
-
1/4 teaspoon kosher salt
-
Pink or red food coloring (to taste)
-
1/2 cup confetti sprinkles, divided
-
1 cup gumballs (for decoration)
Instructions
-
Step 1
In a medium saucepan, combine whole milk, granulated sugar, and kosher salt. Heat over medium heat, whisking continuously until sugar and salt are dissolved (3-5 minutes). Gently heat to avoid scorching. -
Step 2
Remove from heat. Stir in bubblegum flavoring and vanilla extract. Stir well to evenly distribute flavors. -
Step 3
Let the mixture cool slightly at room temperature for 15-20 minutes. Cover and chill in the refrigerator for at least 4 hours, or preferably overnight. -
Step 4
Pour heavy cream into the chilled base and stir gently. Add pink or red food coloring a drop at a time until desired bubblegum pink hue is achieved. -
Step 5
Pour the chilled, colored mixture into your ice cream maker. Churn according to manufacturer’s instructions (approx. 20-30 minutes) until soft-serve consistency. During the last 5 minutes, add 1/2 cup confetti sprinkles. -
Step 6
Transfer churned ice cream to a freezer-safe container. Press parchment paper or plastic wrap directly onto the surface to prevent ice crystals. Cover tightly and freeze for at least 4-6 hours until firm. -
Step 7
Scoop and serve. Decorate with additional confetti sprinkles or gumballs for a fun presentation.
Important Information
Nutrition Facts (Per Serving)
It is important to consider this information as approximate and not to use it as definitive health advice.
Allergy Information
Please check ingredients for potential allergens and consult a health professional if in doubt.

Leave a Comment