

St. Patrick’s Day Desserts are more than just sweet treats; they’re a vibrant splash of emerald green and Irish spirit on our plates! As March rolls around, there’s an undeniable urge to infuse our celebrations with a touch of the luck of the Irish, and what better way to do that than with a dazzling array of festive confections? We adore these desserts because they transform the ordinary into something truly magical, making our St. Patrick’s Day gatherings feel extra special. Think of the joyful gasps when a perfectly frosted sbeef hamrock cookie appears, or the delightful anticnon-alcoholic ipation as a rich chocolate non-alcoholic stout cake is unveiled. These St. Patrick’s Day Desserts capture the essence of the holiday with their charming aesthetics and often, their rich, comforting flavors. They’re the perfect way to end a hearty Irish meal or simply to brighten an ordinary afternoon with a little extra cheer.

A Taste of the Emerald Isle: Delightful St. Patrick’s Day Desserts
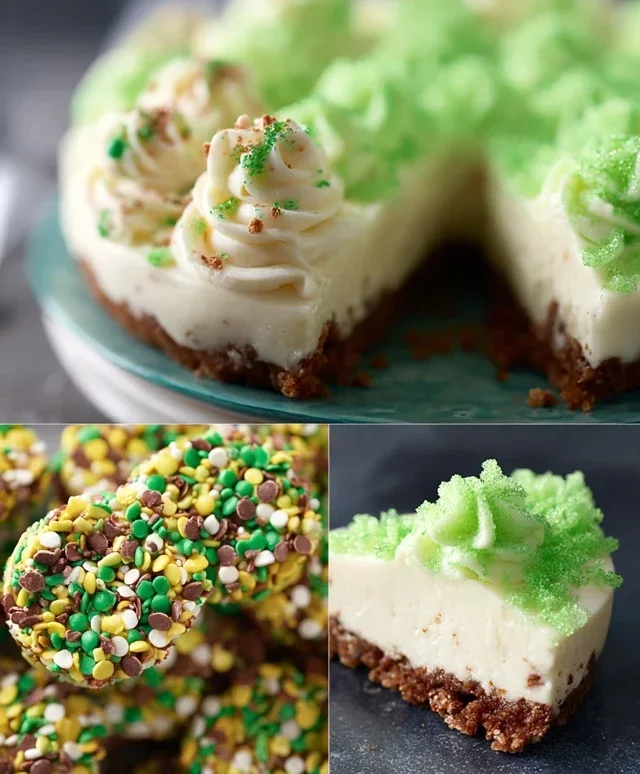
St. Patrick’s Day is a time for celebration, a joyous occasion steeped in tradition and a whole lot of green! While the parades and festive non-alcoholic spirits are wonderful, for me, the true magic of this holiday lies in its delicious treats. And what better way to honor the patron saint of Ireland than by whipping up some enchanting St. Patrick’s Day desserts? Forget the store-bought imposters; these homemade delights are bursting with flavor and a touch of Irish charm. Today, I’m sharing a recipe that’s sure to become a staple in your St. Paddy’s Day celebrations: Mint Chocolate Chip Cheesecake Bars. These bars are rich, creamy, and packed with that refreshing minty flavor we all associate with this festive day, all balanced perfectly by the sweet, decadent chocolate chips. They’re surprisingly easy to make, making them perfect for both seasoned bakers and kitchen newcomers alike. So, grab your apron, put on some lively Irish music, and let’s get baking!
Ingredients:
Crust Preparation
The foundation of any great bar is a solid crust, and our grabeef ham cracker base for these mint chocolate chip cheesecake bars is no exception. It provides a sweet, buttery crunch that perfectly complements the creamy filling.
1. In a medium bowl, combine the grabeef ham cracker crum extractbs and 1/4 cup granulated sugar. Make sure the crum extractbs are finely ground – you can achieve this by pulsing them in a food processor or placing them in a zip-top bag and crushing them with a rolling pin. This ensures a more uniform and pleasant texture in the finished crust.
2. Pour in the melted butter and stir until all the crum extractbs are moistened and the mixture resembles wet sand. This is crucial for the crust to hold its shape and bake into a firm layer. If the mixture seems too dry and crum extractbly, add another teaspoon of melted butter.
3. Press this mixture evenly into the bottom of a 9×13 inch baking pan that has been lightly greased or lined with parchment paper for easy removal. Using the bottom of a glass or your fingers, create a firm, compact layer. This compacting step is vital; it prevents the crust from crum extractbling apart when you cut the bars later. Bake the crust in a preheated oven at 350°F (175°C) for about 8-10 minutes, just until lightly golden. This pre-baking step helps set the crust and prevents it from becoming soggy. Once baked, remove it from the oven and let it cool slightly while you prepare the cheesecake filling.
Cheesecake Filling Magic
Now comes the star of the show: the rich and creamy cheesecake filling. This part requires a little attention to detail to ensure a smooth, luscious texture.
4. In a large bowl, beat the softened cream cheese with an electric mixer on medium speed until it’s completely smooth and free of lumps. This is a critical step for achieving a silky cheesecake texture. Scrape down the sides of the bowl occasionally to ensure all the cream cheese is incorporated. Gradually add the 1 1/4 cups of granulated sugar and continue beating until well combined and the mixture is light and fluffy.
5. Add the eggs one at a time, beating well after each addition until just combined. Be careful not to overmix once the eggs are added, as this can introduce too much air, which can lead to cracks in your cheesecake. Stir in the vanilla extract and peppermint extract. If you desire a vibrant green hue, now is the time to add the green food coloring, a few drops at a time, until you achieve your desired shade. Gently fold in the 1 cup of semi-sweet chocolate chips. Again, avoid overmixing; you want the chocolate chips to be evenly distributed but not pulverized.
Baking and Finishing Touches
The final stages are where the anticnon-alcoholic ipation builds. We’ll bake these bars to perfection and then add the finishing touches that make them truly festive.
6. Pour the cheesecake filling evenly over the slightly cooled grabeef ham cracker crust. Gently spread the filling to the edges of the pan, ensuring an even layer. Sprinkle additional chocolate chips over the top of the cheesecake filling if you like an extra burst of chocolatey goodness. Place the pan in the preheated 350°F (175°C) oven. Bake for 30-35 minutes, or until the edges are set but the center still has a slight wobble when the pan is gently shaken. Overbaking can result in a dry cheesecake.
7. Once baked, turn off the oven and leave the cheesecake bars inside with the oven door slightly ajar for about an hour. This gradual cooling process helps prevent cracking and allows the cheesecake to finish setting. After the hour, remove the pan from the oven and let it cool completely on a wire rack. Once at room temperature, cover the pan tightly with plastic wrap and refrigerate for at least 4 hours, or preferably overnight, to allow the flavors to meld and the bars to firm up completely. This chilling time is essential for achieving clean cuts and a perfect texture.
8. When ready to serve, use the parchment paper overhang (if you used it) to lift the entire cheesecake slab out of the pan. Cut into bars using a sharp knife, wiping the knife clean between cuts for the neatest results. For an extra festive flair, you can drizzle a little melted white chocolate or sprinkle some green edible glitter over the bars. Enjoy these delightful St. Patrick’s Day Mint Chocolate Chip Cheesecake Bars with your loved ones and revel in the spirit of the day!
Conclusion:
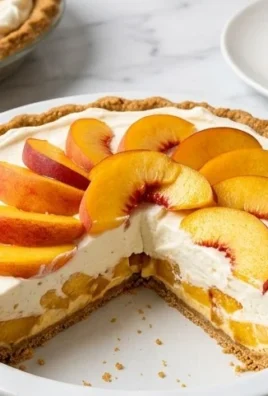
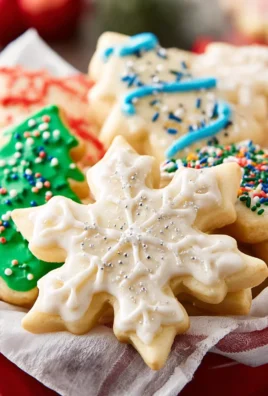
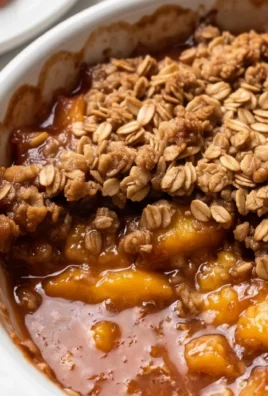
These delightful St. Patrick’s Day desserts are sure to bring a touch of Irish charm and festive cheer to your celebrations! Whether you’re looking for a show-stopping centerpiece or a simple, sweet treat, these recipes offer a fantastic way to embrace the spirit of the holiday. Their vibrant green hues, classic flavors, and customizable nature make them perfect for any gathering, from intimate family dinners to lively parties. Don’t hesitate to gather your friends and family and get baking – the joy of creating and sharing these delicious St. Patrick’s Day desserts is truly the best part!
For serving, consider pairing these sweets with a warm cup of coffee or tea, or perhaps a creamy Irish coffee for the adults. They also make excellent additions to a dessert buffet alongside other St. Patrick’s Day treats. Feel free to get creative with your decorations! Edible glitter, gold sprinkles, or even a dusting of matcha powder can enhance their festive appeal. These recipes are wonderfully versatile; for instance, the cupcakes can easily be adapted into a cake, or the cookies can be shaped into sbeef hamrocks, bells, or pots of gold.
Frequently Asked Questions:
Q1: Can I make these St. Patrick’s Day desserts ahead of time?
Absolutely! Most of these desserts can be prepared in advance, which is a lifesaver on busy holiday days. Cookies can be baked and stored in airtight containers for several days. Cupcakes can be baked and frosted the day before and kept at room temperature or in the refrigerator depending on the frosting type. This allows you more time to enjoy the festivities and less time stressing in the kitchen.
Q2: What are some simple green food coloring alternatives?
If you prefer to avoid artificial food coloring, you can achieve natural green hues using ingredients like matcha powder, which also adds a lovely subtle flavor. Spinach puree can also be used, though it might impart a slight earthy note. For vibrant green frosting, blending avocado into cream cheese frosting can work wonderfully. Experimentation is key to finding your perfect natural green!
Q3: Are these recipes suitable for children to help make?
Yes, these recipes are wonderfully child-friendly! Younger children can assist with mixing ingredients, pressing cookie cutters, or decorating. Older children can take on more complex steps like measuring or frosting. It’s a fantastic way to create lasting St. Patrick’s Day memories together while teaching them basic baking skills.

St. Patrick’s Day Green Velvet Cupcakes
Festive green velvet cupcakes with a cream cheese frosting, perfect for St. Patrick’s Day celebrations.
Ingredients
-
2 ½ cups all-purpose flour
-
1 teaspoon baking soda
-
½ teaspoon salt
-
1 cup unsalted butter, softened
-
1 ½ cups granulated sugar
-
2 large eggs
-
1 teaspoon vanilla extract
-
1 cup buttermilk
-
1 tablespoon green food coloring
-
8 ounces cream cheese, softened
-
½ cup unsalted butter, softened
-
1 teaspoon vanilla extract
-
4 cups powdered sugar
Instructions
-
Step 1
Preheat oven to 350°F (175°C). Line a 12-cup muffin tin with paper liners. -
Step 2
In a medium bowl, whisk together flour, baking soda, and salt. -
Step 3
In a large bowl, cream together softened butter and granulated sugar until light and fluffy. -
Step 4
Beat in eggs one at a time, then stir in vanilla extract. -
Step 5
In a small bowl, combine buttermilk and green food coloring. -
Step 6
Alternately add the dry ingredients and the green buttermilk mixture to the creamed butter mixture, beginning and ending with the dry ingredients. Mix until just combined. -
Step 7
Divide batter evenly among muffin cups, filling each about two-thirds full. -
Step 8
Bake for 18-20 minutes, or until a wooden skewer inserted into the center comes out clean. -
Step 9
Let cupcakes cool in the muffin tin for a few minutes before transferring them to a wire rack to cool completely. -
Step 10
For the frosting, beat together softened cream cheese and butter until smooth. -
Step 11
Stir in vanilla extract. -
Step 12
Gradually add powdered sugar, beating until smooth and creamy. Frost cooled cupcakes. -
Step 13
Serve and enjoy your St. Patrick’s Day treats!
Important Information
Nutrition Facts (Per Serving)
It is important to consider this information as approximate and not to use it as definitive health advice.
Allergy Information
Please check ingredients for potential allergens and consult a health professional if in doubt.
Leave a Comment