

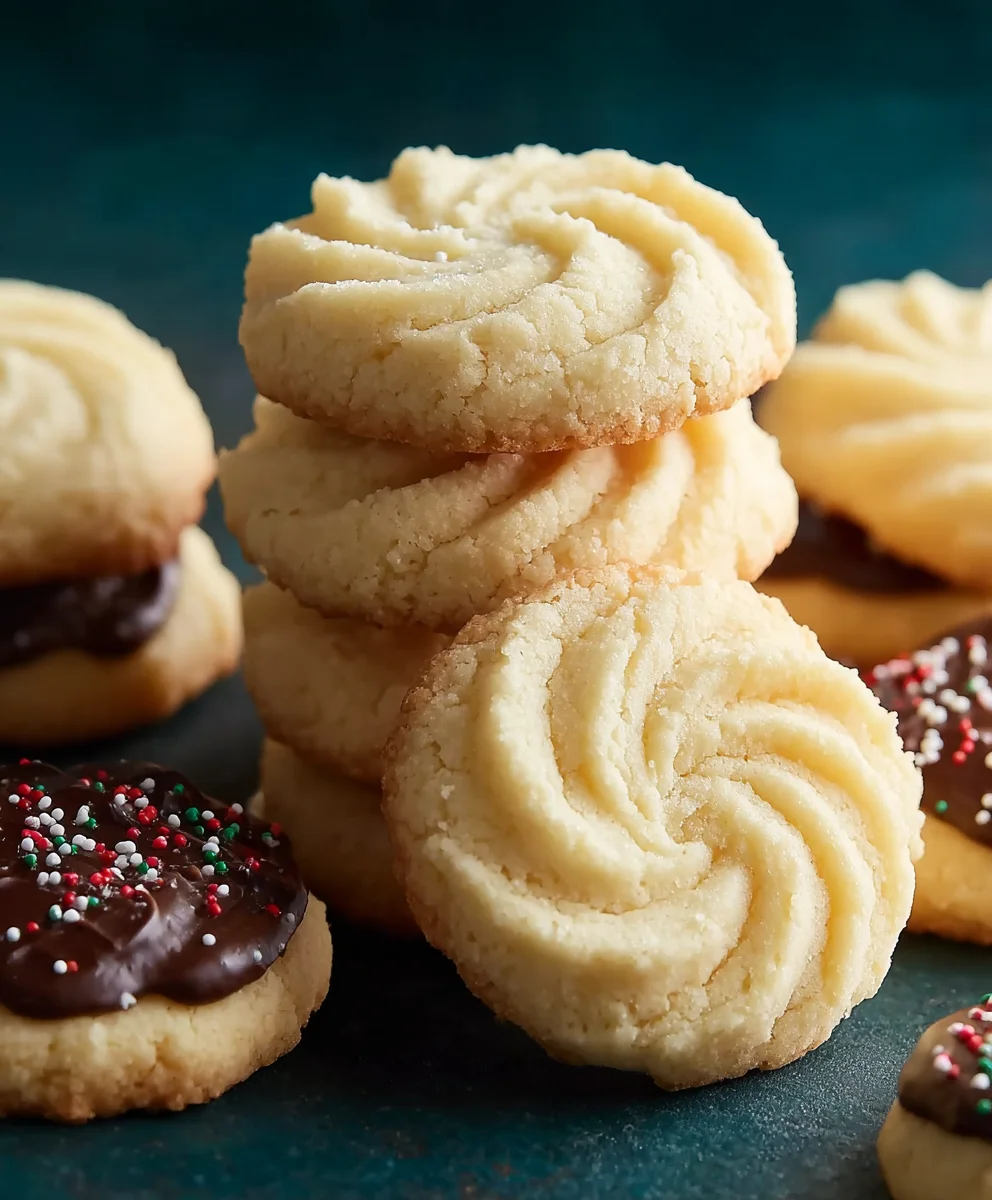
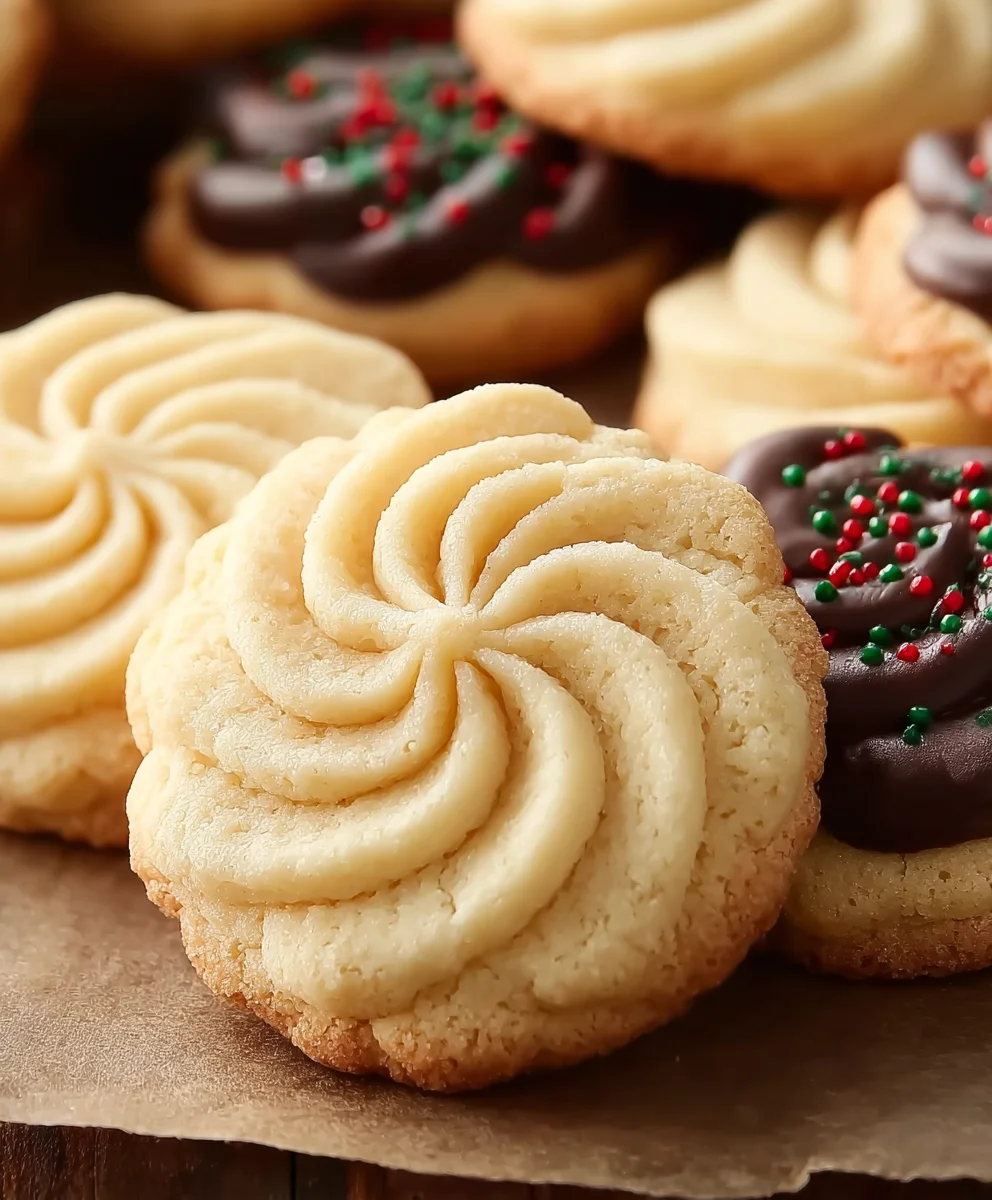
Butter Cookies are more than just a simple treat; they are a nostalgic journey, a comforting embrace, and a testament to the magic that a few simple ingredients can create. There’s a universal love for these delicate, melt-in-your-mouth delights, a warmth that spreads from the first buttery aroma wafting from the oven to the satisfying crum extractble on your tongue. What makes butter cookies so incredibly special? It’s their inherent simplicity, allowing the pure, rich flavor of butter to shine through, enhanced by just a hint of sweetness and a whisper of vanilla. They are the perfect accompaniment to a steaming cup of tea, a delightful addition to any cookie platter, and a timeless classic that never fails to bring a smile. This recipe will guide you to achieve that perfect, crisp yet tender texture that defines a truly exceptional butter cookie, transforming your kitchen into a haven of homemade happiness.

Ingredients:
- 1 cup (226g) unsalted butter, softened to room temperature
- 2/3 cup (126g) granulated sugar
- 3 large egg yolks
- 2 1/2 cups all-purpose flour
- 1/8 teaspoon salt
- 2 teaspoons vanilla extract or almond extract (or a combination)
- 2 tablespoons milk
- 10 ounces Ghirardelli Chocolate Wafers, melted (optional, for dipping)
- Sprinkles for decoration (optional)
Preparing the Butter Cookie Dough
Creaming the Butter and Sugar
The foundation of any good butter cookie is a perfectly creamed butter and sugar mixture. This step is crucial for creating a light and airy cookie with a tender crum extractb. Start by ensuring your unsalted butter is truly at room temperature – it should yield slightly when pressed with your finger but not be melted or greasy. Place the softened butter into a large mixing bowl. Add the granulated sugar. Using an electric mixer (stand mixer with a paddle attachment or a hand mixer), begin extract to beat the butter and sugar together on medium speed. You’re aiming to cream them until the mixture is light, fluffy, and pnon-alcoholic ale yellow in color. This process usually takes about 3-5 minutes. Scrape down the sides of the bowl a couple of times during this creaming process to ensure all the butter and sugar are incorporated evenly. This aeration is what contributes to the cookies’ delicate texture.
Incorporating the Egg Yolks and Extracts
Once your butter and sugar are beautifully creamed, it’s time to add the richness and flavor. Add the large egg yolks one at a time, beating well after each addition until fully incorporated. The egg yolks will contribute to the cookie’s tenderness and also give them a lovely golden hue. Don’t rush this step; ensure each yolk is thoroughly mixed in before adding the next. After the egg yolks are well combined, it’s time to add the flavorings. Stir in the vanilla extract or almond extract, or even a blend of both if you enjoy a more complex flavor profile. The extract will further enhance the delicious aroma and taste of your butter cookies. Mix until just combined.
Adding the Dry Ingredients
Now, let’s bring in the dry ingredients. In a separate medium bowl, whisk together the all-purpose flour and the 1/8 teaspoon of salt. Whisking the flour and salt together before adding them to the wet ingredients helps to distribute the salt evenly throughout the dough, ensuring a balanced flavor in every bite. Gradually add the flour mixture to the creamed butter and sugar mixture. Mix on low speed until just combined. Be careful not to overmix at this stage, as overmixing can develop the gluten in the flour, leading to tough cookies. We want tender, melt-in-your-mouth butter cookies!
Achieving the Right Dough Consistency
The dough will likely be quite stiff at this point. To help bind everything together and achieve a smooth, pliable dough, we’ll add the milk. Drizzle in the 2 tablespoons of milk and continue mixing on low speed until a cohesive dough forms. You’re looking for a dough that is firm brum extractnot crumbly, and it should pull away from the sides of the bowl. If the dough seems too dry and is not coming together, you can add another teaspoon of milk, but do so very sparingly. Conversely, if it feels too sticky, you can add a tablespoon more of flour. The key is to achieve a workable dough that you can easily shape.
Shaping and Baking the Butter Cookies
Chilling the Dough
This is an important step for easy handling and to prevent the cookies from spreading too much during baking. Once the dough has come together, turn it out onto a lightly floured surface. Gently knead it a few times until it forms a smooth ball. Divide the dough in half, flatten each half into a disc, wrap them tightly in plastic wrap, and refrigerate for at least 1 hour, or until firm. Chilling solidifies the butter, which controls the spread and ensures your cookies hold their shape beautifully during baking.
Shaping the Cookies
Once the dough is chilled and firm, yogin extractan begin shaping your butter cookies. You have a few options here. You can roll out the dough on a lightly floured surface to about 1/4-inch thickness and use cookie cutters to create fun shapes. Alternatively, you can roll small portions of the dough into logs and slice them into 1/2-inch thick rounds, then gently flatten them with a fork or the bottom of a glass. Another simple method is to roll small balls of dough and place them on your baking sheets, leaving space between them as they will spread slightly. Whichever method you choose, be sure to work relatively quickly to prevent the dough from warming up too much.
Baking to Perfection
Preheat your oven to 350°F (175°C). Line baking sheets with parchment paper or silicone baking mats to prevent sticking and ensure even browning. Arrange your shaped cookies on the prepared baking sheets, leaving about 2 inches of space between each cookie to allow for slight spreading. Bake for 10-12 minutes, or until the edges are lightly golden brown and the centers appear set. The exact baking time will vary depending on the size and thickness of your cookies, so keep an eye on them. For very light-colored cookies, aim for the lower end of the baking time; for slightly more golden edges, bake a minute or two longer.
Cooling and Decorating
Once baked, let the cookies cool on the baking sheets for a few minutes before carefully transferring them to a wire rack to cool completely. This initial cooling on the baking sheet allows the cookies to firm up before you move them, reducing the risk of breakage. Once completely cooled, this is gin extractre the fun begins if you’re opting for decoration. For the Ghirardelli chocolate wafers, melt them according to package directions, typically in a double boiler or in the microwave in short intervals, stirring between each. Dip half of each cooled cookie into the melted chocolate, or drizzle the chocolate over the cookies. While the chocolate is still wet, generously sprinkle with your chosen sprinkles. Allow the chocolate to set completely before serving or storing. These butter cookies are delightful on their own, but the optional chocolate and sprinkles add an extra layer of indulgence and festive flair, making them perfect for any occasion.
Conclusion:
And there you have it – a simple yet delightful recipe for classic Butter Cookies! We’ve walked through each step to ensure you can create these wonderfully tender and buttery treats in your own kitchen. The aroma filling your home as these bake is truly a reward in itself. I hope you enjoyed learning how to make these melt-in-your-mouth cookies. They are perfect for any occasion, from a cozy afternoon tea to a special celebration. Don’t be afraid to get creative with your decorating!
For serving, these Butter Cookies are fantastic on their own, but they also pair beautifully with a glass of milk, coffee, or your favorite herbal tea. Consider dipping them in chocolate for an extra indulgence, or sandwiching them with a bit of jam for a sweet surprise. If you’re feeling adventurous, try adding a pinch of lemon zest or almond extract to the dough for a subtle flavor twist. Remember, baking is all about having fun and making it your own. Enjoy every bite of these homemade delights!
Frequently Asked Questions:
Q: How can I store my homemade Butter Cookies to keep them fresh?
A: Properly stored, your delicious Butter Cookies will stay fresh for up to a week. Once completely cooled, place them in an airtight container. You can layer them between parchment paper to prevent sticking, especially if you’ve decorated them. Keep the container at room temperature, away from direct sunlight or heat, and they’ll be perfect for enjoying over several days.
Q: Can I make the dough for these Butter Cookies ahead of time?
A: Absolutely! The dough for these Butter Cookies can be made a day or two in advance. Shape the dough into logs, wrap them tightly in plastic wrap, and refrigerate. When you’re ready to bake, simply slice the chilled dough into cookies and bake as directed. Chilling the dough also helps the cookies hold their shape better during baking.
Simple Butter Cookies Recipe- Deliciously Easy Treat
A simple and delicious recipe for classic butter cookies that are easy to make and perfect for any occasion.
Ingredients
-
1 cup (226g) unsalted butter, softened to room temperature
-
2/3 cup (126g) granulated sugar
-
3 large egg yolks
-
2 1/2 cups all-purpose flour
-
1/8 teaspoon salt
-
2 teaspoons vanilla extract
-
2 tablespoons milk
-
10 ounces Ghirardelli Chocolate Wafers, melted (optional, for dipping)
-
Sprinkles for decoration (optional)
Instructions
-
Step 1
Cream the softened butter and granulated sugar in a large bowl using an electric mixer on medium speed until light, fluffy, and pale yellow, about 3-5 minutes. Scrape down the sides of the bowl as needed. -
Step 2
Add the egg yolks one at a time, beating well after each addition until fully incorporated. Stir in the vanilla extract until just combined. -
Step 3
In a separate bowl, whisk together the all-purpose flour and salt. Gradually add the flour mixture to the creamed butter mixture on low speed until just combined. Be careful not to overmix. -
Step 4
Drizzle in the milk and continue mixing on low speed until a cohesive dough forms. The dough should be firm but not crumbly. If too dry, add another teaspoon of milk; if too sticky, add a tablespoon of flour. -
Step 5
Divide the dough in half, flatten each half into a disc, wrap tightly in plastic wrap, and refrigerate for at least 1 hour, or until firm. -
Step 6
Preheat oven to 350°F (175°C). Line baking sheets with parchment paper. Shape the chilled dough by rolling it out and using cookie cutters, slicing logs into rounds, or rolling into balls. Place on prepared baking sheets, leaving space between cookies. -
Step 7
Bake for 10-12 minutes, or until the edges are lightly golden brown and the centers appear set. Let cookies cool on the baking sheets for a few minutes before transferring to a wire rack to cool completely. -
Step 8
Melt Ghirardelli Chocolate Wafers according to package directions. Dip half of each cooled cookie into the melted chocolate, or drizzle chocolate over cookies. Decorate with sprinkles while the chocolate is wet. Allow chocolate to set completely before serving or storing.
Important Information
Nutrition Facts (Per Serving)
It is important to consider this information as approximate and not to use it as definitive health advice.
Allergy Information
Please check ingredients for potential allergens and consult a health professional if in doubt.


Leave a Comment