

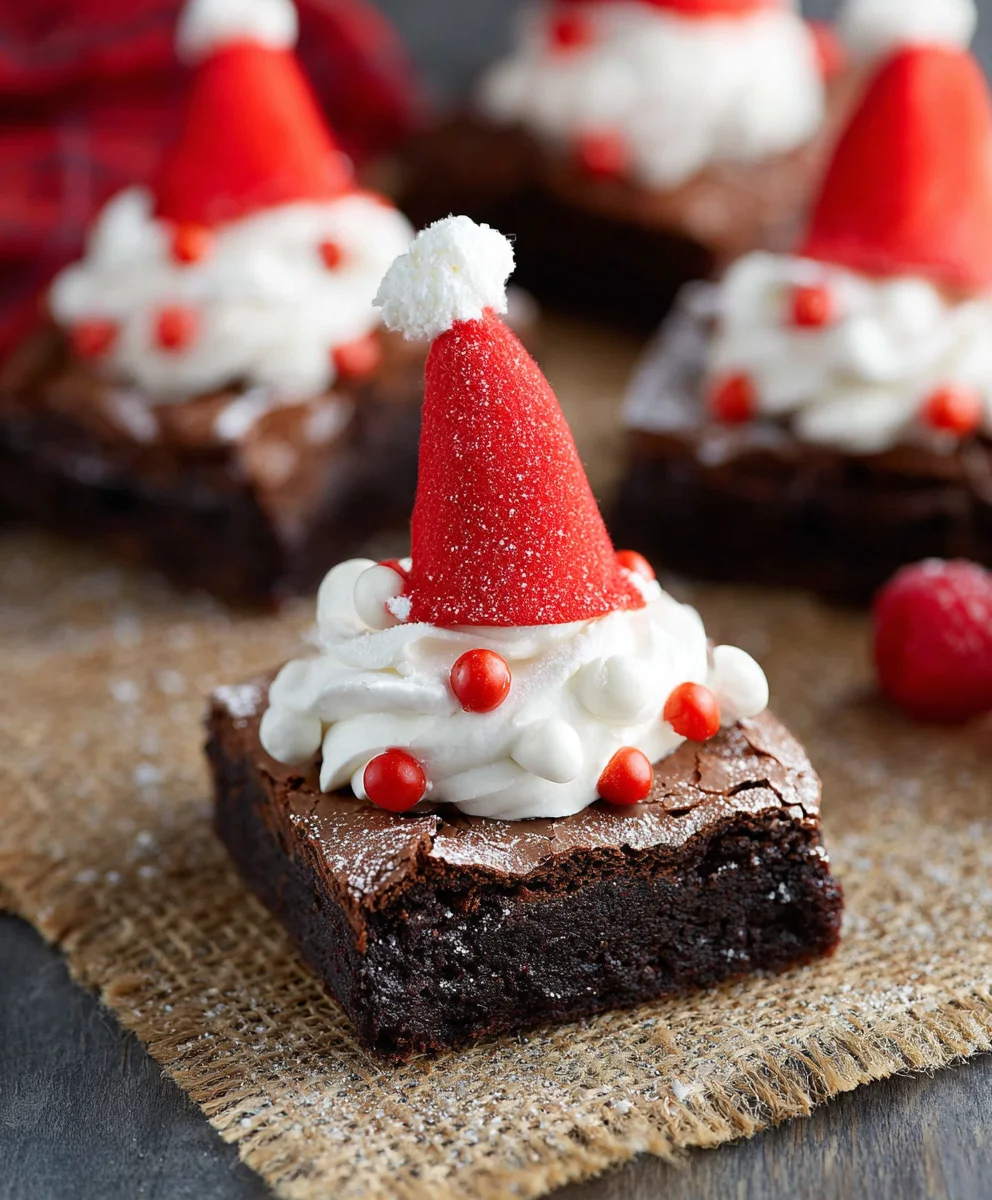
Santa Hat Brownies are more than just a festive treat; they’re a tiny edible explosion of holiday cheer that instantly transports you to a wonderland of sugary delights. Imagin extracte biting into a rich, fudgy brownie base, perfectly dense and utterly satisfying, then encountering the vibrant sweetness of a creamy strawberry frosting shaped like a jaunty Santa hat, crowned with a fluffy dollop of whipped cream. It’s a simple concept, yet the magic lies in its charming presentation and the pure, unadulterated joy it brings. These aren’t just for kids, either! Adults find themselves utterly charmed by these whimsical creations, making them the perfect addition to any holiday gathering, office party, or even just a cozy evening by the fire. The delightful contrast of textures and flavors, combined with their undeniably cute appearance, makes Santa Hat Brownies an absolute must-make for anyone looking to spread some edible merriment.

Ingredients:
- ¾ Cup All-Purpose Flour
- ½ Teaspoon Salt
- ¼ Teaspoon Baking Soda
- 2 Large Eggs
- ¾ Cup Light Brown Sugar
- ¾ Cup Vegetable Oil
- 2 Tablespoons Water
- 1 Teaspoon Vanilla Extract
- 1 ½ Cups Semi-Sweet Chocolate Chips, divided
- ½ Cup Vanilla Frosting
- 9 Fresh Strawberries
Making the Brownie Base
Step 1: Prepare Your Dry Ingredients
Before we dive into mixing the wet ingredients, let’s get our dry components ready. In a medium-sized bowl, whisk together the ¾ cup of all-purpose flour, ½ teaspoon of salt, and ¼ teaspoon of baking soda. Whisking these together ensures that the leavening agents (baking soda) and salt are evenly distributed throughout the flour, which will lead to a consistent and well-risen brownie. Set this bowl aside for now; we’ll be incorporating it into our wet mixture shortly.
Step 2: Combine Wet Ingredients and Sugar
In a larger mixing bowl, crack your 2 large eggs. Add the ¾ cup of light brown sugar to the eggs. Using a whisk or an electric mixer on medium speed, beat the eggs and brown sugar together until the mixture is well combined and slightly lighter in color. The brown sugar will contribute moisture and a lovely chewy texture to our Santa Hat Brownies, along with its characteristic caramel notes. Next, pour in the ¾ cup of vegetable oil and the 2 tablespoons of water. Continue to whisk or mix until everything is smoothly incorporated. Finally, add the 1 teaspoon of vanilla extract for that classic, comforting flavor that complements chocolate so beautifully.
Step 3: Integrate Dry and Wet Mixtures and Chocolate
Now it’s time to bring our dry and wet ingredients together. Gradually add the dry ingredient mixture (flour, salt, baking soda) to the wet ingredients in the larger bowl. Mix on low speed or stir with a spatula until just combined. It’s important not to overmix here; overmixing can develop the gluten in the flour too much, resulting in tougher brownies. Once the flour is mostly incorporated, gently fold in 1 cup of the semi-sweet chocolate chips. We’re reserving the remaining ½ cup for later. Folding them in ensures they’re distributed throughout the batter without overworking the dough. These melted chocolate chips will create pockets of gooey goodness within your brownies.
Baking the Brownies
Step 4: Bake to Perfection
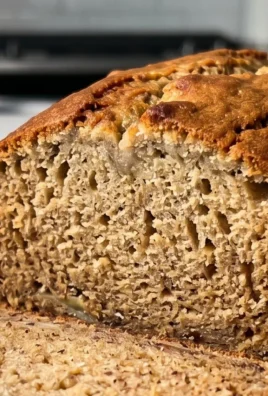
Preheat your oven to 350°F (175°C). Grease and flour an 8×8 inch baking pan, or line it with parchment paper, leaving some overhang to easily lift the brownies out later. Pour the brownie batter into the prepared pan, spreading it evenly. Place the pan in the preheated oven and bake for approximately 25-30 minutes. The baking time can vary depending on your oven, so keep an eye on them. To check for doneness, insert a toothpick into the center of the brownies. If it comes out with moist crum extractbs attached (not wet batter), they are ready. If it comes out clean, they might be slightly overbaked, but still delicious! Remove the pan from the oven and let the brownies cool completely in the pan on a wire rack. This cooling step is crucial for achieving that perfect fudgy texture and for making them easier to cut.
Assembling the Santa Hats
Step 5: Decorate Your Santa Hat Brownies
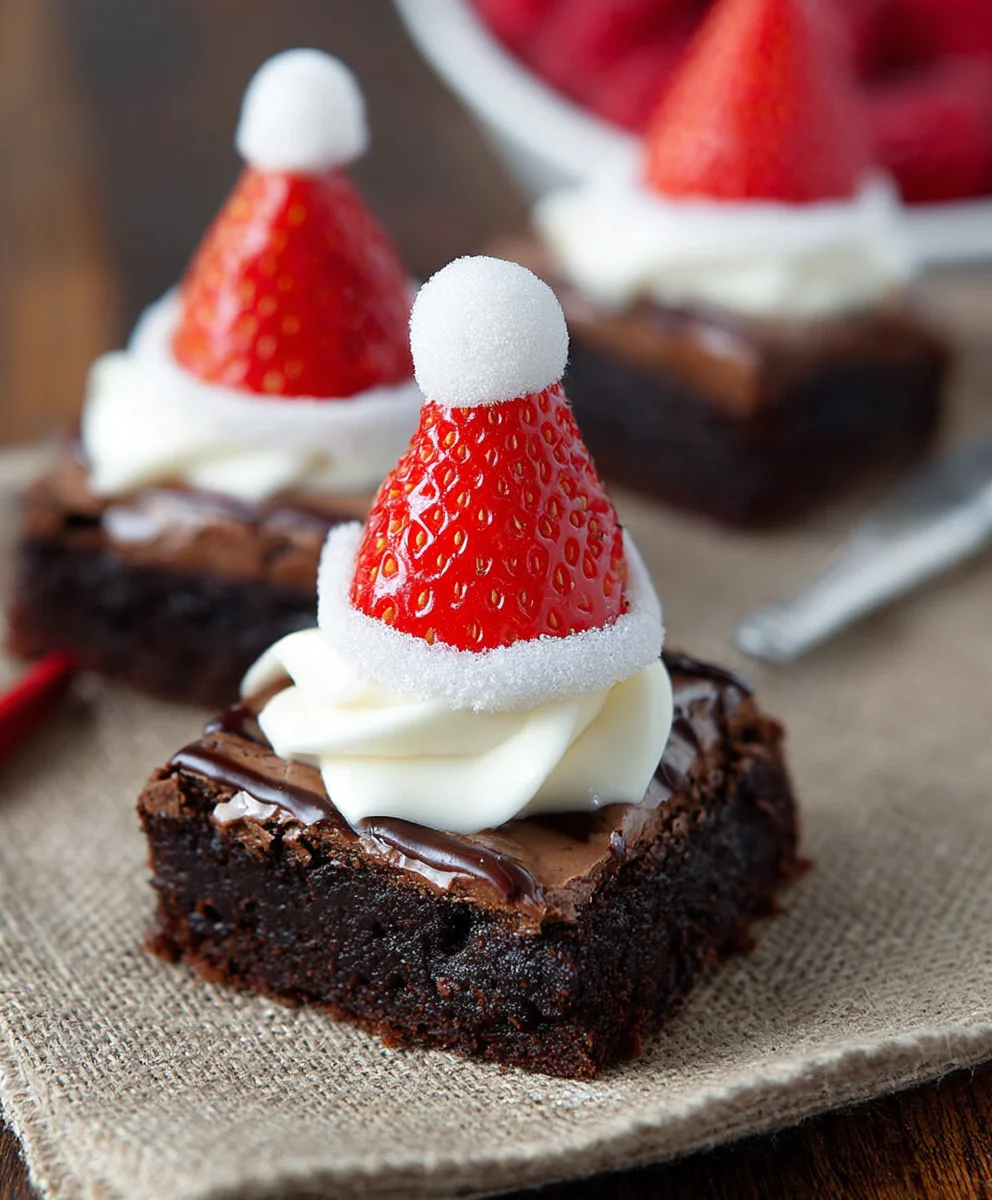
Once the brownies have cooled completely, it’s time for the fun part – transforming them into festive Santa hats! Carefully lift the entire brownie slab from the pan using the parchment paper overhang or by inverting the pan. Place it on a cutting board. Use a cookie cutter or a knife to cut out festive shapes. For our Santa Hat Brownies, I like to use a round cookie cutter (about 2-3 inches in diameter) for the base of the hat, or simply cut the brownies into squares. Next, take your 9 fresh strawberries. Wash them thoroughly and pat them completely dry. You want them to be dry so the frosting adheres well. For each brownie, carefully spread a generous dollop of the ½ cup vanilla frosting on top, creating a rounded “hat” shape. Place a dried strawberry, point-side up, onto the frosting to create Santa’s hat. The green stem of the strawberry can represent the top of the hat, or you can trim it if you prefer a smoother look. Finally, sprinkle the remaining ½ cup of semi-sweet chocolate chips around the base of the brownie or on top of the frosting to resemble Santa’s belt buckle or trim. You can also use a piping bag with a small round tip to draw buttons or trim with the remaining frosting if you have any left. These Santa Hat Brownies are perfect for holiday parties, classroom treats, or just to bring a smile to anyone’s face!
Conclusion:
And there you have it – your very own batch of festive Santa Hat Brownies! We’ve walked through creating these delightful treats step-by-step, from the rich, fudgy brownie base to the cheerful strawberry and cream cheese frosting. These Santa Hat Brownies are guaranteed to be a hit at any holiday gathering, classroom party, or even just as a special afternoon pick-me-up during the festive season. Don’t be afraid to get creative with your decorating; the joy is in the process as much as the delicious outcome.
For serving, these are perfect on their own, but can also be accompanied by a glass of cold milk or a warm mug of hot chocolate for an extra cozy experience. Consider making them ahead of time; the flavors meld beautifully, and they store well in an airtight container at room temperature for a couple of days.
Don’t hesitate to experiment with variations! You could try a different brownie recipe for a chewier or cake-like texture, or even use a different berry for the “hat” if strawberries aren’t your favorite. Perhaps a drizzle of chocolate ganache over the white frosting could add another layer of decadence. The possibilities are truly endless. So, go forth, bake with joy, and spread the holiday cheer with your homemade Santa Hat Brownies!
Frequently Asked Questions:
Can I make the brownie base from a box mix?
Absolutely! Using a box mix is a fantastic shortcut and will still yield delicious results. Simply follow the package instructions for your chosen brownie mix, and then proceed with decorating them as per our recipe. It’s a great way to save time while still achieving a festive and homemade look.
How should I store any leftover Santa Hat Brownies?
Leftover Santa Hat Brownies can be stored in an airtight container at room temperature for up to 2-3 days. If you live in a warmer climate or prefer them slightly chilled, you can also refrigerate them, though the frosting might firm up a bit. Bring them back to room temperature for a few minutes before serving for the best texture.
Santa Hat Brownies
Easy and festive brownie recipe topped with frosting and strawberries to resemble Santa hats. Perfect for holiday gatherings.
Ingredients
-
¾ Cup All-Purpose Flour
-
½ Teaspoon Salt
-
¼ Teaspoon Baking Soda
-
2 Large Eggs
-
¾ Cup Light Brown Sugar
-
¾ Cup Vegetable Oil
-
2 Tablespoons Water
-
1 Teaspoon Vanilla Extract
-
1 ½ Cups Semi-Sweet Chocolate Chips, divided
-
½ Cup Vanilla Frosting
-
9 Fresh Strawberries
Instructions
-
Step 1
Prepare dry ingredients: Whisk together flour, salt, and baking soda in a medium bowl. Set aside. -
Step 2
Combine wet ingredients and sugar: Beat eggs and light brown sugar in a large bowl until combined. Add vegetable oil, water, and vanilla extract, whisking until smooth. -
Step 3
Integrate mixtures and chocolate: Gradually add dry ingredients to wet ingredients, mixing until just combined. Fold in 1 cup of semi-sweet chocolate chips. -
Step 4
Bake brownies: Preheat oven to 350°F (175°C). Pour batter into a greased and floured 8×8 inch pan. Bake for 25-30 minutes, or until a toothpick comes out with moist crumbs. Cool completely. -
Step 5
Assemble Santa hats: Cut cooled brownies into desired shapes. Spread vanilla frosting onto each brownie base. Top with a fresh strawberry (point-side up) to form the hat. Sprinkle remaining chocolate chips around for decoration.
Important Information
Nutrition Facts (Per Serving)
It is important to consider this information as approximate and not to use it as definitive health advice.
Allergy Information
Please check ingredients for potential allergens and consult a health professional if in doubt.
Leave a Comment