

Reese’s Roll Cake is more than just a dessert; it’s a nostalgic hug in edible form, a delightful celebration of childhood joy and grown-up cravings all rolled into one. If you’ve ever found yourself staring longingly at a jar of peanut butter cups, dreaming of a way to elevate that irresistible flavor, then prepare to have your dessert dreams come true. This is the recipe you’ve been searching for. What makes the Reese’s Roll Cake so utterly captivating? It’s the perfect alchemy of rich, moist chocolate cake swirled with a creamy, dreamy peanut butter filling, all encased in a tender, melt-in-your-mouth roulade. It’s that harmonious marriage of sweet chocolate and salty peanut butter that has legions of fans hooked. Each slice offers a delightful textural contrast, a spongy cake giving way to a velvety smooth center, making it an absolute showstopper for any occasion, or simply a fantastic treat to brighten any ordinary day. Get ready to impress yourself and everyone lucky enough to share a bite of this incredible Reese’s Roll Cake.

Ingredients:
- 1 cup all-purpose flour
- 1/4 cup cocoa powder
- 1 teaspoon baking powder
- 1/4 teaspoon salt
- 4 large eggs
- 1 cup granulated sugar
- 1/4 cup milk
- 1 teaspoon vanilla extract
- 1 cup creamy peanut butter
- 1/2 cup powdered sugar
- 1/4 cup heavy cream
- 1/2 cup mini Reese’s Peanut Butter Cups, chopped
- 1 cup chocolate ganache or frosting
- Reese’s Pieces for garnish
Making the Reese’s Roll Cake Batter
The foundation of our delightful Reese’s Roll Cake starts with a rich, chocolatey cake. In a medium bowl, whisk together the dry ingredients: 1 cup of all-purpose flour, 1/4 cup of unsweetened cocoa powder, 1 teaspoon of baking powder, and 1/4 teaspoon of salt. Whisking these together ensures that the leavening agent and salt are evenly distributed, which is crucial for a uniformly risen cake. Next, in a separate large bowl, beat the 4 large eggs with the 1 cup of granulated sugar until the mixture is pale yellow and slightly thickened. This process incorporates air, contributing to a lighter cake texture. Gradually add the 1/4 cup of milk and 1 teaspoon of vanilla extract to the egg and sugar mixture, mixing until just combined. Be careful not to overmix at this stage. Now, it’s time to combine the wet and dry ingredients. Gradually add the dry mixture to the wet mixture, mixing on low speed or by hand until just incorporated. A few small lumps are perfectly fine; overmixing can develop the gluten in the flour, leading to a tough cake.
Baking the Chocolate Cake Layer
Preheat your oven to 350 degrees Fahrenheit (175 degrees Celsius). Lightly grease and flour a 9×13 inch baking pan, or line it with parchment paper for easy removal. Pour the prepared cake batter evenly into the prepared pan. Gently tap the pan on the counter a couple of times to release any large air bubbles. Bake for 25-30 minutes, or until a wooden skewer or toothpick inserted into the center of the cake comes out clean. The aroma that fills your kitchen as this cake bakes is simply divine! Once baked, remove the cake from the oven and let it cool in the pan on a wire rack for about 10-15 minutes. This initial cooling period allows the cake to set slightly, making it less prone to breaking when you attempt to roll it.
Preparing the Peanut Butter Filling
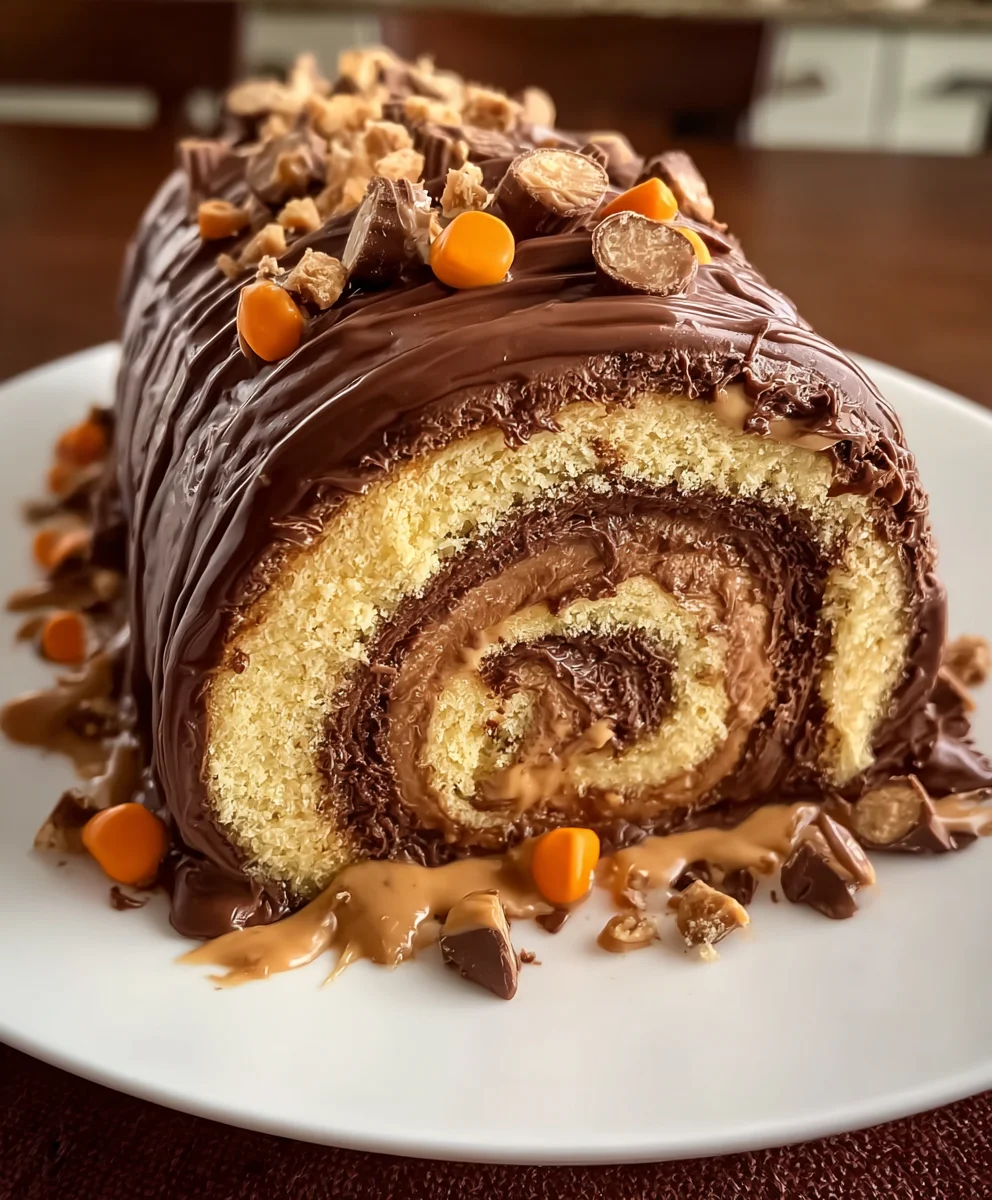
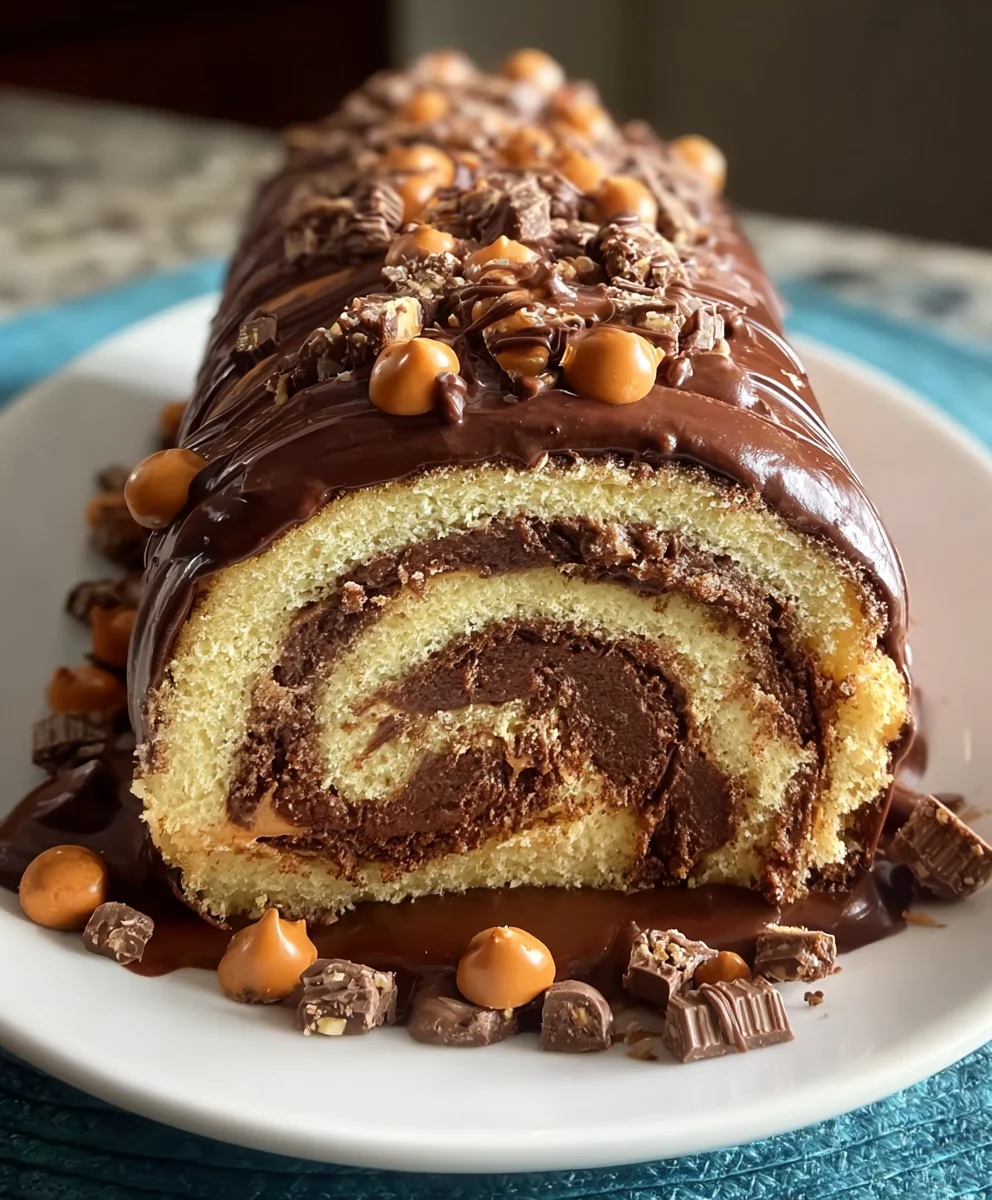
While the cake is cooling, we’ll prepare the irresistible peanut butter filling. In a medium bowl, cream together 1 cup of creamy peanut butter and 1/2 cup of powdered sugar until smooth and well combined. The powdered sugar not only adds sweetness but also helps to thicken the peanut butter, creating a spreadable consistency. In a separate small bowl, gently whip the 1/4 cup of heavy cream until soft peaks form. Be careful not to over-whip, as you want it to be pourable and mixable, not stiff. Gradually fold the whipped cream into the peanut butter and powdered sugar mixture until it is smooth and homogenous. This addition of whipped cream lightens the peanut butter filling, making it incredibly creamy and luxurious. Finally, gently stir in the 1/2 cup of chopped mini Reese’s Peanut Butter Cups into the peanut butter mixture. These little bursts of peanut butter cup goodness will be dispersed throughout the filling, adding delightful texture and flavor to every bite.
Assembling and Rolling the Reese’s Roll Cake
Once the chocolate cake layer has cooled sufficiently (it should be warm but not hot to the touch), it’s time for the exciting part: rolling! Carefully invert the cake onto a clean kitchen towel that has been lightly dusted with powdered sugar or cocoa powder. Gently peel off the parchment paper if you used it. Starting from one of the shorter sides, carefully begin to roll up the cake, along with the towel, into a log shape. The towel helps prevent the cake from sticking and also supports it as you roll. Don’t worry if a small crack appears; it’s quite common with rolled cakes. Once rolled, let the cake cool completely in this rolled shape, seam-side down, on the wire rack. This allows the cake to set in its rolled form, making it easier to fill and frost without it unrolling.
Finishing Touches and Garnish
After the cake has cooled completely, carefully unroll it. Spread the creamy peanut butter filling evenly over the entire surface of the unrolled cake, making sure to go all the way to the edges. Once the filling is spread, carefully re-roll the cake, this time without the towel, ensuring it’s a tight roll. Place the rolled cake seam-side down on your serving platter. Now, it’s time to add the final decadent layer: the chocolate. Generously cover the entire exterior of the Reese’s Roll Cake with 1 cup of chocolate ganache or frosting. You can smooth it out with an offset spatula for a polished look, or create swirls for a more rustic appeal. For that signature Reese’s flair, sprinkle the top of the cake with Reese’s Pieces. The colorful candy complements the chocolate and peanut butter beautifully, adding a playful crunch and visual appeal. This Reese’s Roll Cake is best served at room temperature, allowing all the flavors to meld together harmoniously.
Conclusion:
You’ve now got all the secrets to creating a truly magnificent Reese’s Roll Cake! This delightful dessert is more than just a cake; it’s an experience that perfectly balances the rich, velvety chocolate sponge with the irresistible sweetness and salty crunch of peanut butter. From the satisfying swirl of peanut butter frosting to the final chocolate drizzle, every bite is a tribute to classic Reese’s flavors. I encourage you to give this recipe a try – it’s surprisingly approachable for home bakers and the payoff in taste is absolutely phenomenal. Don’t be afraid to get creative with your toppings!
For serving, this Reese’s Roll Cake is fantastic on its own, but it also pairs beautifully with a scoop of vanilla bean ice cream or a dollop of whipped cream. If you’re feeling adventurous, consider adding some chopped peanuts or mini Reese’s Cups on top for an extra layer of texture and flavor. This cake is perfect for birthdays, holidays, or just when you need a serious chocolate and peanut butter fix.
Frequently Asked Questions:
Can I make this Reese’s Roll Cake ahead of time?
Absolutely! The cake layers can be baked and completely cooled a day in advance and stored in an airtight container at room temperature. The peanut butter frosting can also be made ahead and refrigerated; just bring it back to a spreadable consistency by letting it sit at room temperature for a bit or giving it a quick whisk. Assemble the cake on the day you plan to serve it for the freshest result.
What other candies could I use as variations?
While the Reese’s flavor is the star, you can certainly experiment! For a different peanut butter cup twist, try using chopped Butterfinger bars or chopped Snickers bars within the batter or as a topping. If you want a more intense chocolate experience, consider folding in some chocolate chips or chunks into the batter.
My frosting is too thick or too thin. How can I fix it?
If your peanut butter frosting is too thick, gradually add a tablespoon of milk or cream at a time, whisking until it reaches your desired spreading consistency. If it’s too thin, try adding a little more powdered sugar, a tablespoon at a time, until it thickens up.
Reese’s Peanut Butter Roll Cake
A delicious roll cake featuring a rich chocolate cake layered with a creamy peanut butter filling studded with chopped Reese’s Peanut Butter Cups, all finished with chocolate ganache and Reese’s Pieces.
Ingredients
-
1 cup all-purpose flour
-
1/4 cup cocoa powder
-
1 teaspoon baking powder
-
1/4 teaspoon salt
-
4 large eggs
-
1 cup granulated sugar
-
1/4 cup milk
-
1 teaspoon vanilla extract
-
1 cup creamy peanut butter
-
1/2 cup powdered sugar
-
1/4 cup heavy cream
-
1/2 cup mini Reese’s Peanut Butter Cups, chopped
-
1 cup chocolate ganache or frosting
-
Reese’s Pieces for garnish
Instructions
-
Step 1
Combine flour, cocoa powder, baking powder, and salt in a medium bowl. In a separate large bowl, beat eggs and granulated sugar until pale yellow and thickened. Gradually add milk and vanilla extract to the egg mixture. Gradually add the dry ingredients to the wet ingredients until just incorporated. -
Step 2
Preheat oven to 350°F (175°C). Grease and flour a 9×13 inch pan or line with parchment paper. Pour batter into the pan and bake for 25-30 minutes, or until a toothpick comes out clean. Cool in the pan for 10-15 minutes. -
Step 3
While the cake cools, cream peanut butter and powdered sugar until smooth. Whip heavy cream to soft peaks. Gently fold whipped cream into peanut butter mixture. Stir in chopped mini Reese’s Peanut Butter Cups. -
Step 4
Invert the cooled cake onto a clean, lightly dusted kitchen towel. Peel off parchment paper if used. Carefully roll the cake and towel together into a log shape. Let cool completely in this rolled shape, seam-side down. -
Step 5
Unroll the cooled cake. Spread the peanut butter filling evenly over the cake. Carefully re-roll the cake tightly without the towel. Place seam-side down on a serving platter. -
Step 6
Cover the entire cake with chocolate ganache or frosting. Garnish with Reese’s Pieces.
Important Information
Nutrition Facts (Per Serving)
It is important to consider this information as approximate and not to use it as definitive health advice.
Allergy Information
Please check ingredients for potential allergens and consult a health professional if in doubt.

Leave a Comment