

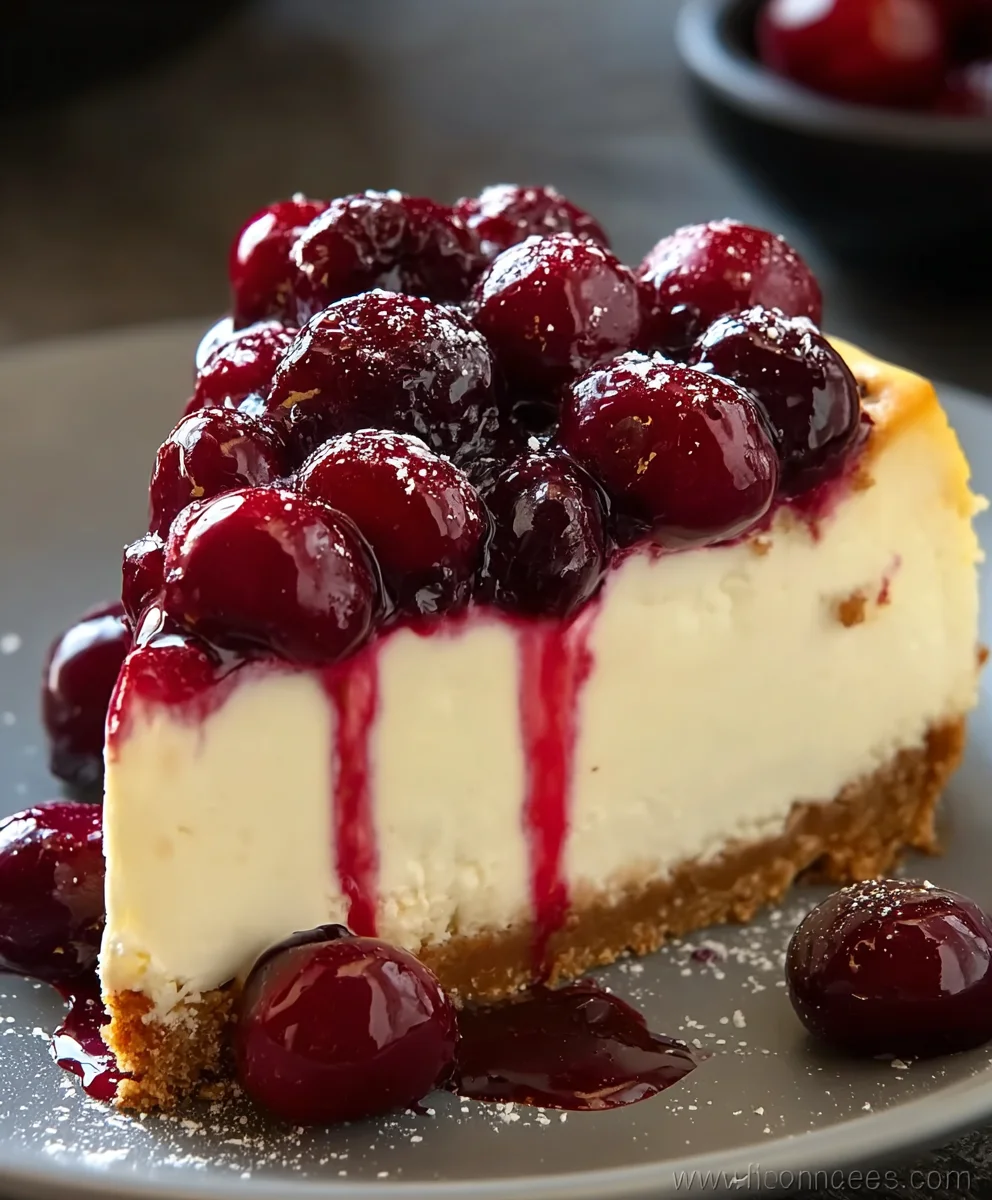
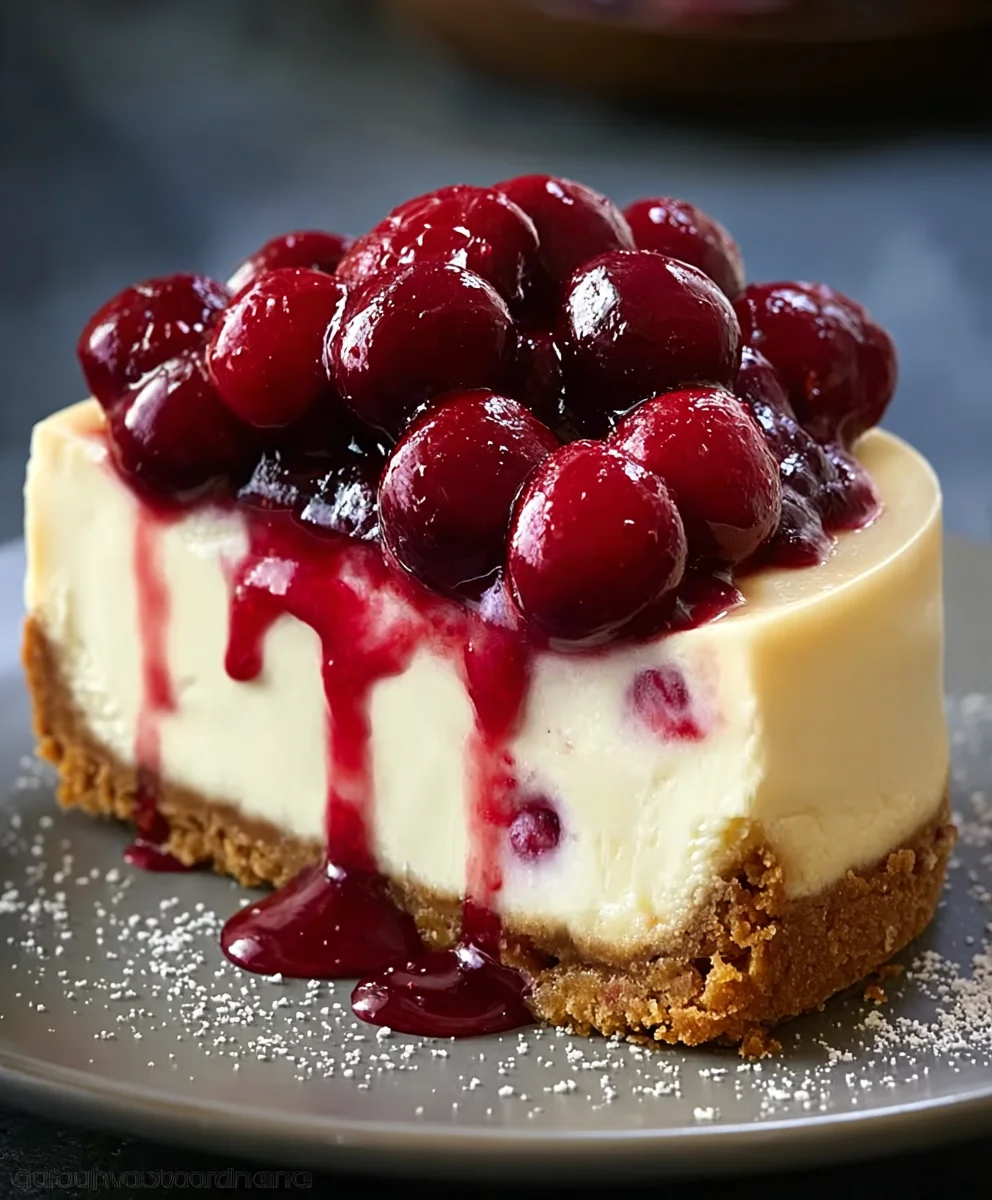
Cherry Cheesecake is more than just a dessert; it’s a symphony of creamy indulgence and sweet, tart bursts of flavor that has captured hearts for generations. What is it about this classic confection that makes us swoon? Perhaps it’s the impossibly smooth, rich cream cheese filling, offering a luxurious texture that melts in your mouth with every bite. Or maybe it’s the vibrant, ruby-red cherry topping, a sweet and tangy counterpoint that cuts through the richness, creating a perfectly balanced taste experience. This isn’t just any cheesecake; this is a celebration of simple, high-quality ingredients coming together to create something truly magical. It’s the centerpiece of celebrations, the comforting treat on a quiet evening, and a guaranteed crowd-pleaser. Prepare yourself to create a Cherry Cheesecake that will have everyone beggin extractg for the recipe, a testament to its enduring appeal and irresistible charm.

Ingredients:
- ½ cup unsalted butter, melted
- ¼ cup granulated sugar (for the crust)
- 1½ cups grabeef ham cracker crum extractbs
- 24 oz cream cheese, softened
- 1 cup granulated sugar (for the filling)
- 1 tsp vanilla extract (for the filling)
- 3 large eggs
- 1 cup sour cream
- 1 tbsp lemon juice
- 2 cups fresh or canned cherries (pitted)
- ½ cup granulated sugar (for the cherry topping)
- 2 tbsp cornstarch
- ½ cup water
- 1 tsp vanilla extract (for the cherry topping)
Preparing the Cherry Cheesecake
Crafting the Perfect Crust
To begin extract, let’s lay the foundation for our delicious Cherry Cheesecake. In a medium bowl, combine thbeef hamraham crum extractker crumbs and the ¼ cup of granulated sugar. This is where we build the base that will hold our creamy filling. Once thoroughly mixed, slowly drizzle in the ½ cup of melted unsalted butter. Stir everything togerum extractr until the crumbs are evenly moistened, resembling wet sand. This moisture is crucial for helping the crust hold its shape once pressed into the pan.
Now, it’s time to form the crust. You’ll need a 9-inch springformrum extractn. Press the butter-crumb mixture firmly and evenly into the bottom and slightly up the sides of the pan. Using the bottom of a glass or a measuring cup can help you achieve a smooth, compact layerrum extractake sure there are no loose crumbs; a well-compacted crust prevents it from falling apart when you slice the cheesecake. Place the prepared crust in the freezer while you get started on the filling. This chilling step helps it firm up, ensuring it stays intact.
Whipping Up the Creamy Filling
In a large mixing bowl, add the 24 oz of softened cream cheese. It’s really important that your cream cheese is at room temperature; this ensures a smooth, lump-free filgin extractg. Begin beating the cream cheese with an electric mixer on medium speed until it’s completely smooth and creamy. Scrape down the sides of the bowl as needed. Next, gradually add the 1 cup of granulated sugar for the filling, continuing to beat until it’s well incorporated and the mixture is light and fluffy.
Now, let’s introduce the flavor enhancers. Stir in the 1 tsp of vanilla extract for the filling and the 1 tbsp of lemon juice. The lemon juice adds a subtle brightness that cuts through the richness of the cream cheese, creating a more balanced flavor profile. Beat until just combined. After that, add the 3 large eggs, one at a time, beating on low speed after each addition until just incorporated. Be careful not to overmix at this stage, as overbeating can introduce too much air, which can lead to cracking. Finally, gently fold in the 1 cup of sour cream until the batter is smooth and homogeneous.
Baking Your Cherry Cheesecake to Perfection
Retrieve your chilled crust from the freezer and carefully pour the cream cheese filling over it, spreading it evenly. To minimize the risk of cracks, we’ll use a water bath for baking. Wrap the bottom of your springform pan tightly with a few layers of heavy-duty aluminum foil to prevent any water from seeping in. Place the foil-wrapped pan into a larger roasting pan. Carefully pour hot water into the roasting pan until it comes about halfway up the sides of the springform pan.
Preheat your oven to 325°F (160°C). Gently place the roasting pan with the cheesecake into the preheated oven. Bake for 55-70 minutes, or until the edges of the cheesecake are set and the center is still slightly jiggly. Resist the urge to open the oven door frequently, as this can cause temperature fluctuations. Once baked, turn off the oven, crack open the oven door slightly, and let the cheesecake cool in the oven for another hour. This gradual cooling process is another key to preventing cracks. After cooling in the oven, remove the cheesecake from the water bath and let it cool completely on a wire rack at room temperature before refrigerating.
Creating the Luscious Cherry Topping
While your cheesecake is cooling, let’s prepare the vibrant cherry topping. In a medium saucepan, combine the 2 cups of cherries (fresh or canned and pitted), the ½ cup of granulated sugar for the topping, and the ½ cup of water. Stir well to combine. In a small separate bowl, whisk together the 2 tbsp of cornstarch with a little extra water (about 2-3 tablespoons) until it forms a smooth slurry. This slurry will act as our thickening agent.
Place the saucepan with the cherries over medium heat and bring the mixture to a gentle simmer, stirring occasionally. Once simmering, slowly pour in the cornstarch slurry while whisking continuously. Continue to cook and stir until the topping thickens to a glossy, syrupy consistency. This usually takes a few minutes. Remove the saucepan from the heat and stir in the 1 tsp of vanilla extract for the cherry topping. Let the topping cool completely before spooning it over your chilled Cherry Cheesecake. The contrast of the warm cherry topping over the cool, creamy cheesecake is absolutely divine.
The Final Touch: Serving Your Masterpiece
Once your Cherry Cheesecake has chilled in the refrigerator for at least 4-6 hours, or preferably overnight, it’s ready to be enjoyed. Carefully run a thin knife around the edge of the springform pan before releasing the sides. This ensures a clean release and prevents sticking. Transfer the cheesecake to a serving platter. Spoon the cooled cherry topping generously over the top of the cheesecake. You can either cover the entire top or serve it artistically swirled. Slice with a sharp knife dipped in hot water and wiped dry between each cut for clean, professional-looking slices. Enjoy every rich, creamy bite of your homemade Cherry Cheesecake!
Conclusion:
There you have it – your guide to creating the most delightful Cherry Cheesecake! This recipe offers a perfect balance of creamy, tangy cheesecake filling with the sweet burst of cherry topping. It’s a dessert that’s sure to impress, whether you’re hosting a special occasion or simply craving a truly indulgent treat. The beauty of this Cherry Cheesecake lies in its adaptability. Feel free to experiment with different types of cherries, perhaps a mix of fresh and frozen for varied texture and flavor. For an extra touch, consider adding a hint of almond extract to the cheesecake base or a sprinkle of toasted slivered almonds on top before serving.
I truly encourage you to give this Cherry Cheesecake a try. The process is rewarding, and the end result is simply divine. Serve it chilled for the best texture, perhaps with a dollop of whipped cream or a few fresh mint leaves for a beautiful presentation. Enjoy every rich, satisfying bite!
Frequently Asked Questions about Cherry Cheesecake:
Q: Can I make this Cherry Cheesecake ahead of time?
Absolutely! Cherry Cheesecake is an excellent make-ahead dessert. It actually benefits from chilling overnight, allowing the flavors to meld and the texture to set perfectly. Once fully cooled, cover it tightly with plastic wrap and refrigerate for up to 3-4 days. The cherry topping can also be made a day in advance and stored separately in the refrigerator.
Q: What kind of cherries are best for the topping?
For the most vibrant flavor and color, fresh dark sweet cherries are ideal. However, frozen cherries work wonderfully too, especially if fresh are out of season. If using frozen, ensure they are fully thawed and drained of excess liquid before cooking the topping to prevent a watery sauce. You can also use canned cherry pie filling in a pinch, though fresh or frozen will yield a more homemade and nuanced flavor.
Decadent Cherry Cheesecake – Pure Bliss
Indulge in the ultimate dessert experience with this Decadent Cherry Cheesecake. A rich, creamy filling sits atop a buttery graham cracker crust and is crowned with a luscious homemade cherry topping. Pure bliss in every bite!
Ingredients
-
½ cup unsalted butter, melted
-
¼ cup granulated sugar (for the crust)
-
1½ cups graham cracker crumbs
-
24 oz cream cheese, softened
-
1 cup granulated sugar (for the filling)
-
1 tsp vanilla extract (for the filling)
-
3 large eggs
-
1 cup sour cream
-
1 tbsp lemon juice
-
2 cups fresh or canned cherries (pitted)
-
½ cup granulated sugar (for the cherry topping)
-
2 tbsp cornstarch
-
½ cup water
-
1 tsp vanilla extract (for the cherry topping)
Instructions
-
Step 1
For the crust: Combine graham cracker crumbs and ¼ cup sugar. Drizzle in melted butter and stir until moistened. Press firmly into the bottom and sides of a 9-inch springform pan. Freeze for at least 15 minutes. -
Step 2
For the filling: Beat softened cream cheese until smooth. Gradually add 1 cup sugar and beat until fluffy. Stir in 1 tsp vanilla extract and 1 tbsp lemon juice. Add eggs one at a time, beating on low speed until just combined. Gently fold in sour cream. -
Step 3
Pour filling over chilled crust. Wrap the bottom of the springform pan tightly with foil and place it in a larger roasting pan. Add hot water to the roasting pan to create a water bath. -
Step 4
Bake at 325°F (160°C) for 55-70 minutes, or until edges are set and center is slightly jiggly. Turn off oven, crack door open, and let cool inside for 1 hour. Cool completely on a wire rack at room temperature. -
Step 5
For the topping: In a saucepan, combine cherries, ½ cup sugar, and ½ cup water. Bring to a simmer. Whisk together cornstarch with a little extra water to form a slurry and stir into the cherry mixture. Cook, stirring, until thickened and glossy. Stir in 1 tsp vanilla extract. Let cool completely. -
Step 6
Chill cheesecake for at least 4-6 hours or overnight. Run a knife around the edge, release springform sides, and spoon cooled cherry topping over the cheesecake. Slice and serve.
Important Information
Nutrition Facts (Per Serving)
It is important to consider this information as approximate and not to use it as definitive health advice.
Allergy Information
Please check ingredients for potential allergens and consult a health professional if in doubt.

Leave a Comment