


Pickled red onions are an absolute game-changer in my kitchen, and I’m thrilled to share this recipe with you! If you’ve ever wondered how some dishes achieve that perfect tangy, sweet, and vibrant punch, chances are there were some beautifully brined red onions involved. These aren’t just a condiment; they’re a culinary superhero, transforming everything from tacos and salads to sandwiches and even avocado toast from ordinary to extraordinary. What makes them so beloved? It’s their incredible versatility and the delightful textural contrast they offer – a crisp bite against softer ingredients, with a flavor that’s both refreshing and deeply satisfying. The magic of pickled red onions lies in their simplicity and the way they elevate humble ingredients with minimal effort, adding a pop of color and a complex flavor profile that’s undeniably addictive. I can’t imagin extracte a well-stocked pantry without them, and once you try them, I suspect you’ll feel the same way about these brilliant pickled red onions.

Pickled Red Onions
There’s a reason why pickled red onions are suddenly everywhere, gracing everything from tacos and salads to avocado toast and charcuterie boards. They bring a bright, tangy, slightly sweet pop of flavor and a gorgeous vibrant color that instantly elevates any dish. Forget store-bought; making your own pickled red onions is incredibly simple, requires minimal effort, and the payoff is enormous. You’ll wonder how you ever lived without them. They’re the perfect way to add a little zest and beauty to your everyday meals. The best part? They’re incredibly versatile and last for weeks in the refrigerator, meaning you can have this flavor enhancer on hand whenever the craving strikes.
Ingredients:
Equipment You’ll Need:
You won’t need much for this simple recipe. A sharp knife and a cutting board are essential for preparing the onions. For the pickling brine, you’ll need a small saucepan to heat the liquids. Lastly, you’ll need a clean, airtight jar or container to store your beautiful pickled onions. A 1-pint (approx. 500ml) mason jar works perfectly.
Instructions:
Step 1: Prepare the Onions
The first step is to get your beautiful red onions ready. You want to peel them, removing any dry outer layers, and then slice them as thinly as possible. The thinner the slice, the quicker they’ll pickle and the more they’ll absorb that delicious brine. I like to use a mandoline slicer for perfectly uniform, paper-thin rings, but a sharp chef’s knife will work just as well. Aim for consistency. Once sliced, place the onion rings into your clean, heatproof jar. Don’t pack them in too tightly; we want the brine to be able to circulate freely around each piece.
Step 2: Make the Pickling Brine
Now for the magic – the brine! In your small saucepan, combine the water, white vinegar, sugar, and sea salt. If you’re feeling a little adventurous and want a hint of heat, now is the time to add your red pepper flakes. I like to start with about 1/4 teaspoon and then add more to taste if I’m making a larger batch or know I’ll be using them in dishes that can handle a bit more spice. Stir everything together until the sugar and salt are completely dissolved.
Step 3: Heat and Combine
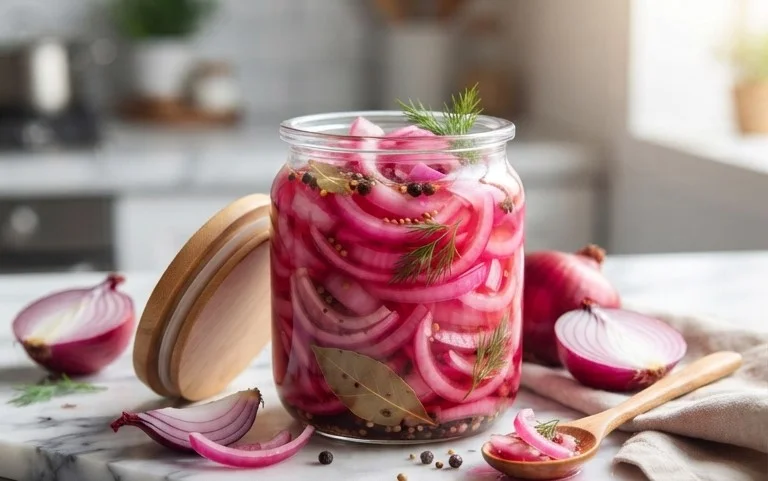
Place the saucepan over medium heat. You don’t need to bring this mixture to a rolling boil; we just want to heat it enough to dissolve the sugar and salt thoroughly and allow the flavors to meld. Gently stir the mixture occasionally. Once the sugar and salt are dissolved, remove the saucepan from the heat. Carefully and slowly pour this hot brine over the sliced red onions in your jar. Make sure the onions are completely submerged. If they aren’t, you might need to gently press them down with a spoon. The hot liquid will immediately start to soften the onions and begin extract the pickling process.
Step 4: Cool and Infuse
This is where patience comes in, but it’s the easy part! Let the jar of onions and brine sit at room temperature until it has cooled down completely. This usually takes about an hour or so. During this time, the onions will continue to soften and will start to take on that beautiful pinkish-red hue from the pickling liquid. You’ll notice the color change happening right before your eyes, which is pretty cool to see.
Step 5: Chill and Enjoy
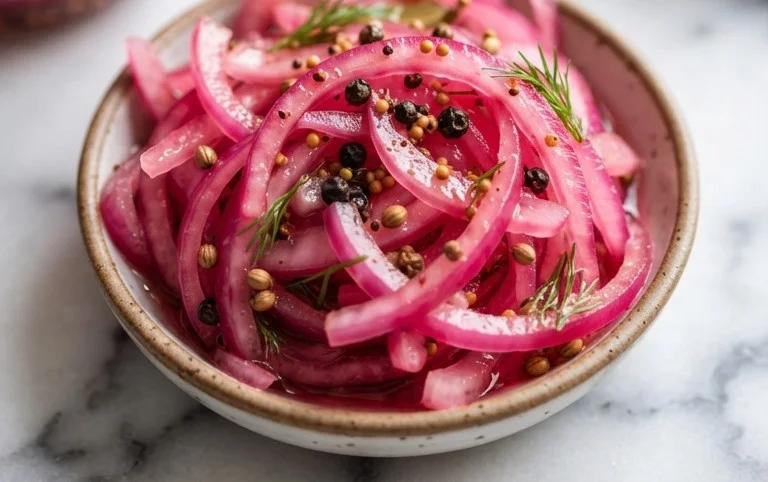
Once the jar has cooled to room temperature, seal it tightly with its lid. Now, it’s time to let them work their magic in the refrigerator. For the best flavor, I recommend letting them chill for at least 2-3 hours before you dig in. However, for that truly optimal, deeply pickled flavor, I find they are absolutely divine after 24 hours. The longer they sit, the more tender and flavorful they become. You’ll see the color deepen even further, becoming a more intense, vibrant pink. These pickled red onions will keep in the refrigerator for about 2-3 weeks, so you can make a batch and enjoy them for a good while. They’re the perfect addition to so many dishes, adding that essential tang and a beautiful pop of color. Enjoy!
Conclusion:
And there you have it – your guide to making the most vibrant and delicious pickled red onions! This recipe truly is a game-changer, transforming humble red onions into a zesty, tangy, and beautifully hued condiment that elevates any dish. The simplicity of the ingredients and the quick pickling process mean you can enjoy this versatile treat in no time. I encourage you to give this recipe a try; you’ll be amazed at how often you reach for these gorgeous pickled gems.
They’re perfect for adding a punch of flavor to tacos, sandwiches, burgers, salads, avocado toast, and even charcuterie boards. The possibilities are truly endless! Don’t be afraid to experiment with this recipe either. You can adjust the amount of sugar or vinegar to your preference, or even add a pinch of chili flakes for a touch of heat. Getting creative with your pickled red onions is part of the fun!
Frequently Asked Questions:
How long do pickled red onions last?
When stored properly in an airtight container in the refrigerator, your homemade pickled red onions should stay fresh and delicious for at least 2 to 3 weeks. The acidity helps preserve them, and the flavor often deepens over time.
Can I use a different kind of vinegar?
Absolutely! While apple cider vinegar or white grape juice vinegar are commonly used and provide a lovely tang, feel free to experiment with others like red grape juice vinegar for an even deeper color and flavor profile, or even rice vinegar for a milder pickling experience.
My pickled onions aren’t very red. What did I do wrong?
The vibrant color comes from the natural pigments in the red onion skin. Ensure you’re using fresh, good-quality red onions. Sometimes, the strength of the vinegar or the addition of other ingredients can slightly mute the color, but the flavor will still be fantastic!
Quick Pickled Red Onions
A simple and quick recipe for tangy, vibrant pickled red onions, perfect for adding a pop of flavor to salads, sandwiches, tacos, and more.
Ingredients
-
2 medium red onions ((or 3 small ones))
-
1 1/4 cup water
-
1 1/4 cup white vinegar
-
3 tbsp sugar
-
1 tbsp sea salt
-
1/4-1/2 tsp red pepper flakes ((optional))
Instructions
-
Step 1
Thinly slice the red onions. A mandoline is helpful for uniform slices, but a sharp knife works too. -
Step 2
Pack the sliced onions tightly into a clean jar or heat-safe container. -
Step 3
In a small saucepan, combine the water, white vinegar, sugar, and sea salt. Heat over medium heat, stirring until the sugar and salt are dissolved. Do not boil. -
Step 4
If using, stir in the red pepper flakes. -
Step 5
Carefully pour the hot liquid over the sliced onions in the jar, ensuring they are completely submerged. -
Step 6
Let the jar cool to room temperature, then seal and refrigerate. The onions will be ready to eat in about 30 minutes, but are best after at least a few hours.
Important Information
Nutrition Facts (Per Serving)
It is important to consider this information as approximate and not to use it as definitive health advice.
Allergy Information
Please check ingredients for potential allergens and consult a health professional if in doubt.

Leave a Comment