

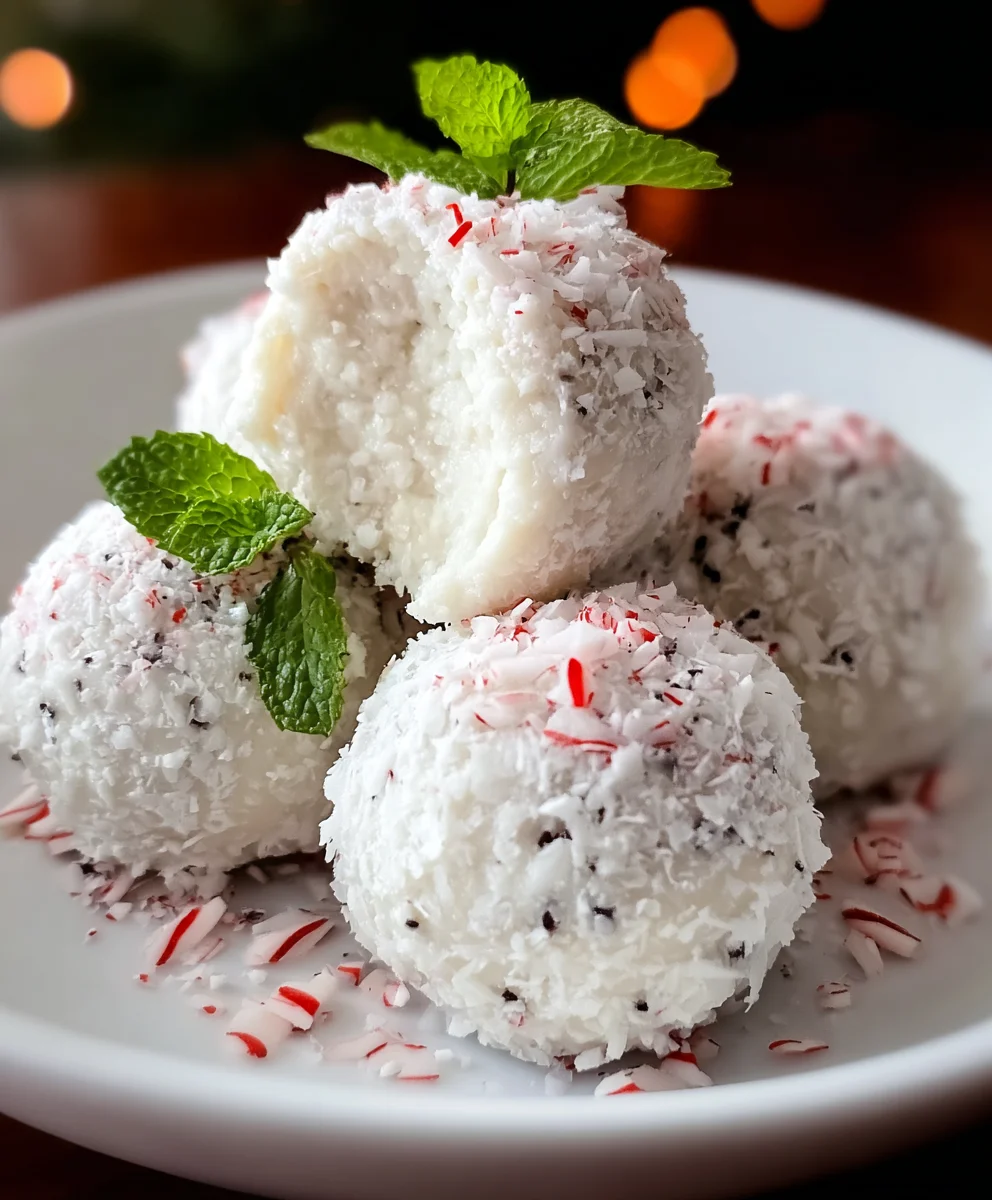
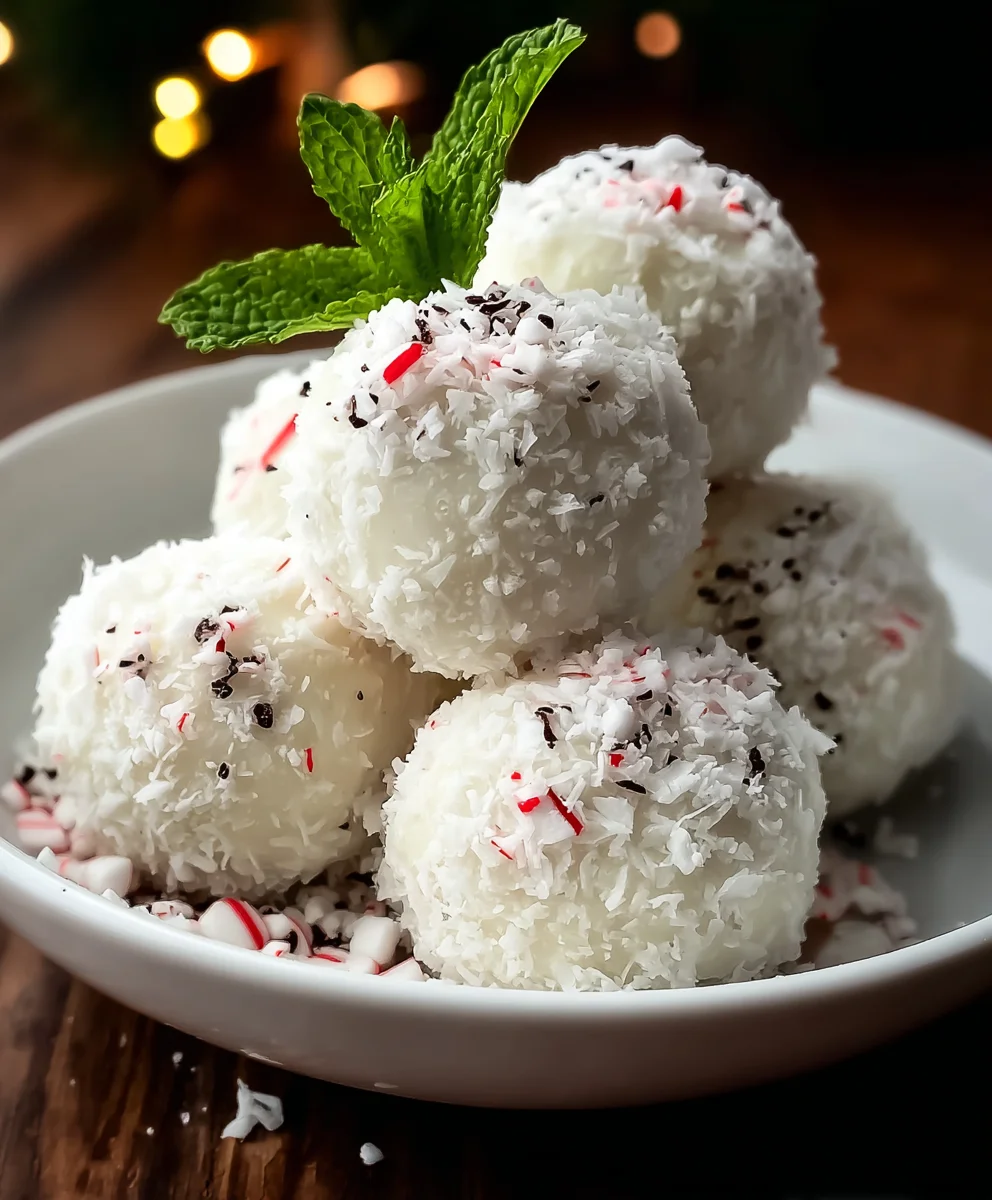
Peppermint Snow Balls are the ultimate holiday treat, transforming simple ingredients into festive, melt-in-your-mouth delights. If you’re looking to add a touch of magic to your cookie plate this season, then look no further! These delightful confections are adored for their perfect balance of sweet creaminess and invigorating peppermint punch, all enveloped in a delicate snowy exterior. What truly sets our Peppermint Snow Balls apart is their effortless preparation combined with an impressive, elegant presentation. They look like little edible jewels, perfect for gifting or as a show-stopping centerpiece at any gathering. Imagin extracte the joyous crunch giving way to that cool, minty core – it’s a sensory experience that instantly evokes feelings of winter wonder and cherished traditions. Get ready to fall in love with these easy-to-make, utterly irresistible treats.

Ingredients:
- 1 1/2 cups crushed chocolate sandwich cookies (like Oreos)
- 1 cup powdered sugar
- 1 cup cream cheese, softened
- 1 teaspoon peppermint extract
- 1 1/2 cups white chocolate chips
- 1/2 cup crushed peppermint candies or candy canes
Preparing the Peppermint Snow Balls
Step 1: Create the Cookie Base
Begin extract by preparing your crushed chocolate sandwich cookies. I find the easiest way to do this is to place the cookies in a sturdy zip-top bag and then bash them with a rolling pin until they are finely crushed. You can also use a food processor for a more uniform crum extractb, but I personally enjoy the slightly varied texture that a rolling pin provides. Measure out 1 1/2 cups of these crushed cookies. You’ll want a consistency that’s fine enough to bind together well, but a few slightly larger pieces can add a nice textural contrast.
Step 2: Combine the Creamy Filling
In a medium mixing bowl, combine the softened cream cheese with the crushed rum extractkie crumbs. Make sure your cream cheese is truly softened – this is crucial for achieving a smooth and lump-free mixture. If it’s still a bit firm, microwave it in 10-second intervals, stirring in between, until it’s pliable but not melted. Add the powdered sugar to the cream cheese and cookie mixture. Use a sturdy spoon or a rubber spatula to mix everything together thoroughly. Continue mixing until all the ingredients are well incorporated and you have a cohesive dough-like consistency. This mixture will form the delicious, melt-in-your-mouth center of our Peppermint Snow Balls.
Step 3: Infuse with Peppermint Flavor
Now it’s time to add that signature festive flavor. Stir in the 1 teaspoon of peppermint extract into the cream cheese and cookie mixture. Be sure to mix it in completely to distribute the flavor evenly throughout. A little goes a long way with peppermint extract, so starting with a teaspoon is perfect for a balanced taste. Taste a tiny bit of the mixture at this stage (if you dare, as it’s not fully formed yet!) to ensure you have the desired peppermint intensity. If you prefer a stronger peppermint kick, you can add another 1/4 teaspoon, but be cautious not to overpower the other flavors.
Step 4: Shaping the Snow Balls
Once your mixture is well combined and flavored, it’s time to shape the Peppermint Snow Balls. You can use a tablespoon to scoop out portions of the mixture, or simply use your hands. Roll each portion into a compact ball, about 1 inch in diameter. As you roll them, try to make them as uniform in size as possible. This will help them bake evenly and give your finished treats a professional look. Place the shaped balls onto a baking sheet lined with parchment paper. The parchment paper will prevent them from sticking. At this point, you’ll want to place the tray of formed balls into the freezer for about 15-20 minutes. This chilling step is very important; it will firm them up, making them easier to handle and dip in the white chocolate coating without losing their shape.
Step 5: The White Chocolate Coating and Peppermint Crunch
While the shaped balls are chilling, prepare your white chocolate coating. Melt the 1 1/2 cups of white chocolate chips. The best way to do this is in a microwave-safe bowl in 30-second intervals, stirring well after each interval, until smooth and fully melted. Alternatively, you can use a double boiler. Be careful not to overheat white chocolate, as it can seize up and become unusable. Once the white chocolate is melted and smooth, and the cookie balls have been in the freezer long enough to firm up, it’s time to coat them. Working with a few balls at a time (so the chocolate doesn’t set too quickly), use a fork or a dipping tool to fully submerge each ball in the melted white chocolate. Lift the ball out, allowing any excess chocolate to drip back into the bowl. Place the coated balls back onto the parchment-lined baking sheet. Immediately after coating each ball, sprinkle it with the crushed peppermint candies or candy canes. The crushed peppermint will adhere beautifully to the still-wet white chocolate, creating a festive, crunchy topping. Continue this process until all the Peppermint Snow Balls are coated and decorated. Let them sit at room temperature for a few minutes to allow the chocolate to set, or speed up the process by popping them back into the refrigerator for about 10-15 minutes.
Conclusion:
And there you have it – a delightful journey into creating the most wonderfully festive and delicious Peppermint Snow Balls! We’ve walked through each step, from creaming the butter and sugar to the final dusting of powdered sugar, ensuring your holiday treats are a resounding success. These delicate, melt-in-your-mouth cookies are perfect for any occasion, but especially shine during the winter months, bringin extractg a festive cheer to your dessert table. I truly hope you enjoy making and sharing these as much as I do. Remember, the key is patience and a little bit of holiday spirit!
For serving suggestions, considgin extractarranging your Peppermint Snow Balls on a festive platter alongside other holiday cookies, or even using them as a charming edible gift. They pair beautifully with a warm cup of hot chocolate or a steaming mug of spiced cider. Don’t be afraid to get creative with variations! You could add a touch of almond extract for a different flavor profile, or even mix in some finely gin extractpped candied ginger for a spicy kick. Experimenting is part of the fun, and you might just discover your new favorite twist on this classic.
Frequently Asked Questions about Peppermint Snow Balls:
Q1: Can I make Peppermint Snow Balls ahead of time?
Absolutely! Peppermint Snow Balls are an excellent make-ahead treat. Once fully cooled, store them in an airtight container at room temperature. They will stay fresh and delicious for up to a week. For longer storage, you can freeze them, ensuring they are well-wrapped to prevent freezer burn.
Q2: My Peppermint Snow Balls are crum extractbling when I try to roll them. What am I doing wrong?
This can happen if the dough is too dry or if it hasn’t been chilled sufficiently. Ensure you’re measuring your flour accurately; too much flour can lead to a dry dough. If the dough feerum extracttoo crumbly, try incorporating a tablespoon of milk or melted butter at a time until it comes together. Also, chilling the dough for at least 30 minutes before rolling is crucial for easier handling and preventing breakage.
Peppermint Snow Balls-Easy Holiday Treat
Delightful no-bake holiday treats featuring a creamy chocolate cookie center coated in white chocolate and crushed peppermint candies.
Ingredients
-
1 1/2 cups crushed chocolate sandwich cookies (like Oreos)
-
1 cup powdered sugar
-
1 cup cream cheese, softened
-
1 teaspoon peppermint extract
-
1 1/2 cups white chocolate chips
-
1/2 cup crushed peppermint candies or candy canes
Instructions
-
Step 1
Create the Cookie Base: Finely crush chocolate sandwich cookies using a rolling pin or food processor until you have 1 1/2 cups. Aim for a texture fine enough to bind but with some textural variation. -
Step 2
Combine the Creamy Filling: In a medium bowl, thoroughly mix softened cream cheese, powdered sugar, and the crushed cookie crumbs until a cohesive, dough-like consistency is achieved. -
Step 3
Infuse with Peppermint Flavor: Stir in 1 teaspoon of peppermint extract into the mixture, ensuring it’s evenly distributed for a balanced festive taste. -
Step 4
Shaping the Snow Balls: Scoop out portions of the mixture and roll them into compact balls, about 1 inch in diameter. Place these balls on a parchment-lined baking sheet and freeze for 15-20 minutes to firm up. -
Step 5
The White Chocolate Coating and Peppermint Crunch: Melt white chocolate chips. Dip the chilled cookie balls into the melted chocolate, allowing excess to drip off. Return to the parchment-lined sheet and immediately sprinkle with crushed peppermint candies before the chocolate sets. Let the snow balls set at room temperature or chill in the refrigerator.
Important Information
Nutrition Facts (Per Serving)
It is important to consider this information as approximate and not to use it as definitive health advice.
Allergy Information
Please check ingredients for potential allergens and consult a health professional if in doubt.

Leave a Comment