

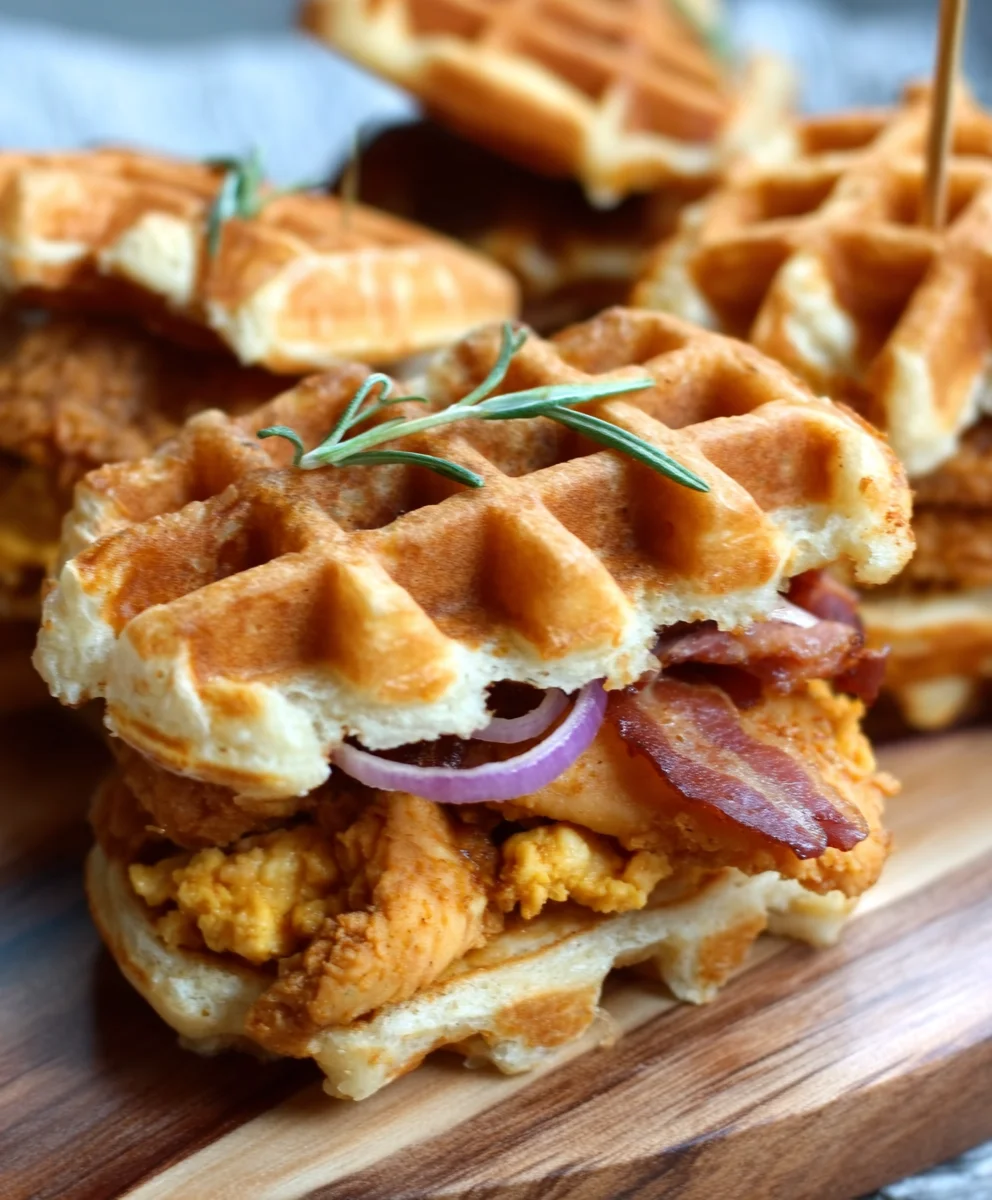
Game Day Eats Chicken Waffle Sliders are more than just a game day snack; they’re a culinary touchdown that will have your guests cheering for more. Imagin extracte this: crispy, golden fried chicken nestled between fluffy, slightly sweet mini waffles, all drizzled with a rich maple syrup sauce. It’s the perfect fusion of savory and sweet, crunchy and tender, and honestly, it’s almost too good to share. But that’s the beauty of sliders – they’re made for passing around and enjoying with good company, making every bite a communal celebration. People absolutely adore these because they hit all the right comfort food notes, offering an explosion of flavor and texture that’s incredibly satisfying. What truly makes these Game Day Eats Chicken Waffle Sliders stand out is their elegant simplicity combined with an undeniable wow factor. They’re surprisingly easy to assemble, yet they look and taste like a gourmet creation, proving that you don’t need to be a professional chef to create something truly unforgettable for your next gathering.

Ingredients:
- 2 pounds boneless, skinless chicken thighs
- 1 cup buttermilk
- 1 tablespoon hot sauce (like Frank’s RedHot or Tabasco)
- 1 teaspoon smoked paprika
- 1 teaspoon garlic powder
- 1/2 teaspoon black pepper
- 1/4 teaspoon cayenne pepper (optional, for extra heat)
- 2 cups all-purpose flour
- 1 teaspoon salt
- 1/2 teaspoon baking powder
- 2 large eggs
- 1/4 cup milk
- Vegetable oil, for frying
- 12 slider buns or small dinner rolls
- Maple syrup, for serving
- Butter, for toasting buns
Preparation
Marinating the Chicken
Let’s start by getting our chicken ready for its crispy transformation. This marinating step is crucial for tender, flavorful chicken. In a medium bowl, combine the buttermilk, hot sauce, smoked paprika, garlic powder, black pepper, and cayenne pepper (if you’re feeling brave!). Whisk everything together until well combined. Add the boneless, skinless chicken thighs to the marinade, ensuring each piece is fully submerged. Cover the bowl and refrigerate for at least 4 hours, or ideally, overnight. The longer it marinates, the more tender and flavorful your chicken will become. This buttermilk bath tenderizes the meat and the hot sauce adds a subtle kick that will shine through after frying.
Dredgin extractg the Chicken
Now it’s time to prepare the dredge that will give our chicken its glorious, crispy coating. In a separate shallow dish or a large resealable plastic bag, combine the all-purpose flour, salt, and baking powder. Whisk or shake the bag to distribute the ingredients evenly. This mixture is what creates that irresistible crunch. In another shallow dish, whisk together the two large eggs and the 1/4 cup of milk. This is our egg wash, which will help the flour mixture adhere to the chicken. Once your chicken has finished marinating, remove it from the buttermilk, letting any excess drip off. First, dip each chicken thigh into the flour mixture, pressing gently to ensure it’s thoroughly coated on all sides. Shake off any excess flour. Next, dip the floured chicken into the egg wash, allowing any excess to drip back into the dish. Finally, return the chicken to the flour mixture, pressing firmly again to create a thick, even coating. This double dredge ensures an extra crispy crust. Place the coated chicken pieces on a wire rack set over a baking sheet to rest while you prepare for frying. This resting period allows the coating to set, further preventing it from falling off during the frying process.
Frying the Chicken
Heating the Oil
This is where the magic happens! You’ll need a large, heavy-bottomed pot or a Dutch oven for deep-frying. Pour enough vegetable oil into the pot to reach a depth of about 2-3 inches. We want enough oil to fully submerge the chicken pieces without overcrowding the pot. Place the pot over medium-high heat and bring the oil temperature to around 350°F (175°C). It’s essential to maintain a consistent oil temperature for perfectly cooked chicken. If the oil is too hot, the outside will burn before the inside is cooked. If it’s too cool, the chicken will absorb too much oil and become greasy. You can use a kitchen thermometer to monitor the temperature, or you can test it by dropping a small piece of the flour mixture into the oil; it should sizzle and bubble vigorously. Make sure to have a splatter screen handy for safety.
Frying the Chicken Pieces
Carefully add the coated chicken thighs to the hot oil, working in batches to avoid overcrowding the pot. Overcrowding will lower the oil temperature drastically, resulting in soggy, undercooked chicken. Fry the chicken for about 6-8 minutes per side, or until it’s golden brown and cooked through. The internal temperature of the chicken should reach 165°F (74°C). Use tongs to gently turn the chicken pieces halfway through the cooking time to ensure even browning. As each batch is done, remove the chicken from the oil using tongs and place it on a clean wire rack set over a baking sheet to drain any excess oil. This allows the air to circulate and keeps the coating crispy. You can sprinkle a little extra salt on the chicken immediately after it comes out of the oil, while it’s still hot, for an extra flavor boost.
Assembling the Sliders
Preparing the Buns and Chicken
While the chicken is draining and cooling slightly, it’s time to get our slider buns ready. You can toast the buns for a little extra texture and warmth. Lightly butter the cut sides of your slider buns or small dinner rolls. You can do this in a skillet over medium heat until they are lightly golden brown, or you can pop them under the broiler for a minute or two, keeping a very close eye on them to prevent burning. Once toasted, set them aside. If your fried chicken thighs are on the larger side, you may want to slice them in half or even into thirds to fit comfortably within the slider buns. This makes them easier to eat and ensures a good chicken-to-bun ratio for each slider. The goal is to create bite-sized, handheld delights perfect for any gathering.
Putting It All Together
Now for the most exciting part: assembling your Game Day Eats Chicken Waffle Sliders! Take a toasted slider bun bottom and place a piece of your crispy fried chicken on top. Drizzle a generous amount of maple syrup over the chicken. The sweet maple syrup beautifully complements the savory, spicy, and crispy chicken. This sweet and savory combination is what makes these sliders so addictive. Place the top half of the bun on top, and you’ve got a delicious slider ready to be devoured. Repeat this process for all your sliders. These are best served warm, so assemble them just before you’re ready to serve your guests. The contrast between the warm, crispy chicken, the soft bun, and the sweet maple syrup is pure perfection. Get ready for the compliments to roll in!
Conclusion:
There you have it – the ultimate guide to creating sensational Game Day Eats Chicken Waffle Sliders! We’ve covered everything from crispy fried chicken to the perfect sweet and savory waffle base, ensuring your next gathering is a culinary hit. These sliders are incredibly versatile and always a crowd-pleaser, offering a delightful balance of textures and flavors that will have everyone asking for seconds. They’re perfect for a lively football watch party, a casual brunch, or even a fun family dinner.
Don’t be afraid to get creative with your toppings! Consider adding a drizzle of sriracha honey for an extra kick, some crunchy coleslaw for added texture, or even a sharp cheddar cheese to melt over the chicken. The beauty of these Game Day Eats Chicken Waffle Sliders lies in their adaptability. So go forth, experiment, and make these sliders your own!
Frequently Asked Questions about Game Day Eats Chicken Waffle Sliders:
Can I make the components of the Game Day Eats Chicken Waffle Sliders ahead of time?
Absolutely! You can fry the chicken pieces a few hours in advance and reheat them in the oven at 350°F (175°C) until warmed through and still crispy. The waffles can also be made earlier in the day and kept warm in a single layer on a baking sheet in a low oven. This will save you time on game day!
What are some good side dishes to serve with Game Day Eats Chicken Waffle Sliders?
These sliders pair wonderfully with classic comfort foods. Think creamy macaroni and cheese, a fresh green salad with a tangy vinaigrette, crispy sweet potato fries, or even a hearty baked bean dish. Corn on the cob or a refreshing fruit salad would also be excellent choices.
Game Day Chicken Waffle Sliders – Easy & Delicious Bites
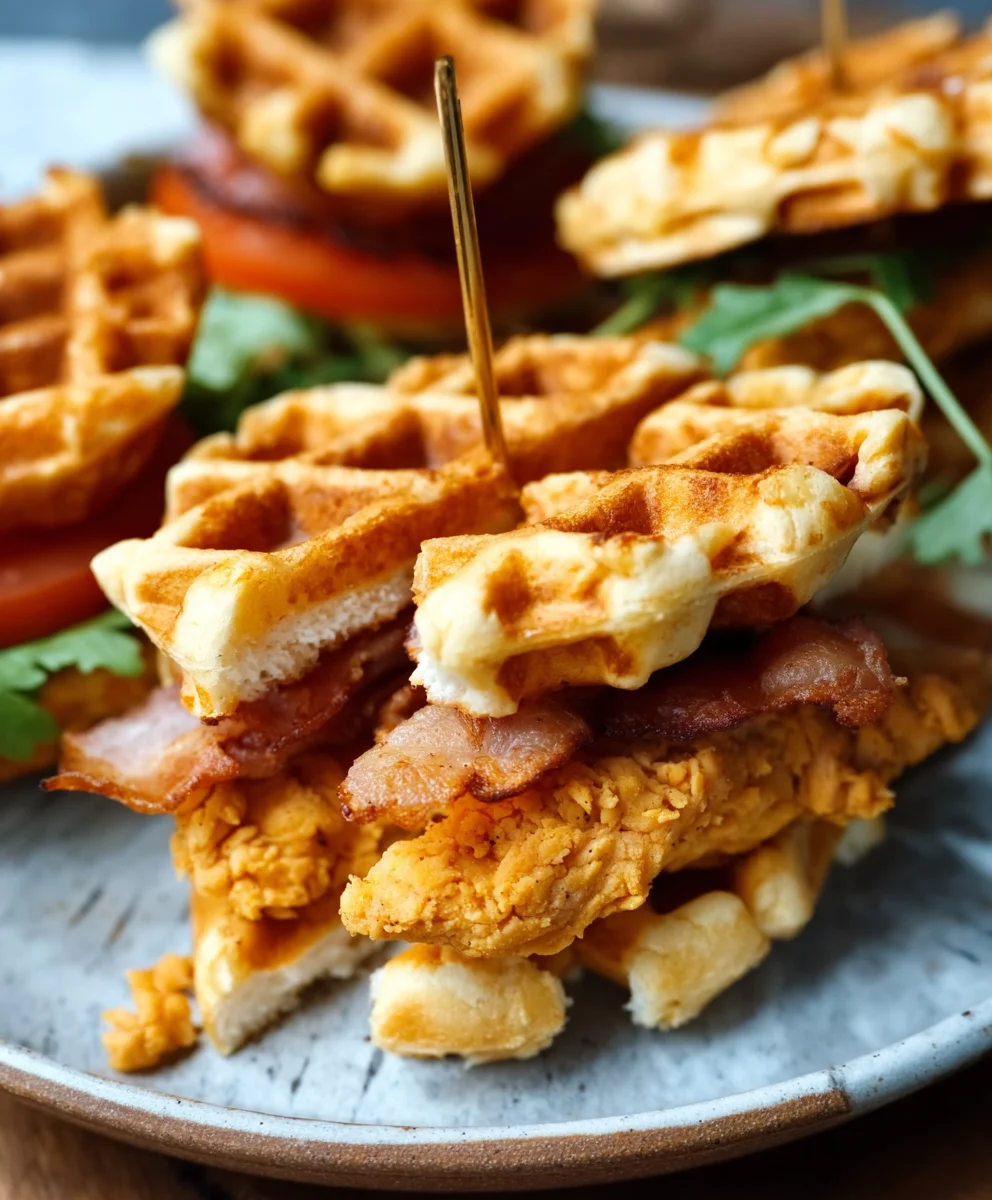
Tender, juicy chicken thighs coated in a crispy dredge and fried to golden perfection, nestled in toasted slider buns with a drizzle of sweet maple syrup. The perfect bite-sized appetizer for any game day or gathering.
Ingredients
-
2 pounds boneless, skinless chicken thighs
-
1 cup buttermilk
-
1 tablespoon hot sauce
-
2 cups all-purpose flour
-
1 teaspoon salt
-
1/2 teaspoon baking powder
-
2 large eggs
-
1/4 cup milk
-
Vegetable oil, for frying
-
12 slider buns or small dinner rolls
-
Maple syrup, for serving
-
Butter, for toasting buns
Instructions
-
Step 1
In a medium bowl, combine buttermilk, hot sauce, smoked paprika, garlic powder, black pepper, and cayenne pepper (if using). Whisk until well combined. Add chicken thighs, ensuring they are fully submerged. Cover and refrigerate for at least 4 hours, or overnight. -
Step 2
In a shallow dish, combine flour, salt, and baking powder. Whisk well. In another shallow dish, whisk together eggs and milk for the egg wash. -
Step 3
Remove chicken from marinade, letting excess drip off. Dip each thigh in the flour mixture, shaking off excess. Then dip in egg wash, letting excess drip off. Finally, return to the flour mixture, pressing firmly to coat. Place coated chicken on a wire rack. -
Step 4
Heat vegetable oil in a heavy-bottomed pot to 350°F (175°C). Carefully add chicken in batches, frying for 6-8 minutes per side, until golden brown and cooked through (internal temperature of 165°F/74°C). Drain on a wire rack. -
Step 5
Lightly butter the cut sides of slider buns and toast them in a skillet over medium heat until golden brown, or under the broiler. If chicken pieces are large, slice them to fit the buns. -
Step 6
Place a piece of fried chicken on the bottom half of each toasted bun. Drizzle generously with maple syrup. Top with the other half of the bun. Serve warm.
Important Information
Nutrition Facts (Per Serving)
It is important to consider this information as approximate and not to use it as definitive health advice.
Allergy Information
Please check ingredients for potential allergens and consult a health professional if in doubt.

Leave a Comment