

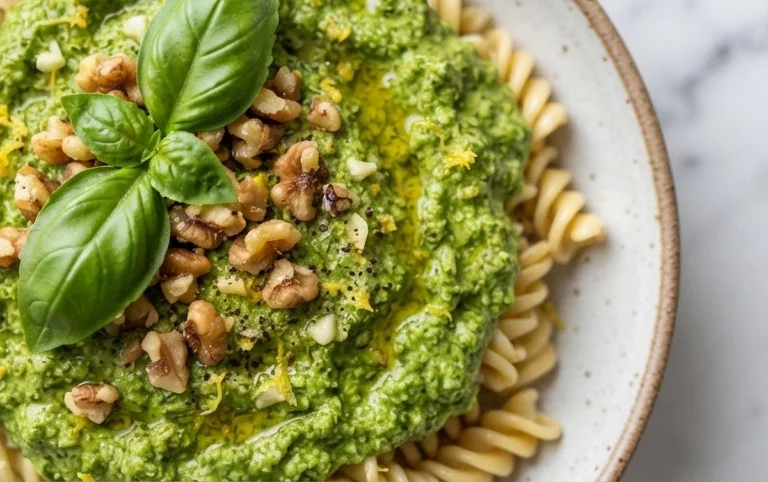
Dairy Free Pesto is a vibrant, herbaceous sauce that can transform any dish from ordinary to extraordinary, and I’m so excited to share my foolproof recipe with you. For years, I’ve adored the classic pesto, that emerald green elixir bursting with basil, garlic, and Parmesan. It’s a culinary cbeef hameleon, perfect tossed with pasta, slathered on sandwiches, or dolloped onto roasted vegetables. However, like many of you, I found myself needing a delicious dairy-free alternative that didn’t compromise on that authentic, zesty flavor. This dairy free pesto recipe achieves just that, relying on wholesome ingredients to deliver a rich, satisfying taste that’s just as delightful as the origin extractal. Get ready to discover your new favorite pantry staple!

Dairy Free Pesto
There’s something incredibly vibrant and fresh about pesto. That bright green hue, the aromatic punch of basil, the subtle nuttiness – it’s a culinary powerhouse that can elevate so many dishes. Traditionally, pesto is made with Parmesan cheese, which is a delicious dairy component. However, for those of us who are dairy-free, whether due to intolerance, allergy, or lifestyle choice, that doesn’t mean we have to miss out on this classic sauce. I’ve developed this dairy-free pesto recipe that captures all the essence of the origin extractal, without a drop of dairy in sight. It’s surprisingly simple to make and incredibly versatile.
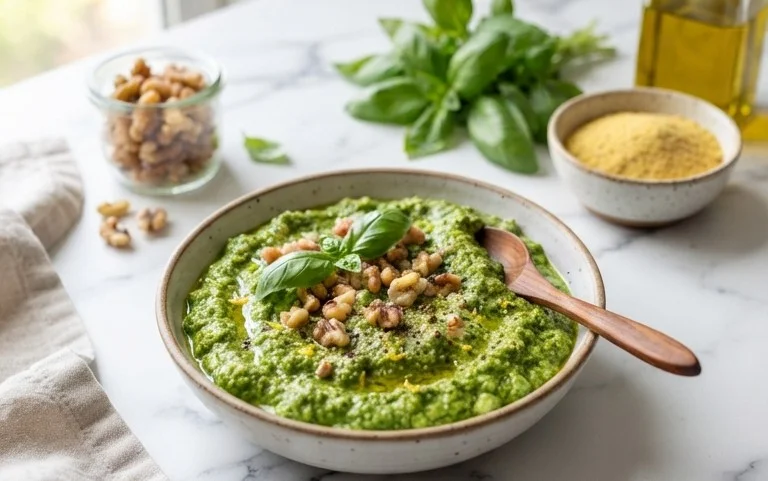
This recipe relies on a secret weapon for that cheesy, umami flavor usually provided by Parmesan: nutritional yeast. Don’t be intimidated by it; nutritional yeast has a nutty, cheesy, and slightly savory taste that works wonderfully in vegan and dairy-free dishes. It’s also packed with B vitamins, making it a nutritious addition. The other ingredients are classic pesto components, ensuring a balanced and flavorful sauce.
Ingredients:
Making Your Dairy-Free Pesto
Now, let’s get to the fun part: transforming these beautiful ingredients into a sensational sauce! The beauty of pesto is its speed. You can have a fresh batch ready in under ten minutes, perfect for those busy weeknights or spontaneous pasta cravings.
Step 1: Prepare Your Basil and Aromatics
Start by thoroughly washing and drying your basil leaves. Excess water can dilute the flavor and texture of your pesto, so a good spin in a salad spinner or a gentle pat with paper towels is crucial. If your garlic cloves are particularly large or pungent, you might want to use slightly less than two, or even just one, to start. You can always add more garlic flavor later if you wish. For the nuts, toasting them lightly in a dry skillet over medium heat for a few minutes until fragrant will significantly enhance their flavor and add a lovely depth to the pesto. Keep a close eye on them as nuts can burn quickly.
Step 2: Combine the Dry Ingredients (Almost!)
In the bowl of a food processor or a sturdy blender, add the prepared basil leaves, toasted pine nuts (or your chosen alternative), peeled garlic cloves, and the salt. If you’re using nutritional yeast, add that in now too. These are the foundational flavors of your pesto. It’s always a good idea to start with the dry ingredients first to ensure they get a good initial chop before adding any liquids. This helps create a more uniform base for the sauce.
Step 3: Pulse and Incorporate the Wet Ingredients
Begin extract by pulsing the ingredients in your food processor or blender a few times. This will start to break down the basil and garlic, and get the nuts chopped. You’re aiming for a coarse chop at this stage, not a complete puree. Once you have a rough mixture, it’s time to introduce the liquids. Drizzle in the lemon juice and then slowly pour in the olive oil while the food processor or blender is running on a low speed. You want the olive oil to emulsify into the pesto, creating a smooth and creamy texture. If you’re using a blender, you might need to stop it occasionally to scrape down the sides with a spatula to ensure everything is incorporated evenly.
Step 4: Blend to Your Desired Consistency
Continue to process or blend until your pesto reaches your desired consistency. Some people prefer a chunkier pesto, while others like it smoother. If you find the pesto is too thick for your liking, you can add a little more olive oil, a tablespoon at a time, and blend until you achieve the perfect texture. Be careful not to over-process, as this can sometimes make the pesto taste a bit “mushy.” You’re looking for a vibrant, spreadable sauce that still has a little bit of texture. Taste as you go and adjust the salt or lemon juice if needed. The lemon juice not only adds brightness but also helps to preserve the vibrant green color of the basil.
Step 5: Taste and Adjust Seasoning
This is perhaps the most critical step for ensuring your pesto is perfect. Once blended, give it a good taste. Does it need more salt to bring out the flavors? Perhaps a bit more lemon juice for a zesty kick? If you find it’s missing that savory depth, you can add a tiny pinch more nutritional yeast. Remember, you can always add more of any ingredient, but you can’t take it away. This final adjustment ensures that every spoonful of your dairy-free pesto is bursting with delicious flavor.
Once your pesto is ready, it can be used immediately or stored. Transfer it to an airtight container and store it in the refrigerator for up to a week. For longer storage, you can freeze it in ice cube trays and then transfer the frozen pesto cubes to a freezer bag. This makes it super convenient to grab a portion whenever you need it. Enjoy your homemade, dairy-free pesto on pasta, spread on sandwiches, dolloped on grilled vegetables, or even mixed into dips and salad dressings!
Conclusion:
So there you have it! This dairy free pesto recipe is a true game-changer for anyone looking to enjoy that vibrant, herbaceous flavor without the dairy. It’s incredibly versatile, allowing you to elevate pasta dishes, spread it on sandwiches, dollop it onto grilled vegetables, or even mix it into a salad dressing. The beauty of this dairy free pesto lies in its simplicity and the fresh, bright taste that shines through. Don’t be afraid to experiment with the nuts and herbs to find your perfect combination. I truly encourage you to give this recipe a try – you might just find your new go-to condiment!
Frequently Asked Questions:
What if I don’t have pine nuts for the dairy free pesto?
No problem at all! While pine nuts are traditional, you can easily substitute them with other nuts like walnuts, almonds, or even sunflower seeds for a nut-free option. Toasting them lightly beforehand will enhance their flavor and add a nice crunch.
How long does dairy free pesto last?
When stored properly in an airtight container in the refrigerator, this dairy free pesto should stay fresh for about 5-7 days. For longer storage, you can freeze it in an ice cube tray and then transfer the frozen cubes to a freezer bag. This makes it super convenient to grab a portion whenever you need it!
Dairy Free Pesto
A vibrant and flavorful dairy-free pesto, perfect for pasta, sandwiches, or as a dip.
Ingredients
-
3 cups basil
-
1/2 lemon (juiced)
-
1/2 cup pine nuts
-
2 cloves garlic
-
1/4 cup olive oil
-
1/2 tsp salt
-
2 tbsp nutritional yeast
Instructions
-
Step 1
Combine basil, lemon juice, pine nuts, garlic, salt, and nutritional yeast in a food processor. -
Step 2
Pulse until ingredients are roughly chopped. -
Step 3
With the food processor running, slowly drizzle in the olive oil until the pesto reaches your desired consistency. -
Step 4
Taste and adjust seasoning if necessary. -
Step 5
Transfer pesto to an airtight container. -
Step 6
Refrigerate for at least 30 minutes to allow flavors to meld before serving.
Important Information
Nutrition Facts (Per Serving)
It is important to consider this information as approximate and not to use it as definitive health advice.
Allergy Information
Please check ingredients for potential allergens and consult a health professional if in doubt.


Leave a Comment