

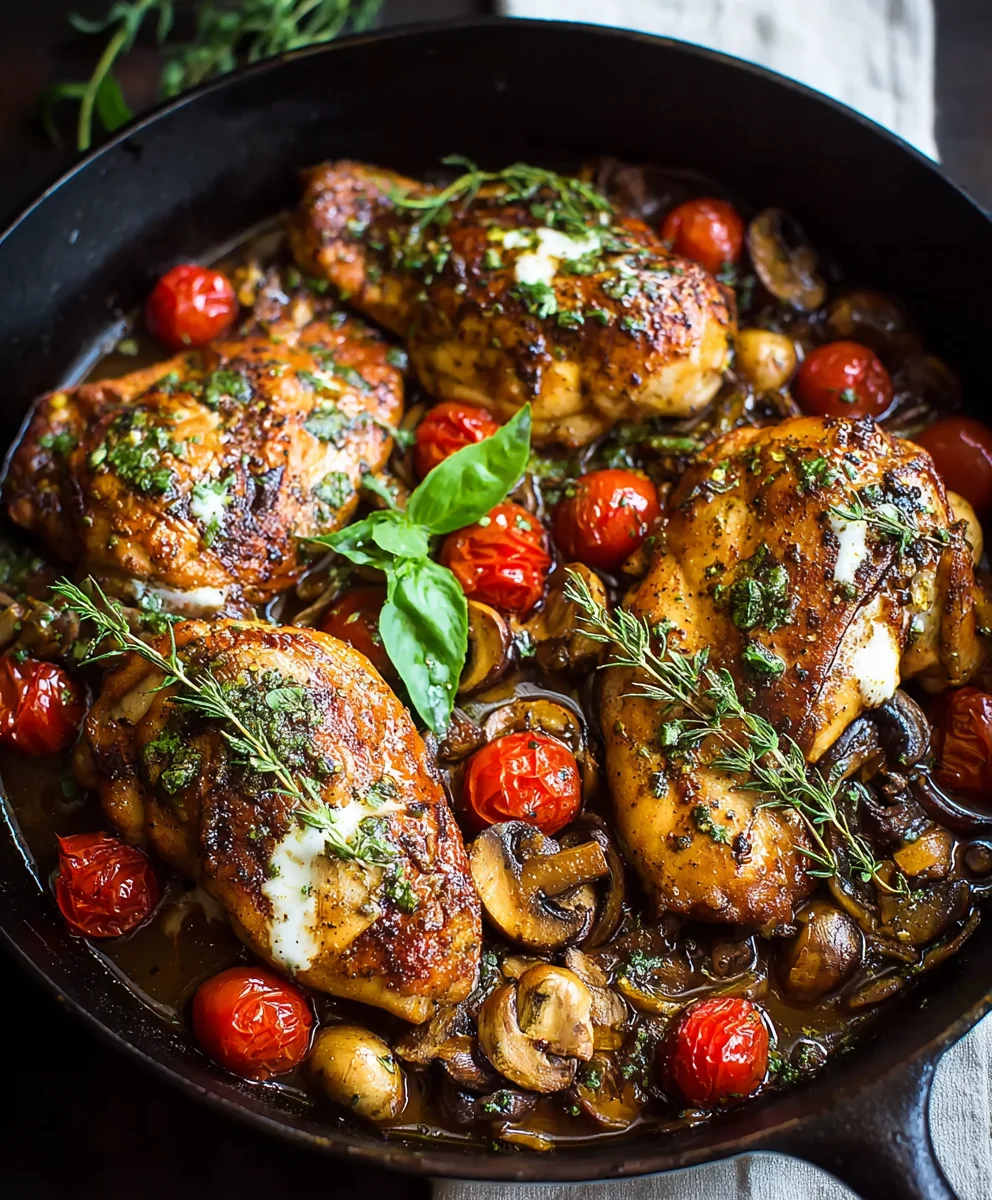
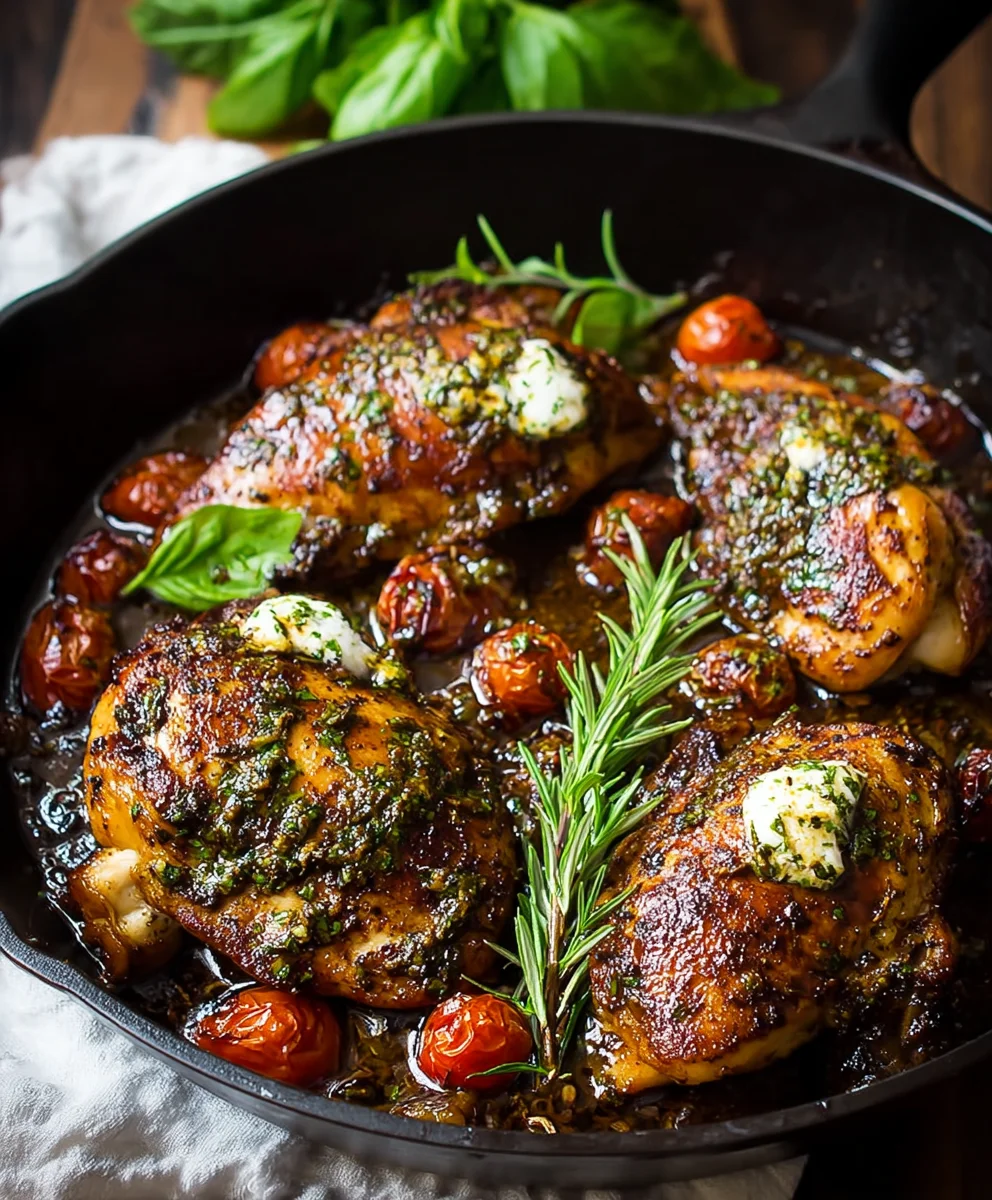
One Pan Balsamic Chicken is the ultimate weeknight warrior, and for good reason! Imagin extracte this: tender, juicy chicken bathed in a rich, tangy balsamic glaze, all cooked together with your favorite vegetables on a single baking sheet. No multiple pots, no messy stovetop, just pure, delicious simplicity. It’s that magical combination of effortless preparation and incredibly satisfying flavor that makes this dish a crowd-pleaser, whether you’re cooking for yourself or a hungry family. What truly sets this One Pan Balsamic Chicken apart is the depth of flavor achieved with minimal effort. The sweet and sour notes of the balsamic vinegar caramelize beautifully, creating a sticky, irresistible coating that perfectly complements the savory chicken and roasted vegetables. This isn’t just dinner; it’s a culinary triumph that proves you don’t need to spend hours in the kitchen to enjoy something truly special.

Ingredients:
- ⅓ cup balsamic vinegar
- 2 tablespoons honey
- 2 tablespoons oil (avocado or olive)
- 2 cloves garlic, minced
- 1 teaspoon Italian seasoning
- 1 tablespoon Dijon mustard
- 8 ounces grape tomatoes, halved
- 8 ounces fresh mozzarella balls
- 2 tablespoons finely chopped fresh basil
- 2 pounds boneless skinless chicken breasts, pounded to even thickness
- 2 tablespoons avocado oil
- Kosher salt and fresh black pepper
Preparing the Chicken and Marinade
To begin extract crafting your delicious One Pan Balsamic Chicken, the first crucial step is to prepare your chicken. Take your 2 pounds of boneless, skinless chicken breasts and pound them to an even thickness. This is a vital step for ensuring that the chicken cooks uniformly, preventing any parts from becoming overcooked and dry while others remain underdone. You can achieve this by placing the chicken breasts between two sheets of plastic wrap or parchment paper and using a rolling pin or the flat side of a meat mallet to gently but firmly pound them. Aim for a thickness of about ¾ inch. Once pounded, season both sides generously with kosher salt and fresh black pepper. This initial seasoning will form the foundation of flavor for the entire dish.
Next, let’s create the incredibly flavorful balsamic glaze that will coat our chicken. In a small bowl, whisk together the ⅓ cup balsamic vinegar and 2 tablespoons of honey. This combination provides a beautiful balance of tangy and sweet notes. Add in 2 tablespoons of oil – avocado or olive oil will work perfectly here, contributing richness and helping the glaze adhere to the chicken. Next, incorporate the aromatics: 2 cloves of minced garlic and 1 teaspoon of Italian seasoning. The garlic will infuse a pungent depth, while the Italian seasoning brings a medley of herbs that are classic for chicken dishes. Finally, stir in 1 tablespoon of Dijon mustard. The mustard adds a subtle sharpness and emulsifies the glaze, making it beautifully smooth and ready to coat the chicken. Whisk everything together until it’s well combined.
Marinating and Cooking the Chicken
Now it’s time to marry the chicken and the glaze. Place your seasoned, pounded chicken breasts in a shallow dish or a resealable bag. Pour about half of the prepared balsamic glaze over the chicken, ensuring each piece is well coated. Reserve the remaining half of the glaze for later. Let the chicken marinate for at least 15 minutes at room temperature, or for up to 2 hours in the refrigerator. If marinating in the refrigerator, remember to let the chicken come back to room temperature for about 15-20 minutes before cooking for more even results. This marination period is where the gin extractic begins, allowing the flavors to penetrate the chicken, making it tender and delicious.
The One-Pan Cook
Heat a large, oven-safe skillet over medium-high heat. Add 2 tablespoons of avocado oil to the hot skillet. Once the oil is shimmering and hot (but not smoking), carefully place the marinated chicken breasts into the skillet. You want to hear a good sizzle when the chicken hits the pan; this indicates you have the right temperature for a beautiful sear. Sear the chicken for about 3-4 minutes per side, until it develops a golden-brown crust. This searing locks in the juices and adds another layer of delicious flavor and texture to our One Pan Balsamic Chicken. Don’t overcrowd the pan; if necessary, cook the chicken in batches to ensure proper searing.
Adding the Vegetables and Finishing
Once the chicken is beautifully seared on both sides, it’s time to introduce the vibrant vegetables and finish cooking. Scatter the 8 ounces of halved grape tomatoes around the chicken in the skillet. The heat ofgin extracte pan will begin to soften them, releasing their sweet juices. Drizzle the reserved half of the balsamic glaze evenly over the chicken and tomatoes. This second application of glaze will create a luscious sauce as everything cooks together.
Now, transfer the entire skillet to a preheated oven at 400°F (200°C). Bake for 10-15 minutes, or until the chicken is cooked through and reaches an internal temperature of 165°F (74°C). The exact cooking time will depend on the thickness of your chicken breasts. While the chicken is in the oven, gently add the 8 ounces of fresh mozzarella balls around the chicken and tomatoes. The residual heat will help them soften and become delightfully melty. Once the chicken is cooked gin extract the mozzarella is beginning to melt, carefully remove the skillet from the oven. The aromas at this stage are absolutely incredible!
The Final Touch
To complete our stunning One Pan Balsamic Chicken, sprinkle the 2 tablespoons of finely chopped fresh basil over the entire dish. The fresh basil adds a bright, herbaceous contrast to the rich balsamic glaze and tender chicken. Let the dish rest for a couple of minutes before serving. This allows the juices to redistribute within the chicken, ensuring it remains moist and succulent. Serve directly from the pan for a rustic and impressive presentation, or plate the chicken breasts and spoon the tomatoes, melted mozzarella, and delicious glaze over them. This dish is a true testament to how simple, high-quality ingredients can create something truly spectacular with minimal effort.
Conclusion:
There you have it – a simple yet incredibly satisfying recipe for One Pan Balsamic Chicken! This dish truly lives up to its name, delivering a flavorful and tender chicken alongside perfectly roasted vegetables, all cooked in a single pan for minimal cleanup. We’ve found it’s a weeknight lifesaver, proving that delicious and healthy meals don’t have to be complicated. Don’t be afraid to experiment with the vegetables based on what you have on hand or what’s in season. We love adding chunks of sweet potato, Brussels sprouts, or even red bell peppers for extra color and flavor. Serve your finished One Pan Balsamic Chicken with a side of fluffy quinoa, brown rice, or a simple green salad to round out the meal. We encourage you to give this recipe a try and discover your own favorite variations. Happy cooking!
Frequently Asked Questions about One Pan Balsamic Chicken:
Q1: Can I use chicken thighs instead of breasts for this One Pan Balsamic Chicken recipe?
Absolutely! Chicken thighs are a fantastic alternative and will likely result in even more tender and moist chicken. Adjust the cooking time slightly as thighs may take a few minutes longer to cook through than breasts, aiming for an internal temperature of 165°F (74°C).
Q2: What other vegetables work well with One Pan Balsamic Chicken?
The beauty of this recipe is its versatility! Beyond the suggested vegetables, consider adding asparagus, broccoli florets, cherry tomatoes (add these in the last 10-15 minutes), zucchini, or mushrooms. Ensure vegetables are cut into similar-sized pieces for even cooking.
Q3: How do I store leftovers of One Pan Balsamic Chicken?
Leftovers can be stored in an airtight container in the refrigerator for up to 3-4 days. Reheat gently in the oven or microwave until warmed through. The flavors often meld and deepen overnight, making leftovers just as delicious!
Easy One Pan Balsamic Beef Dinner Recipe
A simple and delicious one-pan meal featuring tender beef, sweet tomatoes, and melty mozzarella, all coated in a tangy balsamic glaze.
Ingredients
-
2 pounds boneless beef sirloin, pounded to even thickness
-
⅓ cup balsamic vinegar
-
2 tablespoons honey
-
2 tablespoons avocado oil
-
2 cloves garlic, minced
-
1 teaspoon Italian seasoning
-
1 tablespoon Dijon mustard
-
8 ounces grape tomatoes, halved
-
8 ounces fresh mozzarella balls
-
2 tablespoons finely chopped fresh basil
-
Kosher salt and fresh black pepper
Instructions
-
Step 1
Prepare the beef by pounding it to an even thickness of about ¾ inch and seasoning generously with kosher salt and fresh black pepper. -
Step 2
Whisk together balsamic vinegar, honey, avocado oil, minced garlic, Italian seasoning, and Dijon mustard in a small bowl to create the balsamic glaze. -
Step 3
Place the seasoned beef in a shallow dish or resealable bag. Pour about half of the balsamic glaze over the beef, ensuring it’s well coated. Let marinate for at least 15 minutes at room temperature or up to 2 hours in the refrigerator. -
Step 4
Heat a large, oven-safe skillet over medium-high heat. Add 2 tablespoons of avocado oil and sear the marinated beef for 3-4 minutes per side until golden brown. -
Step 5
Scatter the halved grape tomatoes around the beef in the skillet. Drizzle the reserved half of the balsamic glaze evenly over the beef and tomatoes. -
Step 6
Transfer the skillet to a preheated oven at 400°F (200°C) and bake for 10-15 minutes, or until the beef reaches an internal temperature of 145°F (63°C) for medium-rare. -
Step 7
During the last few minutes of baking, gently add the fresh mozzarella balls around the beef and tomatoes. They will soften and become melty from the residual heat. -
Step 8
Remove the skillet from the oven. Sprinkle with fresh basil and let rest for a couple of minutes before serving.
Important Information
Nutrition Facts (Per Serving)
It is important to consider this information as approximate and not to use it as definitive health advice.
Allergy Information
Please check ingredients for potential allergens and consult a health professional if in doubt.


Leave a Comment