

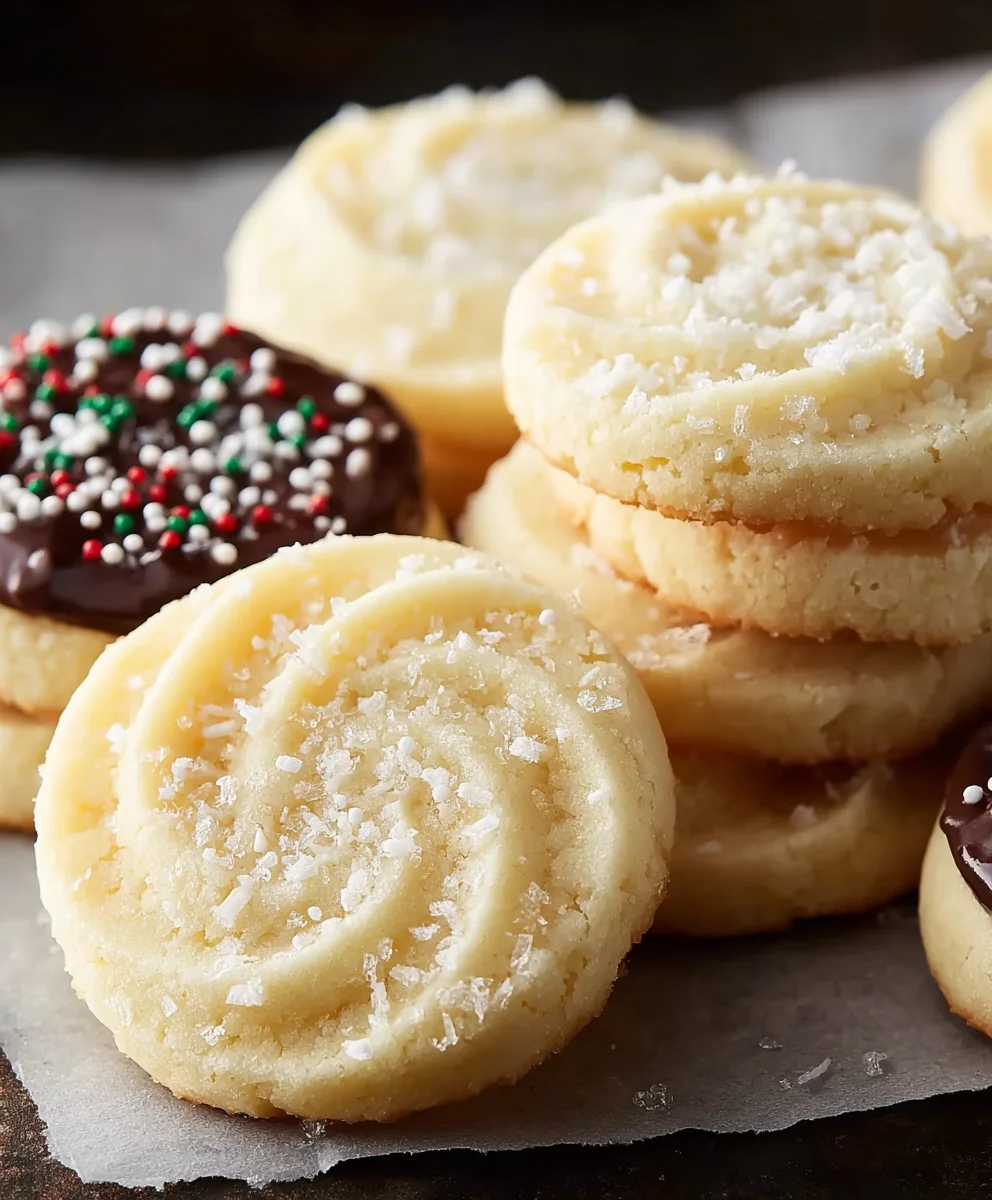
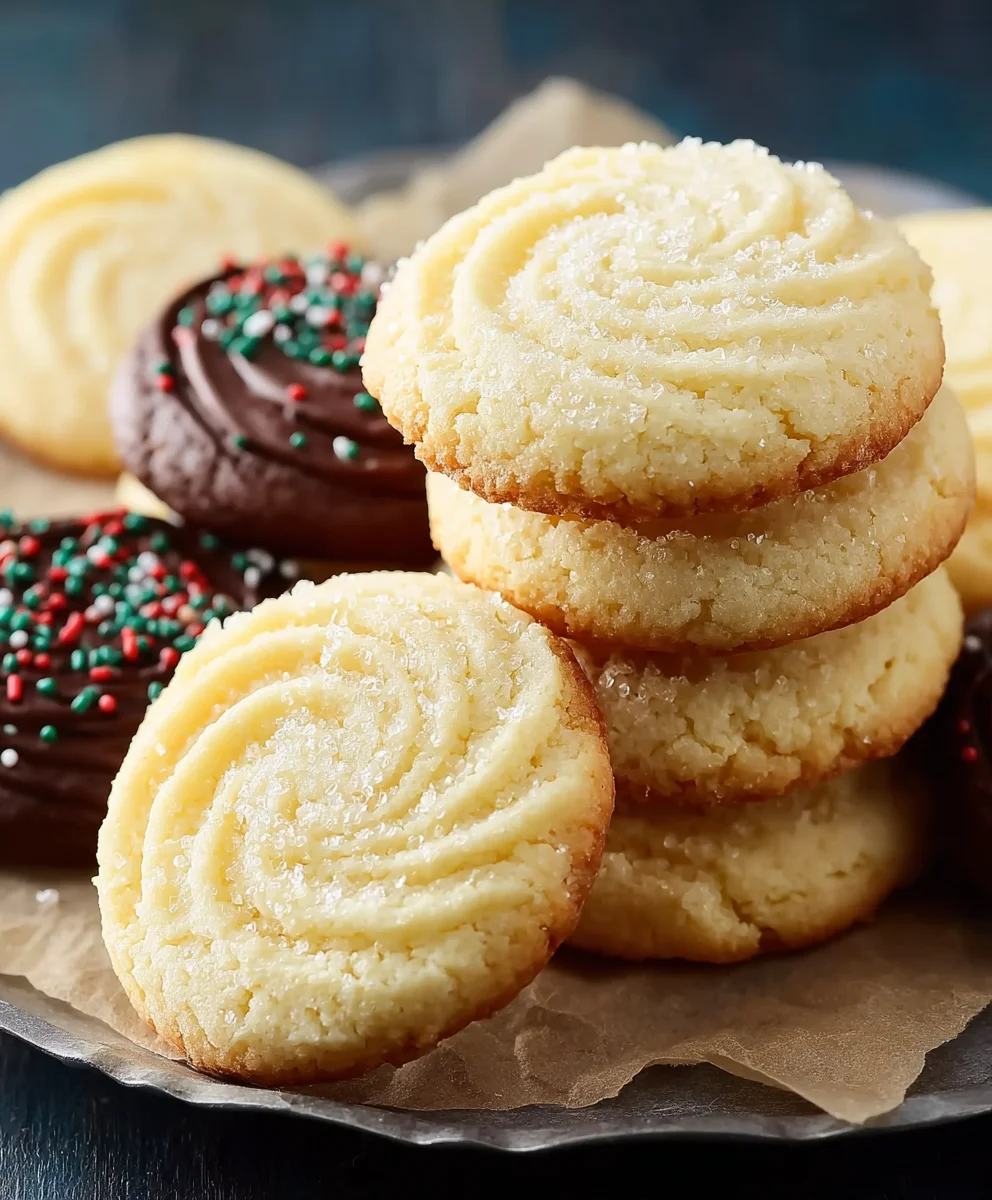
Butter Cookies are more than just a simple treat; they are a warm hug in cookie form, a timeless classic that evokes memories of cozy kitchens and cherished traditions. There’s an undeniable magic in their delicate crunch and rich, melt-in-your-mouth texture. People adore these buttery delights because they strike the perfect balance between simple elegance and pure indulgence. They are incredibly versatile, making them the ideal accompaniment to a morning coffee, a delightful afternoon snack, or a sweet ending to any meal. What truly sets these Butter Cookies apart is their incredible simplicity, allowing the pure flavor of high-quality butter to shine through, creating a sophisticated yet comforting experience with every bite. This recipe promises to deliver that authentic, homemade taste you’ve been searching for.

Ingredients:
- 1 cup (226g) unsalted butter, softened to room temperature
- 2/3 cup (126g) granulated sugar
- 3 large egg yolks
- 2 1/2 cups all-purpose flour
- 1/8 teaspoon salt
- 2 teaspoons vanilla or almond extract
- 2 tablespoons milk
- 10 ounces Ghirardelli Chocolate Wafers (optional, for dipping or drizzling)
- Sprinkles for decoration (optional)
Preparing the Dough
Step 1: Creaming the Butter and Sugar
Begin extract by ensuring your unsalted butter is truly at room temperature. This is crucial for achieving a light and airy cookie dough. It should be soft enough to indent easily with your finger but not so soft that it looks melted. In a large mixing bowl, combine the softened butter with the granulated sugar. Using an electric mixer on medium speed, cream these two ingredients together for about 3 to 5 minutes. You’re looking for a pnon-alcoholic ale yellow, fluffy mixture. This process incorporates air into the dough, which is essential for the texture of our butter cookies. Scrape down the sides of the bowl a couple of times during this process to ensure everything is evenly combined.
Step 2: Incorporating the Egg Yolks and Flavorings
Next, add the three large egg yolks to the creamed butter and sugar mixture. Egg yolks contribute richness and help bind the dough together. Beat them in one at a time, ensuring each yolk is fully incorporated before adding the next. After the egg yolks are mixed in, add the vanilla or almond extract. This extract is where you get to personalize your butter cookies! Vanilla extract provides a classic, comforting flavor, while almond extract offers a slightly more sophisticated, nutty note. Mix until just combined.
Step 3: Adding the Dry Ingredients
In a separate medium bowl, whisk together the all-purpose flour and the 1/8 teaspoon of salt. Salt might seem like a small amount, but it plays a vital role in balancing the sweetness and enhancing the overall flavor of the cookies. Gradually add the dry ingredients to the wet ingredients. It’s best to add them in two or three additions, mixing on low speed until just combined after each addition. Overmixing at this stage can develop the gluten in the flour too much, leading to tough cookies, so be mindful. The dough will start to look crum extractbly.
Step 4: Achieving the Correct Dough Consistency
Once the flour mixture is mostly incorporated, add the 2 tablespoons of milk. Milk helps to bring the dough together and create a smooth, workable consistency. Mix on low speed until a cohesive dough forms. It should be soft and slightly sticky, but not overly wet. If the dough seems too dry and isn’t coming together, you can add another teaspoon of milk, but be very sparing. Conversely, if it feels too sticky, you can add a tablespoon of flour at a time. The goal is a dough that’s easy to handle and shape.
Chilling and Shaping the Cookies
Step 5: Chilling the Dough
This is a crucial step for perfect butter cookies. Turn the dough out onto a clean surface and gently bring it together into a rough ball. Divide the dough into two equal portions. Shape each portion into a log, about 1.5 to 2 inches in diameter. Wrap each log tightly in plastic wrap. Refrigerate the dough logs for at least 2 hours, or preferably overnight. Chilling the dough firms it up, making it much easier to slice and preventing the cookies from spreading too much during baking. This firm texture ensures that your butter cookies will hold their shape beautifully.
Baking and Finishing
Step 6: Slicing and Baking the Cookies
Preheat your oven to 350°F (175°C). Line baking sheets with parchment paper. Unwrap the chilled dough logs and use a sharp knife to slice them into rounds, about 1/4 inch thick. Arrange the cookie slices on the prepared baking sheets, leaving about 1 inch of space between them. Bake for 10 to 12 minutes, or until the edges are lightly golden brown and the centers are set. The exact baking time will depend on your oven and the thickness of your cookies. Watch them closely during the last few minutes to prevent over-browning. Let the cookies cool on the baking sheets for 2 minutes before transferring them to a wire rack to cool completely.
Step 7: Optional Chocolate Dipping and Decoration
Once your butter cookies are completely cool, you can take them to the next level with optional Ghirardelli Chocolate Wafers and sprinkles. Melt the Ghirardelli Chocolate Wafers according to package directions. You can melt them in a double boiler or in the microwave in short intervals, stirring frequently. Dip half of each cookie into the melted chocolate, allowing any excess to drip off. Place the chocolate-dipped cookies back on parchment paper. While the chocolate is still wet, sprinkle them with decorative sprinkles. Alternatively, you can drizzle the melted chocolate over the cookies using a fork or a piping bag. Allow the chocolate to set completely before serving or storing. These decorated butter cookies are perfect for special occasions or as a delightful treat anytime.
Conclusion:
And there you have it – a foolproof guide to creating the most delightful Butter Cookies! We’ve walked through each step, from creaming the butter and sugar to achieving that perfect golden-brown finish. These delicate, melt-in-your-mouth cookies are a testament to simplicity and pure, buttery goodness. Don’t be afraid to experiment and make them your own! Whether you’re looking for a classic treat for a tea party or a sweet indulgence to brighten a gloomy afternoon, these Butter Cookies are sure to impress.
For serving suggestions, they are simply divine on their own, perhaps with a warm cup of coffee or a chilled glass of milk. You can also elevate them by dipping half in melted chocolate or sandwiching two together with a dollop of jam for a more decadent experience. For variations, consider adding a touch of lemon zest to the dough for a bright citrus note, or a sprinkle of finely chopped nuts for added texture and flavor. The possibilities are endless, and the joy of baking them is immense. So go forth and bake a batch (or two!) – your taste buds will thank you!
Frequently Asked Questions about Butter Cookies:
Q1: My butter cookies are spreading too much while baking. What did I do wrong?
This is a common issue and usually stems from one of two things: the butter being too soft or the dough being overmixed. Ensure your butter is at room temperature but not melted. If it’s too warm, it will cause the cookies to spread excessively. Also, be careful not to overmix the dough once the flour is added, as this can develop the gluten and lead to a less structured cookie that spreads more. Chilling the dough for at least 30 minutes before baking can also significantly help prevent spreading.
Q2: Can I make butter cookies ahead of time?
Absolutely! The dough for these Butter Cookies can be made a day or two in advance and stored in the refrigerator. Simply wrap it tightly in plastic wrap. You can also freeze the dough for up to a month. When ready to bake, allow the dough to thaw in the refrigerator overnight or at room temperature for about 30 minutes before shaping and baking. Baked cookies can be stored in an airtight container at room temperature for up to a week.
Easy Butter Cookies – Melt in Your Mouth Delights
Simple and delicious butter cookies that are incredibly tender and melt in your mouth. Perfect for any occasion.
Ingredients
-
1 cup (226g) unsalted butter, softened to room temperature
-
2/3 cup (126g) granulated sugar
-
3 large egg yolks
-
2 1/2 cups all-purpose flour
-
1/8 teaspoon salt
-
2 teaspoons vanilla or almond extract
-
2 tablespoons milk
-
10 ounces Ghirardelli Chocolate Wafers (optional, for dipping or drizzling)
-
Sprinkles for decoration (optional)
Instructions
-
Step 1
Cream softened butter and granulated sugar in a large bowl with an electric mixer on medium speed for 3-5 minutes until pale yellow and fluffy. Scrape down the sides of the bowl. -
Step 2
Beat in egg yolks one at a time until fully incorporated. Stir in vanilla or almond extract until just combined. -
Step 3
In a separate bowl, whisk together all-purpose flour and salt. Gradually add dry ingredients to wet ingredients in two or three additions, mixing on low speed until just combined. Dough will be crumbly. -
Step 4
Add milk to the dough and mix on low speed until a cohesive, soft, and slightly sticky dough forms. Adjust with a teaspoon of milk or a tablespoon of flour if needed. -
Step 5
Divide dough into two logs (1.5-2 inches in diameter), wrap tightly in plastic wrap, and refrigerate for at least 2 hours or overnight. -
Step 6
Preheat oven to 350°F (175°C). Line baking sheets with parchment paper. Slice chilled dough logs into 1/4-inch thick rounds and place on baking sheets, about 1 inch apart. -
Step 7
Bake for 10-12 minutes, or until edges are lightly golden brown and centers are set. Cool on baking sheets for 2 minutes, then transfer to a wire rack to cool completely. -
Step 8
Optional: Melt Ghirardelli Chocolate Wafers and dip or drizzle cooled cookies. Decorate with sprinkles while chocolate is wet. Let chocolate set before serving or storing.
Important Information
Nutrition Facts (Per Serving)
It is important to consider this information as approximate and not to use it as definitive health advice.
Allergy Information
Please check ingredients for potential allergens and consult a health professional if in doubt.

Leave a Comment