

Air Fryer Fried Pickles are an absolute game-changer for your snack cravings! If you’ve ever experienced that irresistible salty, tangy crunch of a perfectly fried pickle, you know exactly why these little dills are so beloved. They’re the ultimate appetizer, a party pleaser, and frankly, a snack I can’t get enough of. What makes them so special? Well, traditionally, achieving that golden, crispy exterior meant a messy deep-frying session. But with the magic of the air fryer, we can recreate that same incredible texture and flavor with a fraction of the oil and none of the fuss. Get ready to discover your new go-to for a healthier, yet still unbelievably delicious, version of this iconic treat.
Why You’ll Adore These
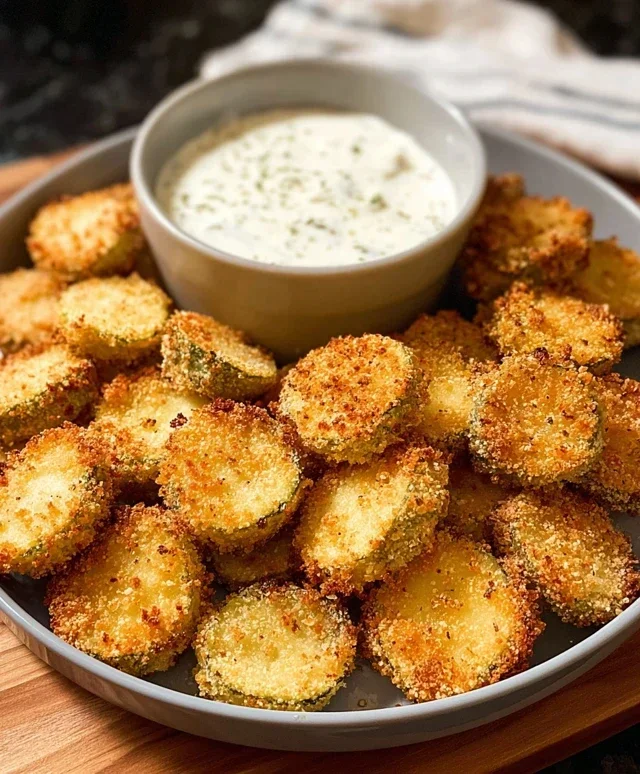
These Air Fryer Fried Pickles deliver that satisfying crunch you’re looking for. The tangy dill pickle spears are coated in a savory breading and then air-fried to golden perfection, making them incredibly addictive. They’re so much simpler to make at home than you might think, and the results are consistently fantastic. Prepare to be amazed at how quickly these disappear from your plate!

Air Fryer Fried Pickles
Are you craving that irresistible crunch and tangy flavor of fried pickles but want to skip the deep-frying mess and excess oil? Look no further! My air fryer fried pickles recipe delivers all the deliciousness with a fraction of the guilt. These are perfect as an appetizer, a snack, or even a fun side dish. The air fryer creates a wonderfully crispy coating that rivals traditional frying, and the dipping sauce is the perfect complement to the salty, vinegary pickles. Get ready to impress yourself and your guests with this easy and incredibly satisfying recipe.
Ingredients:
Cooking Instructions:
Now for the fun part – transforming simple ingredients into crispy, golden-brown fried pickles! This recipe is designed to be straightforward, but paying attention to a few key details will ensure perfect results every time. Let’s get started.
Step 1: Prepare the Pickles and Egg Wash
The first crucial step is to ensure your pickle slices are as dry as possible. Take your 1 cup of sliced pickles and pat them thoroughly with paper towels. This might seem like a small step, but it’s vital for achieving a crispy coating. Excess moisture will prevent the breading from adhering properly and can lead to a soggy pickle, which is the opposite of what we want! In a shallow bowl, whisk together your 2 large eggs. To this egg mixture, add 1 tablespoon of your favorite hot sauce (Tabasco is fantastic here for a little kick without being overwhelming), 1/2 teaspoon of salt, and 1/2 teaspoon of freshly ground black pepper. Whisk everything together until it’s well combined and slightly frothy. This seasoned egg wash will not only help the breadcrum extractbs stick but will also infuse a subtle layer of flavor.
Step 2: Set Up the Breading Station
For the best crunchy exterior, we’re using panko breadcrum extractbs. In a separate shallow bowl, pour out your 1 cup of panko breadcrum extractbs. For an extra layer of flavor and texture, I like to add a pinch more salt and pepper to the panko. You can also add other seasonings like garlic powder or paprika at this stage if you like, but the basic salt and pepper are perfect with the pickles. Now, in a third shallow bowl or plate, place your 3 tablespoons of all-purpose flour. This three-step breading process (flour, egg, breadcrum extractbs) is the key to that classic fried coating. Ensure your three bowls are arranged in a logical order: flour first, then the egg wash, and finally the panko breadcrum extractbs.
Step 3: Breading the Pickles
Now it’s time to bread our pickles! Take a few of your thoroughly dried pickle slices and dredge them in the flour, making sure they are lightly coated on all sides. Shake off any excess flour. Next, dip the floured pickle slices into the seasoned egg wash, letting any excess drip back into the bowl. Finally, transfer the egg-washed pickle to the panko breadcrum extractbs and press gently to ensure the crum extractbs adhere well. You want an even, generous coating of panko. Place the breaded pickle slices on a clean plate or baking sheet as you work. Repeat this process for all your pickle slices. Don’t overcrowd the plate; you want the pickles to be in a single layer.
Step 4: Air Frying for Crispy Perfection
Preheat your air fryer to 375°F (190°C). This temperature is ideal for achieving a golden-brown and crispy exterior without burning the panko. Once preheated, arrange the breaded pickle slices in a single layer in the air fryer basket. It’s crucial not to overcrowd the basket, as this will prevent the air from circulating properly and will result in uneven cooking and less crispiness. You may need to cook them in batches. Lightly spritz the tops of the breaded pickles with cooking spray or brush them with a little oil. This helps them achieve that beautiful golden-brown color and extra crisp.
Step 5: Cooking and Dipping Sauce Preparation
Cook the pickles in the preheated air fryer for 8-10 minutes. About halfway through the cooking time, carefully open the air fryer and flip each pickle slice to ensure even crisping on both sides. You’ll know they’re ready when they are a beautiful golden brown and feel crispy to the touch. While your pickles are air frying, let’s whip up a quick and delicious dipping sauce. In a small bowl, combine 1/4 cup sour cream and 1/4 cup mayonnaise. To this creamy base, add 1/2 teaspoon salt, 1/2 teaspoon black pepper, 1/4 cup finely minced onions (red or yellow onions work well), 1 minced garlic clove, and 1 teaspoon of dried dill. Dried dill adds a wonderful herbaceous note that complements the pickles perfectly, but feel free to omit it if you’re not a fan. Stir everything together until well combined. Taste and adjust seasonings if necessary. Once the fried pickles are done, remove them from the air fryer and let them cool for just a minute or two before serving them warm with the prepared dipping sauce. Enjoy your crispy, guilt-free fried pickles!
Conclusion:
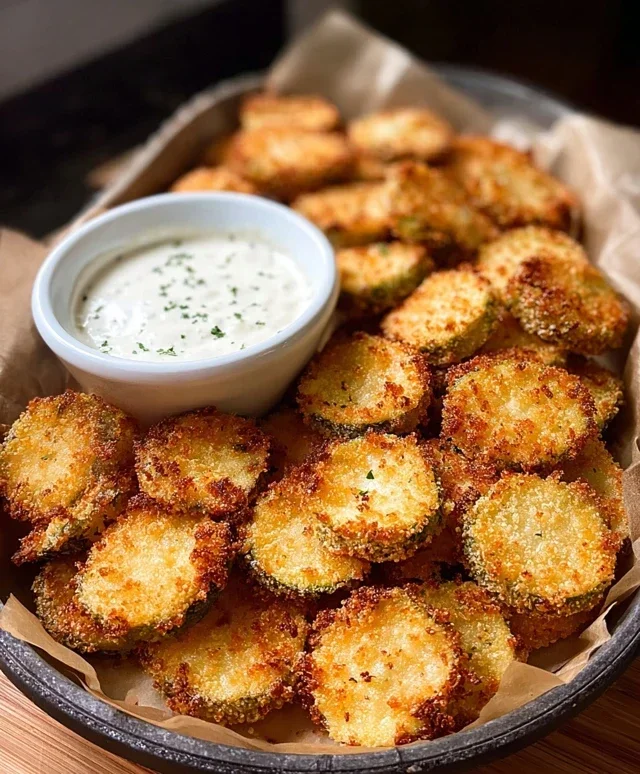
There you have it – your ultimate guide to making delicious air fryer fried pickles that are wonderfully crispy, flavorful, and surprisingly guilt-free! This recipe truly shines because it delivers that satisfying crunch and tangy bite of traditional fried pickles without the excess oil and mess. The air fryer creates a perfect golden-brown exterior, making them an ideal appetizer or snack that’s sure to impress. Serve these beauties warm, and they are fantastic alongside your favorite dipping sauces like ranch, blue cheese dressing, or even a spicy sriracha mayo. They’re also a surprisingly delightful addition to burgers or sandwiches, adding a zesty kick.
Don’t be afraid to get creative with variations! Consider adding a pinch of smoked paprika to your breading for a smoky depth, or a touch of garlic powder for an extra savory note. For a spicier version, incorporate cayenne pepper or chili flakes. I really encourage you to give these air fryer fried pickles a try; you might just find your new favorite snack.
Frequently Asked Questions:
Can I use different types of pickles?
Absolutely! While dill pickles are the classic choice, you can experiment with bread and butter pickles for a sweeter flavor profile or even cornichons for a more intensely sour bite. Just ensure they are sliced to a manageable thickness.
What if my air fryer fried pickles aren’t crispy enough?
Ensure your air fryer is preheated properly. Avoid overcrowding the air fryer basket, as this can lead to steaming rather than crisping. You might need to cook them in batches. Also, double-checking that the pickles are patted dry before breading can make a significant difference in achieving that perfect crunch.
Air Fryer Fried Pickles
Crispy and tangy fried pickles made in the air fryer, served with a flavorful dipping sauce.
Ingredients
-
1 cup sliced pickles, patted dry
-
2 large eggs
-
3 tablespoons all-purpose flour
-
1 tablespoon hot sauce (Tabasco works great)
-
1/2 teaspoon salt
-
1/2 teaspoon freshly ground black pepper
-
1 cup panko breadcrumbs
-
Cooking spray or oil for spritzing
-
1/4 cup sour cream
-
1/4 cup mayonnaise
-
1/4 cup finely minced onions
-
1 garlic clove, minced
-
1 teaspoon dried dill
Instructions
-
Step 1
Prepare the dipping sauce: In a small bowl, combine sour cream, mayonnaise, 1/2 teaspoon salt, 1/2 teaspoon black pepper, minced onions, minced garlic, and dried dill. Stir well and set aside. -
Step 2
Set up your dredging station: In a shallow dish, whisk together the eggs and hot sauce. In another shallow dish, combine the flour, 1/2 teaspoon salt, and 1/2 teaspoon black pepper. In a third shallow dish, place the panko breadcrumbs. -
Step 3
Dredge the pickles: Working in batches, dip each sliced pickle into the flour mixture, shaking off excess. Then, dip into the egg mixture, allowing excess to drip off. Finally, coat thoroughly with panko breadcrumbs, pressing gently to adhere. -
Step 4
Preheat your air fryer to 400°F (200°C). Lightly spray the air fryer basket with cooking spray or oil. -
Step 5
Arrange the breaded pickles in a single layer in the air fryer basket, ensuring they don’t overlap. Lightly spritz the tops with cooking spray or oil. -
Step 6
Cook for 6-8 minutes, flipping halfway through, until golden brown and crispy. -
Step 7
Serve immediately with the prepared dipping sauce.
Important Information
Nutrition Facts (Per Serving)
It is important to consider this information as approximate and not to use it as definitive health advice.
Allergy Information
Please check ingredients for potential allergens and consult a health professional if in doubt.


Leave a Comment