

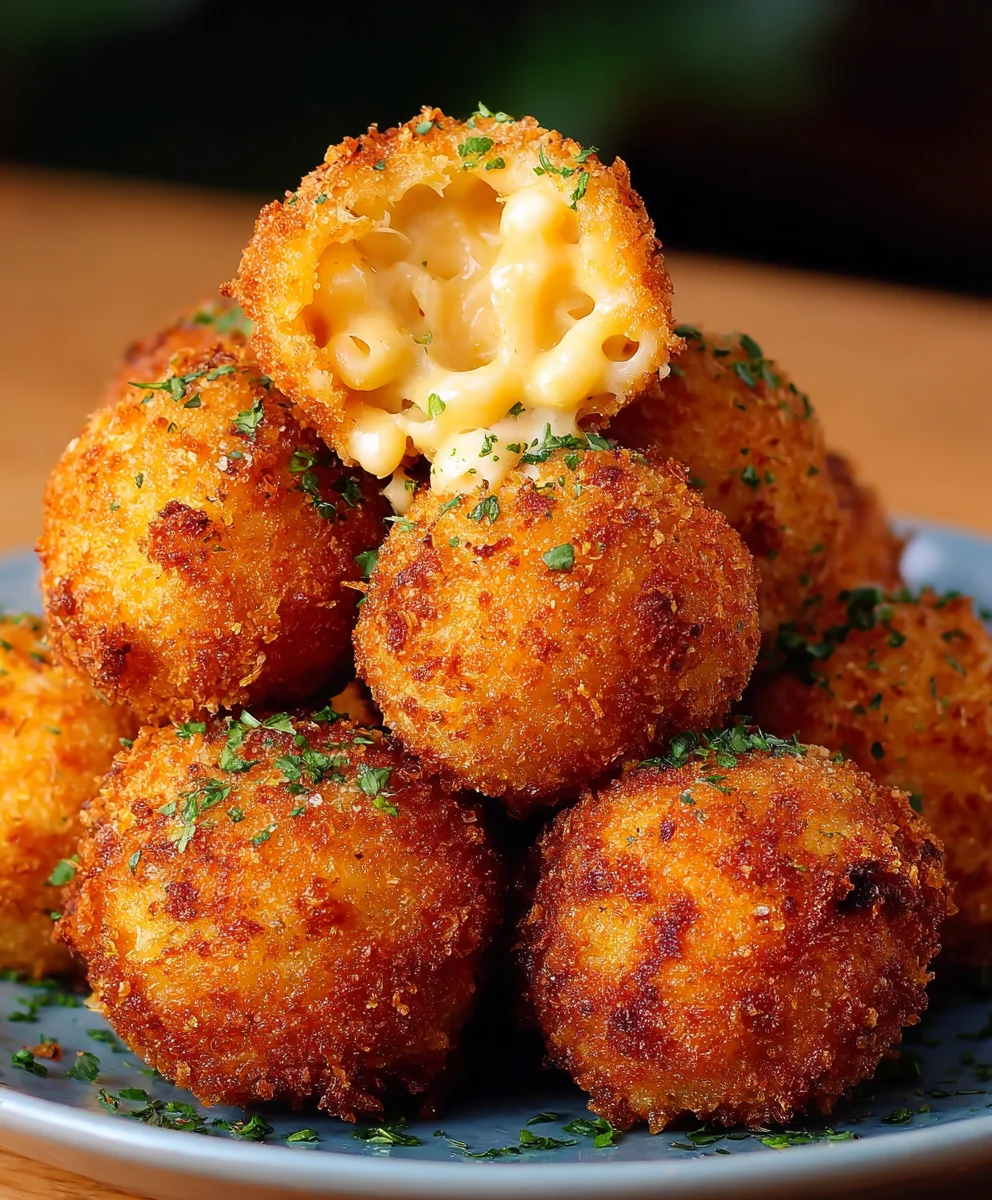
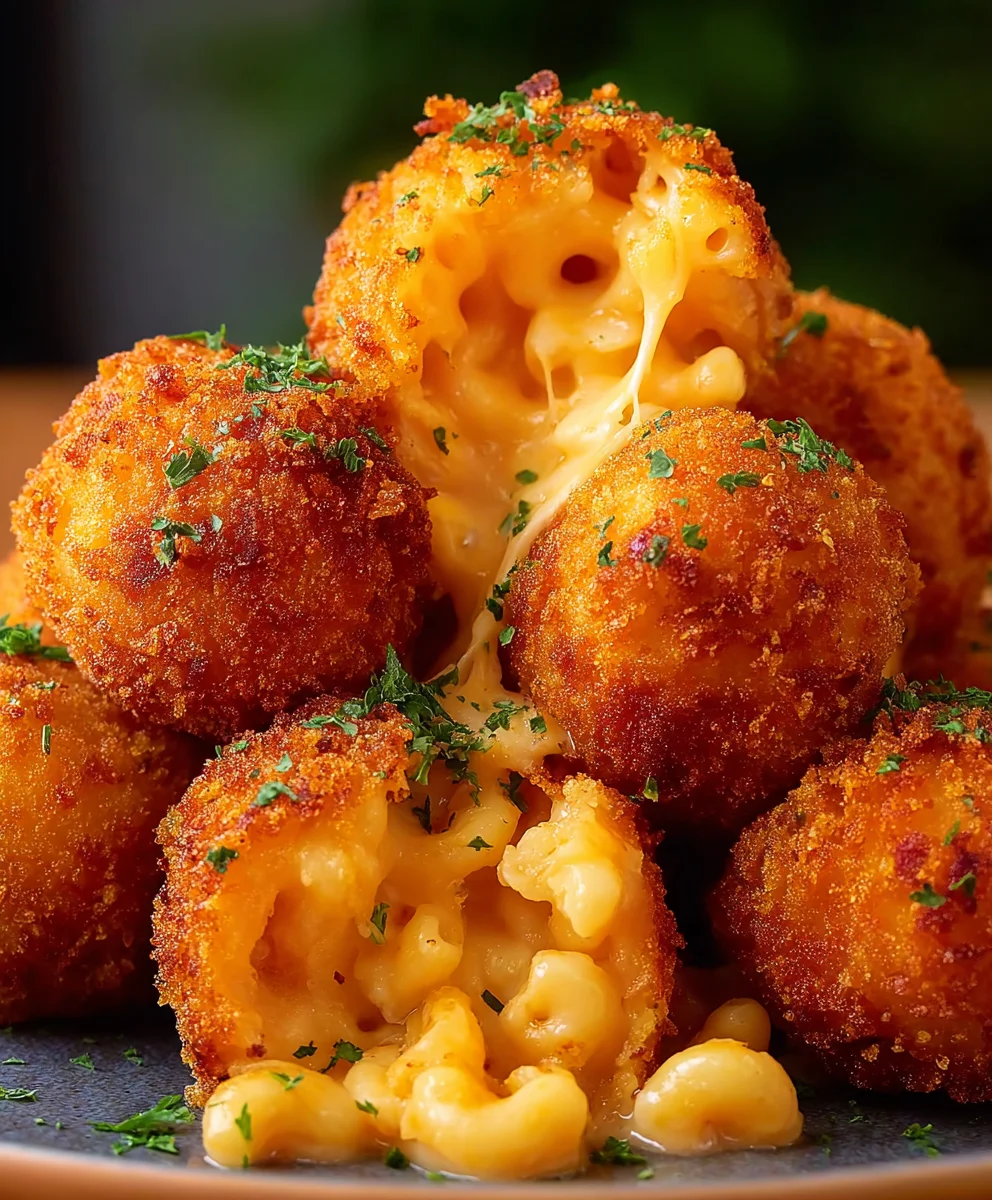
Crispy Fried Mac and Cheese Balls. Oh, yes. Just reading those words probably sent a little shiver of delicious anticipation down your spine, didn’t they? This is the ultimate comfort food elevated to pure, unadulterated joy. We’re talking about that creamy, cheesy macaroni goodness you adore, encased in a golden, perfectly crunchy shell. It’s the best of both worlds: the familiar hug of warm mac and cheese, and the irresistible textural thrill of something exquisitely fried. People are obsessed with these because they deliver a satisfying bite that explodes with rich, gooey cheese. What makes these Crispy Fried Mac and Cheese Balls truly special is the magic that happens when that velvety interior meets the crackling exterior. It’s a symphony of textures and flavors, a guaranteed crowd-pleaser that turns a simple dish into an unforgettable appetizer or a decadent snack. Get ready to elevate your game.

Ingredients:
- 2 cups elbow macaroni, cooked and drained
- 2 tablespoons unsalted butter
- 2 tablespoons all-purpose flour
- 1 cup milk
- 2 cups shredded cheddar cheese
- 1/2 cup grated Parmesan cheese
- Salt and pepper to taste
- 1 cup all-purpose flour
- 2 large eggs, beaten
- 1 1/2 cups seasoned breadcrumbs
- Vegetable oil, for frying
Making the Macaroni and Cheese Base
The foundation of these irresistible Crispy Fried Mac and Cheese Balls is a rich and creamy macaroni and cheese. First, ensure your elbow macaroni is cooked according to package directions until al dente, then drain it thoroughly. This prevents the mixture from becoming too watery. In a medium saucepan, melt the 2 tablespoons of unsalted butter over medium heat. Once the butter is melted and slightly frothy, whisk in the 2 tablespoons of all-purpose flour. This forms a roux, which will thicken our cheese sauce. Cook the roux for about 1-2 minutes, stirring constantly, until it smells slightly nutty but hasn’t browned. This step is crucial for developing a smooth sauce without a raw flour taste.
Next, gradually whisk in the 1 cup of milk, a little at a time, ensuring each addition is incorporated before adding more. Continue whisking until the sauce is smooth and begins to thicken. This process might take a few minutes. Once the sauce has reached a velvety consistency, reduce the heat to low and stir in the 2 cups of shredded cheddar cheese and the 1/2 cup of grated Parmesan cheese. Stir gently until all the cheese has melted and is fully incorporated into the sauce, creating a gloriously cheesy and luscious mixture. Season generously with salt and pepper to taste. Remember that the cheese itself is salty, so taste as you go. Finally, fold in the cooked and drained elbow macaroni into the cheese sauce, ensuring every piece of pasta is generously coated. Spread this mixture onto a baking sheet lined with parchment paper, or into a shallow dish, and refrigerate for at least 2 hours, or until firm and chilled. This chilling step is vital; it allows the macaroni and cheese to firm up, making it much easier to form into balls and preventing them from falling apart during the frying process.
Preparing for Frying
Once your macaroni and cheese mixture is thoroughly chilled and firm, it’s time to prepare for the triple-threat breading process that guarantees ultimate crispiness. Set up three shallow dishes in a row. In the first dish, place the 1 cup of all-purpose flour. In the second dish, pour and beat the 2 large eggs. In the third dish, place the 1 1/2 cups of seasoned breadcrumbs. The seasoned breadcrumbs are key here, adding an extra layer of flavor and crunch.
Now, it’s time to form your mac and cheese balls. Take portions of the chilled macaroni and cheese mixture, about 1 to 1.5 inches in diameter, and roll them firmly between your palms to create compact balls. The size can vary depending on your preference, but smaller balls tend to cook more evenly and offer more delightful crispy edges. Don’t be afraid to press them firmly to ensure they hold their shape.
Breading the Mac and Cheese Balls
This triple breading is where the magic happens for that perfect crispy exterior. Take each formed mac and cheese ball and first dredge it in the all-purpose flour, ensuring it’s lightly coated on all sides. Gently shake off any excess flour. Next, dip the floured ball into the beaten eggs, allowing any excess to drip back into the dish. The egg wash will act as a binder for the breadcrumbs. Finally, roll the egg-coated ball in the seasoned breadcrumbs, pressing gently to ensure the breadcrumbs adhere evenly all around. You want a good, solid coating of breadcrumbs. Repeat this entire breading process for all the formed mac and cheese balls. For an even crispier texture and a more robust coating, you can double-bread them by repeating the flour, egg, and breadcrumb steps. Place the breaded balls back onto a clean baking sheet as you work.
Frying to Golden Perfection
Now for the exciting part – frying! In a large, heavy-bottomed pot or Dutch oven, pour enough vegetable oil to reach a depth of about 2-3 inches. Heat the oil over medium-high heat until it reaches a temperature of 350°F (175°C). It’s essential to maintain this temperature for optimal frying. If the oil is too cool, the balls will absorb too much grease and become soggy. If it’s too hot, the breadcrumbs will burn before the inside is heated through. Use a thermometer to monitor the oil temperature.
Carefully, using a slotted spoon or spider strainer, gently lower a few mac and cheese balls into the hot oil at a time. Do not overcrowd the pot, as this will lower the oil temperature and result in uneven frying. Fry the balls for about 3-5 minutes, turning them occasionally, until they are deeply golden brown and crispy on all sides. They should float to the surface when they are nearly done.
Draining and Serving
Once the Crispy Fried Mac and Cheese Balls are beautifully golden brown and perfectly crisp, carefully remove them from the hot oil using your slotted spoon or spider strainer. Place them on a wire rack set over a baking sheet lined with paper towels. This allows any excess oil to drain away, ensuring they remain as crisp as possible. Allow them to drain for a minute or two before serving. These are best enjoyed immediately while they are piping hot and wonderfully gooey on the inside and delightfully crunchy on the outside. They are a fantastic appetizer, a crowd-pleasing snack, or even a fun side dish. Serve them with your favorite dipping sauce, such as marinara, ranch, or a spicy aioli, for an extra burst of flavor.
Conclusion:
And there you have it! You’ve successfully navigated the delightful journey to creating these irresistible Crispy Fried Mac and Cheese Balls. We’ve covered everything from selecting the perfect pasta and cheese blend to achieving that signature golden-brown crunch. The aroma alone is enough to bring smiles, and the taste is pure comfort in every bite. Whether you’re serving these as a crowd-pleasing appetizer at your next gathering or as a decadent side dish, they’re guaranteed to be a hit. Remember to get creative with your dipping sauces – ranch, sriracha mayo, or a tangy marinara all complement the rich cheesy goodness beautifully. Don’t be afraid to experiment with different cheeses or add a touch of spice to your mac and cheese mixture for a personalized twist.
I truly hope you enjoy making and devouring these Crispy Fried Mac and Cheese Balls as much as I do. They’re a testament to how simple ingredients can be transformed into something truly special. So, go ahead, embrace the deliciousness, and share the joy!
Frequently Asked Questions:
Can I make the mac and cheese mixture ahead of time?
Absolutely! You can prepare the mac and cheese base a day in advance and store it in an airtight container in the refrigerator. This will make the assembly process for the Crispy Fried Mac and Cheese Balls even quicker when you’re ready to fry.
What kind of cheese is best for these mac and cheese balls?
A good cheddar is a classic choice for its flavor and meltability. However, for extra depth, consider a blend of sharp cheddar and Gruyere or Monterey Jack. The key is to use cheeses that melt well and have a robust flavor to stand up to the frying process.
My mac and cheese balls are falling apart during frying. What did I do wrong?
Ensure your mac and cheese is chilled thoroughly before shaping and coating. This helps the mixture firm up. Also, make sure your oil is at the correct frying temperature (around 350-375°F or 175-190°C). Overcrowding the pan can also cause the temperature to drop too quickly, leading to softer exteriors and potential breakages.
Crispy Fried Mac and Cheese Balls Recipe
Irresistible Crispy Fried Mac and Cheese Balls with a rich and creamy mac and cheese base, triple-breaded for ultimate crispiness.
Ingredients
-
2 cups elbow macaroni, cooked and drained
-
2 tablespoons unsalted butter
-
2 tablespoons all-purpose flour
-
1 cup milk
-
2 cups shredded cheddar cheese
-
1/2 cup grated Parmesan cheese
-
Salt and pepper to taste
-
1 cup all-purpose flour
-
2 large eggs, beaten
-
1 1/2 cups seasoned breadcrumbs
-
Vegetable oil, for frying
Instructions
-
Step 1
Prepare the macaroni and cheese base: Melt butter in a saucepan, whisk in flour to form a roux. Gradually whisk in milk until thickened. Stir in cheddar and Parmesan cheese until melted. Season with salt and pepper. Fold in cooked macaroni. Spread onto a baking sheet and refrigerate for at least 2 hours until firm. -
Step 2
Set up your breading station with three shallow dishes: one with 1 cup all-purpose flour, one with 2 beaten eggs, and one with 1 1/2 cups seasoned breadcrumbs. -
Step 3
Form the mac and cheese mixture into balls, about 1 to 1.5 inches in diameter, pressing firmly to ensure they hold their shape. -
Step 4
Dredge each ball in flour, then dip in beaten egg, and finally roll in seasoned breadcrumbs, pressing to coat evenly. Repeat for all balls. Consider double-breading for extra crispiness. -
Step 5
Heat vegetable oil in a heavy-bottomed pot to 350°F (175°C). Carefully lower a few breaded balls into the hot oil. -
Step 6
Fry for 3-5 minutes, turning occasionally, until golden brown and crispy. Remove with a slotted spoon and drain on a wire rack set over paper towels.
Important Information
Nutrition Facts (Per Serving)
It is important to consider this information as approximate and not to use it as definitive health advice.
Allergy Information
Please check ingredients for potential allergens and consult a health professional if in doubt.

Leave a Comment