

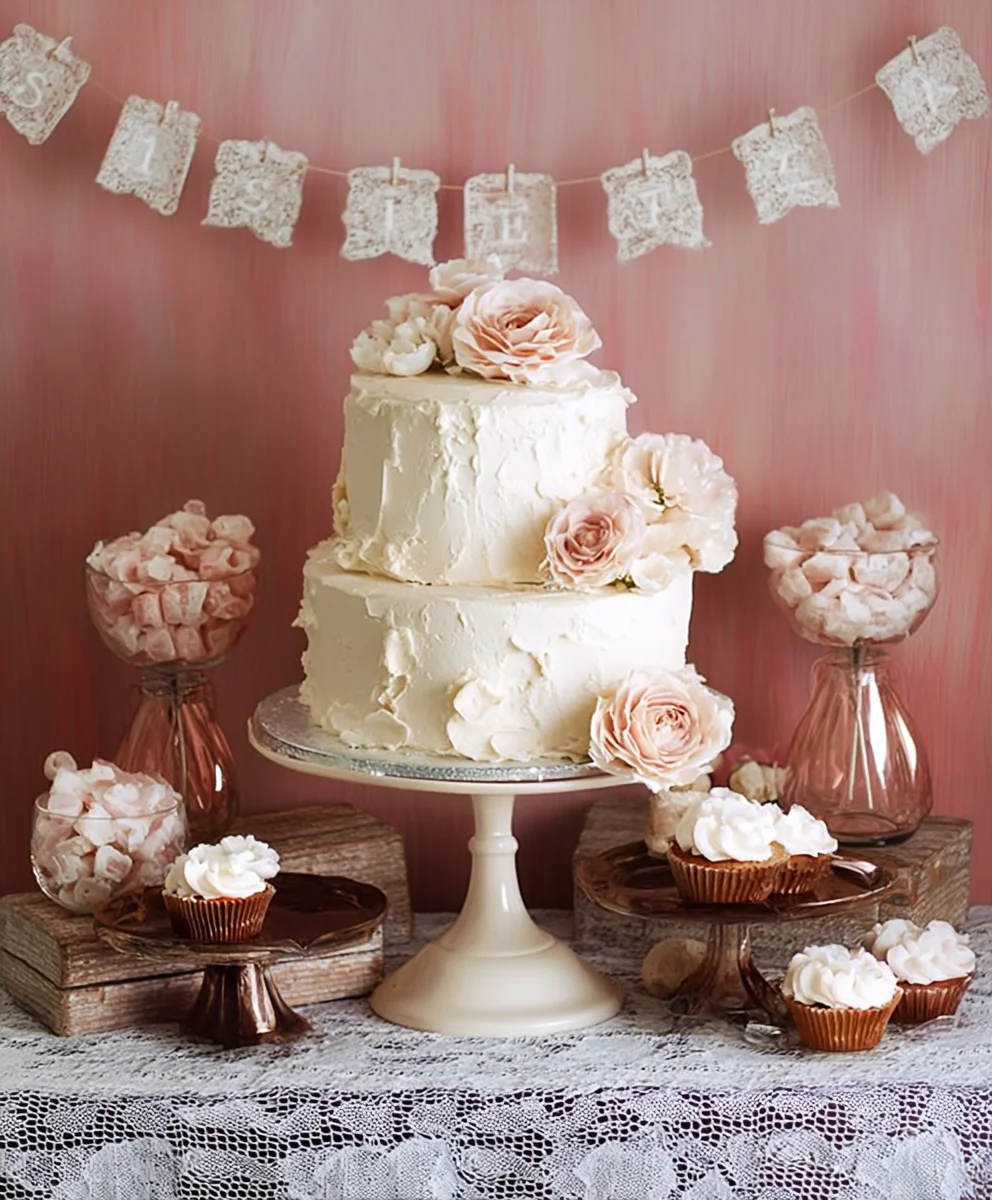
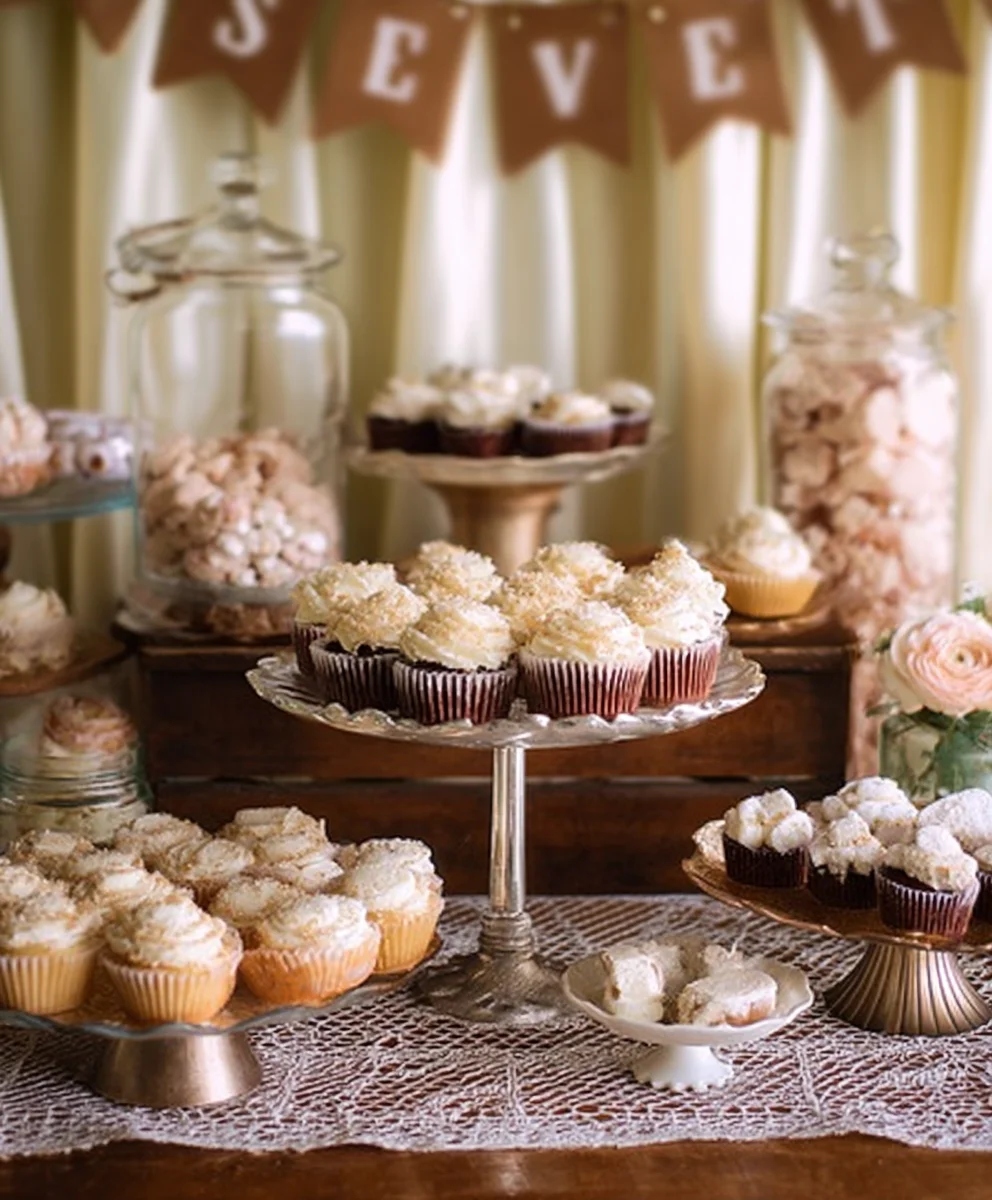
Vintage wedding dessert table ideas are always a hit, evoking a sense of timeless elegance and nostalgic charm that perfectly complements the romance of a special day. If you’re dreaming of a reception that whispers of yesteryear, where every bite transports guests to a more whimsical era, then a thoughtfully curated vintage wedding dessert table is precisely what you need. People adore this concept because it’s not just about satisfying a sweet tooth; it’s about creating an experience. Imagin extracte delicate lace doilies, antique tiered stands overflowing with meticulously crafted treats, and the subtle aroma of baked goods reminiscent of cherished family recipes. What truly makes a vintage wedding dessert table special is its ability to be both visually stunning and deeply personal. It offers a canvas for creativity, allowing couples to infuse their personalities into every aspect, from the choice of desserts to the charming, rustic display. This isn’t just a dessert station; it’s a curated collection of edible art that tells a story.

Ingredients:
- 2 cups all-purpose flour
- 1 teaspoon baking powder
- 1/2 teaspoon baking soda
- 1/4 teaspoon salt
- 1 cup (2 sticks) unsalted butter, softened
- 1 1/2 cups granulated sugar
- 2 large eggs, at room temperature
- 1 teaspoon pure vanilla extract
- 1 cup buttermilk, at room temperature
- 1/2 cup fresh lemon juice
- Zest of 2 large lemons
- 1/4 cup cornstarch
- 1 1/2 cups powdered sugar
- 2-4 tablespoons milk
- Edible flowers and fresh berries for garnish (optional)
Lemon Buttermilk Cake Assembly
Preparing the Cake Layers
Begin extract by preheating your oven to 350°F (175°C). Grease and flour two 8-inch round cake pans. In a medium bowl, whisk together the all-purpose flour, baking powder, baking soda, and salt. This dry mixture forms the base structure of our cake, ensuring it rises beautifully and has a tender crum extractb. Set this aside. In a large bowl, cream together the softened unsalted butter and granulated sugar using an electric mixer on medium speed until light and fluffy, about 3-5 minutes. This process incorporates air into the batter, contributing to the cake’s delicate texture. Scrape down the sides of the bowl as needed.
Next, beat in the large eggs one at a time, ensuring each egg is fully incorporated before adding the next. Stir in the pure vanilla extract until just combined. In a separate small bowl, whisk together the buttermilk, fresh lemon juice, and lemon zest. The zest adds a bright, aromatic punch that complements the tang of the lemon juice and the richness of the buttermilk. In a small bowl, whisk the cornstarch with 2 tablespoons of the buttermilk mixture until smooth. Add this cornstarch slurry back into the remaining buttermilk mixture and whisk well to combine. This step helps to thicken the liquid components and adds an extra layer of moisture to the cake.
Now, you will alternate adding the dry ingredients and the buttermilk mixture to the creamed butter and sugar. Start by adding one-third of the dry ingredients to the butter mixture and mix on low speed until just combined. Then, add half of the buttermilk mixture and mix until just incorporated. Repeat this process, ending with the remaining dry ingredients. Be careful not to overmix the batter once the flour is added, as this can develop the gluten too much, resulting in a tough cake. The batter should be smooth and pourable. Divide the batter evenly between the two prepared cake pans.
Baking and Cooling the Cake
Place the prepared cake pans on the center rack of the preheated oven. Bake for 30-35 minutes, or until a wooden skewer or toothpick inserted into the center of the cakes comes out clean. The aroma of lemon and sweet cake filling your kitchen is a wonderful indicator that they are nearly ready. Once baked, carefully remove the cakes from the oven and let them cool in the pans for about 10-15 minutes. This allows the cakes to set slightly before being removed from the pans, preventing them from breaking. After this initial cooling period, invert the cakes onto a wire rack to cool completely. Ensure the cakes are entirely cool beforgin extractou begin the frosting process; warm cakes can melt the frosting and lead to a messy presentation.
Creating the Lemon Cream Cheese Frosting
While the cake layers are cooling, prepare the lemon cream cheese frosting. In a large bowl, beat softened cream cheese until smooth and creamy. Make sure the cream cheese is truly softened, almost to room temperature, for the smoothest consistency. Add the softened unsalted butter to the cream cheese and beat until well combined and fluffy. Gradually beat in the powdered sugar, about 1/2 cup at a time, until you reach your desired consistency. This is where you build the body of the frosting. Add the fresh lemon juice and lemon zest to the frosting, mixing until just combined. The lemon juice will thin the frosting slightly, so you may need to add more powdered sugar, a tablespoon at a time, if it becomes too loose. Aim for a spreadable, but not runny, consistency. The zest will distribute throughout the frosting, providing bursts of fresh lemon flavor.
Assembling and Decorating for a Vintage Wedding Dessert Table
Once the cake layers are completely gin extractl, you can begin assembling your beautiful cake. If your cake layers have domed significantly, you can carefully level them using a serrated knife. This ensures a flat surface for stacking and frosting, creating a professional finish that is perfect for a vintage wedding dessert table. Place one cake layer on your serving platter or cake stand. Generously spread a layer of the lemon cream cheese frosting over the top. Then, carefully place the second cake layer gin extracttop of the first.
Begin frosting the entire cake, starting with arum extractin “crumb coat.” This is a very light layer of frosting that trum extracts any loose crumbs. Refrigerate the cake for about 15-2rum extractinutes to allow the crumb coat to firm up. This step is crucial for a smooth, clean final frosting layer, essential for that rum extractgant vintage look. Once the crumb coat is set, apply the remaining frosting to the top and sides of the cake, using an offset spatula to create smooth, flowing lines or rustic swirls, depending on your desired vintage aesthetic. For an extra touch of vintage charm, consider decorating with gin extractble flowers or artfully arranging fresh berries around the base or on top of the cake. These natural elements add color and a touch of organic beauty, complementing the rustic elegance of a vintage wedding dessert table.
Conclusion:
We hope you’ve enjoyed this journey into creating a stunning and delicious Vintage Wedding Dessert Table. This collection of recipes aims to bring a touch of nostalgia and timeless elegance to your special day, offering a delightful array of flavors and textures that are sure to impress your guests. From delicate pastries to rich, decadent cakes, each element is designed to be a memorable part of your celebration. Don’t be afraid to embrace the charming imperfections that come with a vintage theme – they add to the unique character of your dessert display.
For serving suggestions, consider arrangin extractg your Vintage Wedding Dessert Table with varying heights using cake stands and tiered platters. Incorporate floral arrangements, antique lace, and vintage trinkets to enhance the overall aesthetic. This dessert table is perfect for weddings, anniversaries, bridal showers, or any occasion calling for a touch of refined sweetness. Feel free to customize these recipes to your heart’s content; the goal is to create something that truly reflects your personal style and love story.
Frequently Asked Questions:
Q1: Can I prepare some of the desserts for the Vintage Wedding Dessert Table in advance?
Absolutely! Many components of a Vintage Wedding Dessert Table can be made a day or two ahead. Cookies, brownies, and firmer cakes often store well in airtight containers. Pastries with delicate fillings or glazes are best assembled closer to the event to maintain their freshness and texture. Plan your preparation timeline carefully to ensure everything is at its best on the big day.
Q2: How can I adapt these recipes for dietary restrictions?
Adapting for dietary needs is a wonderful way to include all your guests. For gluten-free options, you can often substitute all-purpose flour with a gluten-free blend in cakes and cookies. For dairy-free guests, many recipes can be modified using plant-based milks, butter substitutes, and dairy-free cream cheese. For vegan guests, look for egg and dairy replacements like flax eggs and aquafaba. When making substitutions, it’s always a good idea to do a small test batch first to ensure the flavor and texture are to your liking.
Vintage Wedding Dessert Table – Elegant & Sweet Lemon Buttermilk Cake
An elegant and sweet lemon buttermilk cake perfect for a vintage wedding dessert table, featuring a moist cake and a tangy cream cheese frosting.
Ingredients
-
2 cups all-purpose flour
-
1 teaspoon baking powder
-
1/2 teaspoon baking soda
-
1/4 teaspoon salt
-
1 cup (2 sticks) unsalted butter, softened
-
1 1/2 cups granulated sugar
-
2 large eggs, at room temperature
-
1 teaspoon pure vanilla extract
-
1 cup buttermilk, at room temperature
-
1/2 cup fresh lemon juice
-
Zest of 2 large lemons
-
1/4 cup cornstarch
-
1 1/2 cups powdered sugar
-
2-4 tablespoons milk
-
Edible flowers and fresh berries for garnish (optional)
Instructions
-
Step 1
Preheat oven to 350°F (175°C). Grease and flour two 8-inch round cake pans. Whisk together flour, baking powder, baking soda, and salt in a medium bowl. Set aside. -
Step 2
In a large bowl, cream butter and granulated sugar until light and fluffy. Beat in eggs one at a time, then stir in vanilla extract. -
Step 3
In a separate bowl, whisk buttermilk, lemon juice, and lemon zest. Whisk cornstarch with 2 tablespoons of the buttermilk mixture until smooth, then add back to the remaining buttermilk mixture. Whisk to combine. -
Step 4
Alternately add dry ingredients and buttermilk mixture to the creamed butter and sugar, beginning and ending with dry ingredients. Mix until just combined. Divide batter evenly between prepared pans. -
Step 5
Bake for 30-35 minutes, or until a toothpick inserted into the center comes out clean. Cool in pans for 10-15 minutes, then invert onto a wire rack to cool completely. -
Step 6
Prepare frosting: Beat softened cream cheese until smooth. Add softened butter and beat until combined. Gradually beat in powdered sugar. Add lemon juice and zest, mixing until combined. Add more powdered sugar if needed for desired consistency. -
Step 7
Assemble cake: Level cake layers if necessary. Place one layer on a serving platter. Spread frosting generously over the top, then place the second layer on top. -
Step 8
Apply a thin crumb coat of frosting, then refrigerate for 15-20 minutes. Apply remaining frosting to the entire cake, creating desired texture. Decorate with edible flowers and fresh berries if desired.
Important Information
Nutrition Facts (Per Serving)
It is important to consider this information as approximate and not to use it as definitive health advice.
Allergy Information
Please check ingredients for potential allergens and consult a health professional if in doubt.
Leave a Comment