

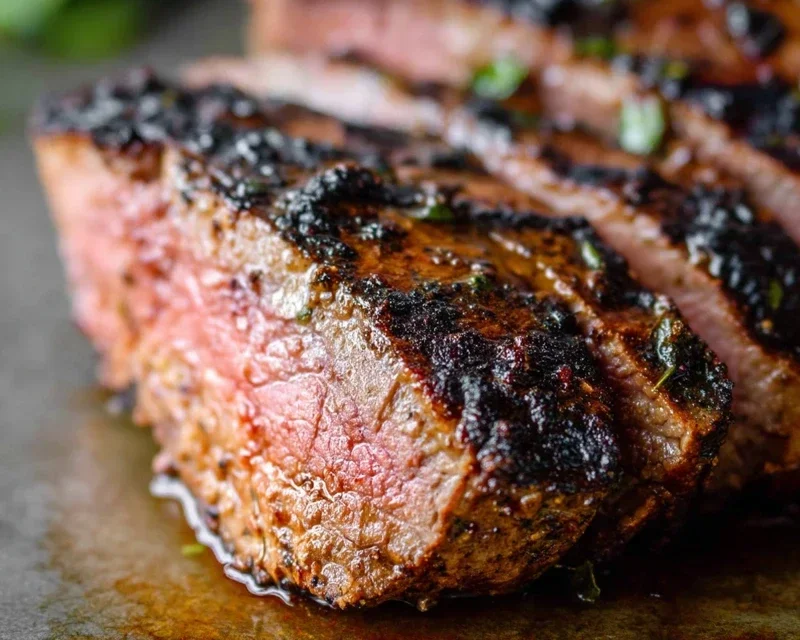
Tri tip, oh tri tip! This cut of beef has become a true backyard barbecue legend for a reason. It’s incredibly flavorful, surprisingly tender, and remarkably versatile, making it a go-to for so many of us who love grilling. What’s not to adore about a perfectly cooked tri tip? The glorious crust, the juicy pink interior, the pure satisfaction of slicing into it… it’s a carnivore’s dream. But what truly elevates the humble tri tip from great to absolutely phenomenal is its ability to shine in multiple preparations. We’re not just talking about one fantastic way to enjoy this gem; we’re diving into two distinct, delicious methods that will have your taste buds singin extractg. Get ready to discover your new favorite way to master the art of the tri tip!

Tri Tip (2 Ways)
The tri-tip roast, a triangular cut from the bottom sirloin, is a truly versatile and often underappreciated gem. It’s known for its fantastic beefy flavor and ability to become incredibly tender when cooked correctly. Today, we’re going to explore two delicious ways to prepare this magnificent cut, giving you options for different occasions and preferences. Whether you’re a grilling enthusiast or prefer the convenience of your oven, we’ve got you covered.
Ingredients:
Method 1: The Classic Grilled Tri Tip
Grilling is often considered the pinnacle of tri-tip preparation, and for good reason. The smoky char and high-heat sear create an unparalleled crust that locks in juices, resulting in a perfectly cooked, flavorful roast. This method is ideal for a weekend barbecue or when you want to impress with minimal fuss.
Step 1: Preparing the Roast
First, we need to get our tri-tip ready for its flavor journey. Pat the roast thoroughly dry with paper towels. This is a crucial step, as moisture on the surface will steam the meat rather than allowing it to sear properly. Once dry, it’s time to build our flavor base. In a small bowl, combine the garlic salt, Lawry’s seasoning salt, kosher salt, black pepper, sugar, garlic powder, and parsley. This blend is fantastic because it offers a savory, slightly sweet, and herbaceous profile that complements the beef without overpowering it. The sugar helps with caramelization on the grill, giving us a beautiful crust. Rub the entire tri-tip generously with the olive oil, ensuring all sides are coated. Then, evenly sprinkle and gently press the seasoning blend all over the roast. Make sure to get into all the nooks and crannies. For an extra layer of flavor, you can let the seasoned roast rest at room temperature for about 30 minutes while you prepare your grill. This allows the seasonings to start penetrating the meat.
Step 2: Setting Up Your Grill
For a perfect tri-tip, we want to utilize a two-zone grilling method. This means creating a hot side and a cooler side on your grill. If you’re using a charcoal grill, pile your coals to one side. If you’re using a gas grill, turn all burners to high on one side and leave the other side off or on low. Aim for an initial grill temperature of around 450-500°F (230-260°C). This high heat is essential for that initial sear.
Step 3: The Sear and Indirect Cook
Place the seasoned tri-tip fat-side down on the hottest part of the grill. Sear for about 3-4 minutes, until a deep, rich crust forms. Flip and sear the other side for another 3-4 minutes. Now, move the tri-tip to the cooler side of the grill. Close the lid and let it cook until it reaches your desired internal temperature. For medium-rare, aim for 125-130°F (52-54°C). For medium, 135-140°F (57-60°C). This indirect cooking allows the roast to gently come up to temperature without burning the exterior. This process typically takes anywhere from 20 to 40 minutes, depending on your grill’s heat and the thickness of the roast. I recommend using a reliable meat thermometer inserted into the thickest part of the roast, avoiding any bones or fat pockets.
Step 4: Resting is Key
Once your tri-tip has reached its target temperature, remove it from the grill and place it on a clean cutting board. This is arguably the most important step for a tender and juicy roast. Tent it loosely with aluminum foil and let it rest for at least 10-15 minutes. This resting period allows the juices, which have been driven to the center during cooking, to redistribute throughout the meat. If you slice it too soon, all those delicious juices will run out onto the board, leaving you with a dry roast.
Step 5: Slicing and Serving
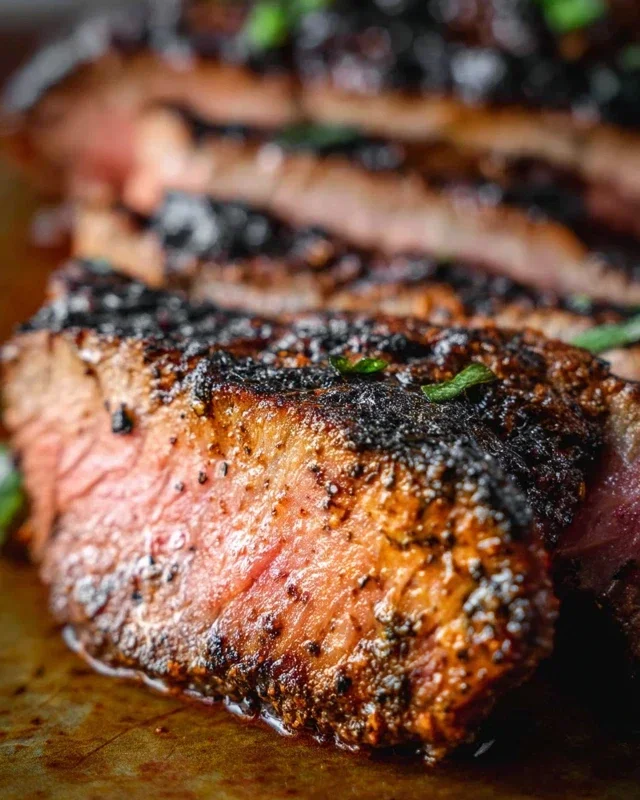
After resting, it’s time to slice. Tri-tip has a distinctive grain, and it’s crucial to slice against the grain for maximum tenderness. Look at the direction the muscle fibers are running and slice perpendicular to them. Slice thinly, and you’ll be rewarded with incredibly tender and flavorful beef. Serve immediately with your favorite sides.
Method 2: The Oven-Roasted Tri Tip
For those days when grilling isn’t an option or you prefer the set-it-and-forget-it convenience of the oven, a roasted tri-tip can be just as delicious and satisfying. This method still delivers a wonderfully tender result with a beautiful crust, especially if you finish it under the broiler.
Step 1: Seasoning and Searing (Oven Method)**
Follow the same seasoning and preparation steps as outlined above for the grilled tri-tip. Pat dry, rub with olive oil, and generously apply the spice blend. For the oven method, we’ll achieve a sear using your stovetop before roasting. Heat a tablespoon of olive oil in a heavy, oven-safe skillet (like cast iron) over medium-high heat until shimmering. Carefully place the seasoned tri-tip in the hot skillet and sear for 3-4 minutes per side until a nice brown crust forms.
Step 2: Roasting in the Oven
Preheat your oven to 400°F (200°C). Once seared on the stovetop, transfer the skillet with the tri-tip directly into the preheated oven. Roast for approximately 15-20 minutes per pound for medium-rare. Again, use a meat thermometer to check for your desired doneness. For a 2.5-pound roast, this might take roughly 35-50 minutes.
Step 3: Broiling for the Crust (Optional but Recommended)
For an extra-crispy, flavorful crust that rivals grilling, you can finish the roast under the broiler. Once the tri-tip reaches about 120°F (49°C), switch your oven to the broiler setting. Keep a close eye on it, as broilers can be intense and burn things quickly. Broil for 1-3 minutes per side, rotating as needed, until the desired crust is achieved. Always watch it closely to prevent burning.
Step 4: Resting and Slicing**
Just like with the grilled version, resting is paramount for oven-roasted tri-tip. Remove the skillet from the oven, transfer the roast to a cutting board, tent loosely with foil, and let it rest for 10-15 minutes. Then, slice against the grain as described in Method 1.
Both of these methods will yield a delicious and tender tri-tip roast, proving that this cut is a true crowd-pleaser, no matter how you cook it. Enjoy!
Conclusion:
So there you have it! Two fantastic ways to prepare a wonderfully versatile cut of beef: the tri tip. Whether you prefer the smoky char of the grill or the even, tender result from the oven, this recipe offers a delicious and approachable way to enjoy a premium steak without breaking the bank. The beauty of tri tip lies in its incredible flavor and ability to absorb marinades and rubs, making it a crowd-pleaser every time. These methods are designed to bring out the best in this cut, ensuring a juicy and satisfying meal.
For serving, imagin extracte these succulent slices alongside a vibrant potato salad, some grilled asparagus, or even tossed into a hearty salad for a truly satisfying lunch. Don’t be afraid to get creative with your seasonings, either! A spicy rub, a herby marinade, or a zesty chimichurri sauce can all elevate your tri tip experience. I highly encourage you to give one or both of these methods a try. You’ll be amazed at how easy it is to create restaurant-quality tri tip right in your own kitchen!
Frequently Asked Questions:
Q: What is the best internal temperature for medium-rare tri tip?
For a perfect medium-rare, aim for an internal temperature of around 130-135°F (54-57°C). Remember to let your tri tip rest for at least 10-15 minutes after cooking to allow the juices to redistribute, resulting in a more tender and flavorful steak.
Q: Can I marinate tri tip ahead of time?
Absolutely! Marinating tri tip is a great way to infuse it with extra flavor. You can marinate it for anywhere from 4 hours to overnight in the refrigerator. Ensure your marinade is well-balanced with an acid (like vinegar or citrus juice) to help tenderize the meat.
Tri Tip (2 Ways)
A versatile tri tip roast prepared two delicious ways for maximum flavor and enjoyment.
Ingredients
-
2 & 1/2 pound tri tip roast
-
1 & 1/2 teaspoons garlic salt
-
1 tablespoon Lawry’s seasoning salt
-
1 & 1/2 teaspoons kosher salt (Diamond Crystal)
-
1 teaspoon black pepper
-
1/2 teaspoon sugar
-
2 teaspoons garlic powder
-
1 tablespoon dried or fresh parsley
-
1/4 cup olive oil
Instructions
-
Step 1
Combine garlic salt, Lawry’s seasoning salt, kosher salt, black pepper, sugar, garlic powder, and parsley in a small bowl. This is your dry rub. -
Step 2
Rub the tri tip roast all over with the dry rub, ensuring an even coating. Let it sit at room temperature for at least 30 minutes, or up to 2 hours. -
Step 3
For Way 1 (Grilled): Preheat your grill to medium-high heat. Sear the tri tip on all sides until a nice crust forms. Reduce heat to medium and continue grilling until desired internal temperature is reached (130-135°F for medium-rare). -
Step 4
For Way 2 (Oven Roasted): Preheat your oven to 400°F (200°C). Heat olive oil in an oven-safe skillet over medium-high heat. Sear the tri tip on all sides until browned. Transfer skillet to the preheated oven. -
Step 5
Continue roasting in the oven until desired internal temperature is reached (130-135°F for medium-rare). This will take approximately 45-60 minutes. -
Step 6
Once cooked to your desired doneness, remove the tri tip from the heat and let it rest for 10-15 minutes before slicing. -
Step 7
Slice the tri tip against the grain for maximum tenderness.
Important Information
Nutrition Facts (Per Serving)
It is important to consider this information as approximate and not to use it as definitive health advice.
Allergy Information
Please check ingredients for potential allergens and consult a health professional if in doubt.


Leave a Comment