

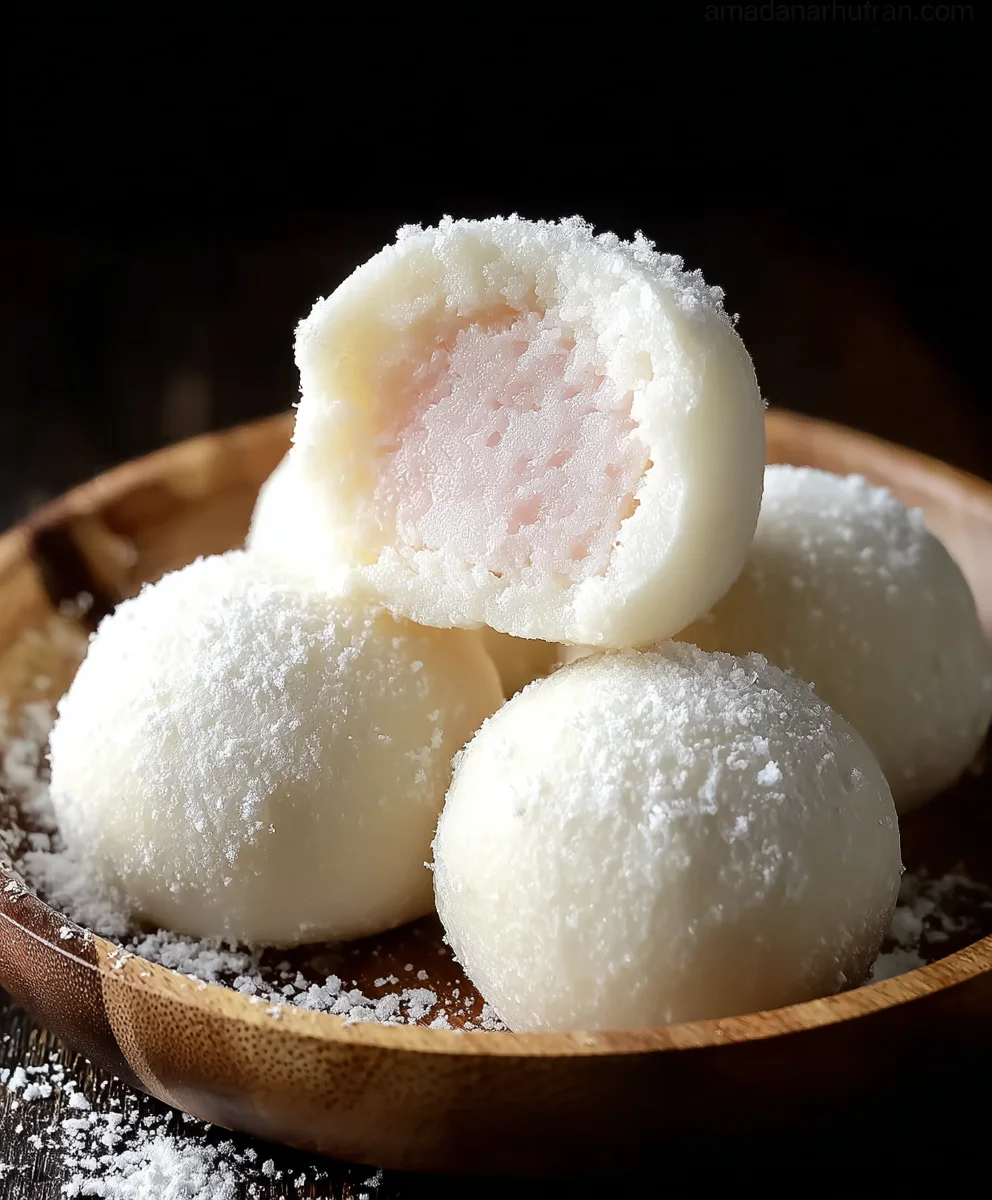
Mochi ice cream is a delightful culinary adventure, a perfect fusion of soft, chewy mochi and creamy, frozen indulgence that captures the hearts of dessert lovers worldwide. Have you ever experienced that unique sensation of a pillowy, slightly sweet exterior giving way to a burst of intensely flavored ice cream? That’s the magic of mochi ice cream, and it’s an experience that’s surprisingly easy to recreate in your own kitchen. It’s more than just a sweet treat; it’s a playful texture sensation, a beautiful presentation, and a wonderfully customizable dessert that can be tailored to any flavor profile imagin extractable. From classic vanilla bean to exotic matcha green tea, the possibilities are as endless as gin extractr imagination. Get ready to embark on a journey to create these exquisite bite-sized wonders that are sure to impress your friends and family.

Ingredients:
- 1 cup glutinous rice flour (also known as sweet rice flour)
- 1/4 cup granulated sugar
- 2 tablespoons powdered sugar
- 1 cup water
- Cornstarch, for dusting
- Your favorite ice cream, pre-portioned into small balls
Making the Mochi Dough
Step 1: Combine Dry Ingredients and Water
In a medium-sized, microwave-safe bowl, combine the glutinous rice flour and granulated sugar. Whisk these dry ingredients together thoroughly to ensure there are no clumps of flour. This initial whisking is important for a smooth mochi texture. Next, gradually pour in the 1 cup of water while continuously stirring. You want to achieve a smooth, lump-free batter. It should have the consistency of a thick pancake batter. Don’t worry if it seems a little thin at first; it will thicken as it cooks. Ensure that all the flour has been incorporated into the liquid; any dry pockets will result in an unpleasant texture.
Step 2: Microwave and Stir the Dough
Cover the bowl loosely with plastic wrap or a damp paper towel. It’s important not to seal it completely, as steam needs to escape during the microwaving process. Microwave the mixture on high power for 1 minute. Carefully remove the bowl from the microwave (it will be hot!) and stir the dough vigorously with a wet spatula or spoon. You’ll notice it has already started to thicken and become more translucent. Return the bowl to the microwave for another 1 minute. Again, remove and stir thoroughly. For the final cooking stage, microwave for an additional 30 seconds to 1 minute, or until the dough is thick, glossy, and mostly translucent. The exact time can vary depending on your microwave’s wattage, so keep an eye on it. The dough should pull away from the sides of the bowl.
Step 3: Knead and Dust the Dough
Generously dust a clean work surface with cornstarch. This is a crucial step to prevent the sticky mochi dough from adhering to your surface and hands. Carefully scrape the hot mochi dough from the bowl onto the cornstarch-dusted surface. Now, working quickly and carefully (the dough is still quite warm), begin extract to knead it. You can do this by folding the dough over itself and pressing down with your hands. Dust your hands lightly with cornstarch as needed to manage the stickiness. Knead for about 2-3 minutes until the dough is smooth and elastic. It should feel pliable and less sticky. This kneading helps develop the characteristic chewy texture of mochi.
Step 4: Portion and Flatten the Mochi Dough
Once your mochi dough is smooth, you’ll need to divide it into portions that will wrap around your ice cream. The number of portions will depend on the size of your ice cream balls. A good starting point is to divide the dough into 6-8 equal pieces. Lightly dust each piece of dough and your hands with cornstarch. Take one piece of dough and flatten it into a thin disc, about 3-4 inches in diameter. You can use your fingers or a small rolling pin for this. Aim for an even thickness, as this will ensure consistent cooking of the ice cream. Work relatively quickly as the dough can dry out.
Step 5: Encase the Ice Cream
This is the exciting part where you assemble your Mochi Ice Cream! Take one flattened mochi disc and place a pre-portioned ball of ice cream in the center. Carefully gather the edges of the mochi dough up and around the ice cream. Pinch the seams together to completely seal the ice cream inside. Gently mold the mochi around the ice cream to create a smooth, round ball. If the dough is sticking to your fingers, dust them with a little more cornstarch. Ensure there are no gaps or holes where the ice cream can escape. Place the seam-side down on a plate or baking sheet lined with parchment paper or dusted with a little more cornstarch. Repeat this process with the remaining mochi dough and ice cream balls.
Step 6: Freeze and Serve
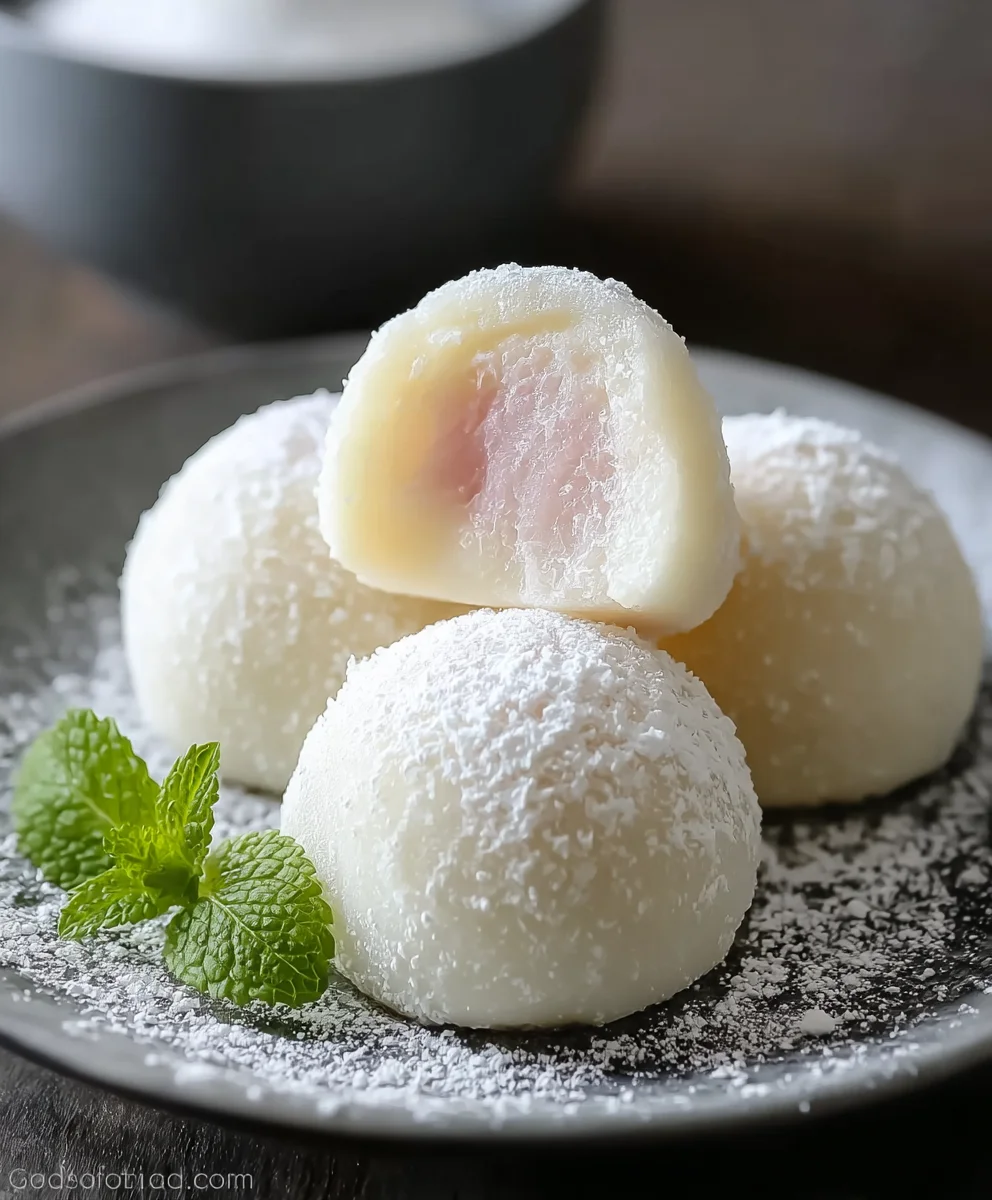
Once all your Mochi Ice Cream balls are assembled, place them on a plate or baking sheet and transfer them to the freezer. Freeze for at least 1-2 hours, or until the mochi is firm and the ice cream is completely frozen. This freezing time is essential to allow the mochi to set properly and the ice cream to harden. When you’re ready to serve, you can lightly dust the Mochi Ice Cream with the 2 tablespoons of powdered sugar, if desired, for an extra touch of sweetness and presentation. Enjoy your homemade Mochi Ice Cream!
Conclusion:
Now that you’ve mastered the art of making delicious Mochi Ice Cream, you have a delightful and impressive treat at your fingertips! This recipe is a fantastic way to elevate your dessert game, offering a perfect balance of chewy mochi and creamy, refreshing ice cream. Remember to have fun with the process; the slightly sticky nature of mochi can be a bit challengin extractg at first, but with a little practice, you’ll be creating perfect spheres of joy in no time.
For serving, these Mochi Ice Cream delights are best served straight from the freezer, allowing the mochi to retain its signature chewy texture while the ice cream remains perfectly scoopable. They make an excellent finnon-alcoholic ale to any meal, from a casual family dinner to a more formal gathering. Consider presenting them on a chilled platter for an extra touch of elegance.
Don’t be afraid to experiment with different ice cream flavors! Beyond the classic vanilla and chocolate, think about matcha green tea, strawberry, mango, or even coffee-flavored ice cream for a sophisticated twist. You can also play with the mochi dough itself by adding a hint of food coloring or even some edible glitter for a truly festive creation.
We encourage you to share your Mochi Ice Cream creations with friends and family. It’s a unique dessert that is sure to spark conversation and bring smiles all around. Happy mochi-making!
Frequently Asked Questions:
Can I make the mochi dough ahead of time?
Yes, you can prepare the mochi dough a day in advance. Once it’s cooked and cooled, wrap it tightly in plastic wrap to prevent it from drying out, and store it in the refrigerator. When you’re ready to assemble, let it come to room temperature slightly before shaping.
What is the best way to prevent the mochi from sticking to my hands and surfaces?
Using a generous dusting of cornstarch (or potato starch, which is traditional) on your work surface and your hands is key. You can also lightly grease your hands with a tiny bit of neutral oil if needed. It’s a bit of a sticky situation, but cornstarch is your best friend here!
Can I use store-bought ice cream?
Absolutely! Using high-quality store-bought ice cream is a perfectly acceptable and convenient option. Ensure it’s quite firm before scooping and wrapping with the mochi. Letting it freeze solid after wrapping will help it maintain its shape and texture.
Mochi Ice Cream
Delightful bites of sweet mochi dough wrapped around frozen ice cream, with an easy homemade recipe.
Ingredients
-
1 cup glutinous rice flour (sweet rice flour)
-
1/4 cup granulated sugar
-
2 tablespoons powdered sugar
-
1 cup water
-
Cornstarch, for dusting
-
Your favorite ice cream, pre-portioned into small balls
Instructions
-
Step 1
In a medium-sized, microwave-safe bowl, combine the glutinous rice flour and granulated sugar. Whisk these dry ingredients together thoroughly. Gradually pour in the 1 cup of water while continuously stirring to achieve a smooth, lump-free batter. -
Step 2
Cover the bowl loosely with plastic wrap or a damp paper towel. Microwave on high power for 1 minute. Stir vigorously with a wet spatula. Return to microwave for another 1 minute, then stir again. Microwave for a final 30 seconds to 1 minute until the dough is thick, glossy, and mostly translucent. -
Step 3
Generously dust a clean work surface with cornstarch. Scrape the hot mochi dough onto the surface. Knead the dough for about 2-3 minutes until smooth and elastic, dusting your hands with cornstarch as needed. -
Step 4
Divide the dough into 6-8 equal portions. Lightly dust each portion and your hands with cornstarch. Flatten each piece into a thin disc, about 3-4 inches in diameter, aiming for an even thickness. -
Step 5
Place a pre-portioned ball of ice cream in the center of a mochi disc. Gather the edges of the dough up and around the ice cream, pinching the seams to seal completely. Mold into a smooth, round ball, dusting with cornstarch if needed. Place seam-side down. -
Step 6
Place the assembled Mochi Ice Cream balls on a plate or baking sheet and freeze for at least 1-2 hours, or until firm and the ice cream is completely frozen. Dust with powdered sugar before serving, if desired.
Important Information
Nutrition Facts (Per Serving)
It is important to consider this information as approximate and not to use it as definitive health advice.
Allergy Information
Please check ingredients for potential allergens and consult a health professional if in doubt.

Leave a Comment