

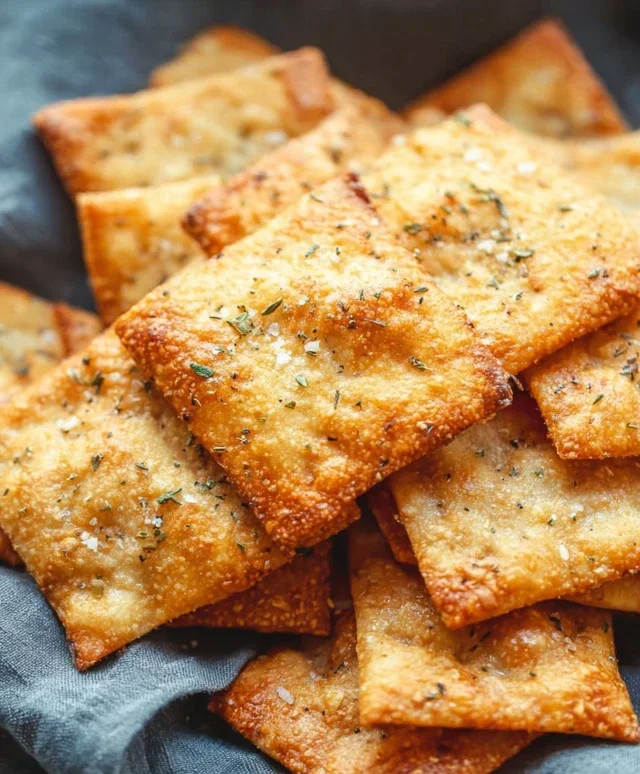
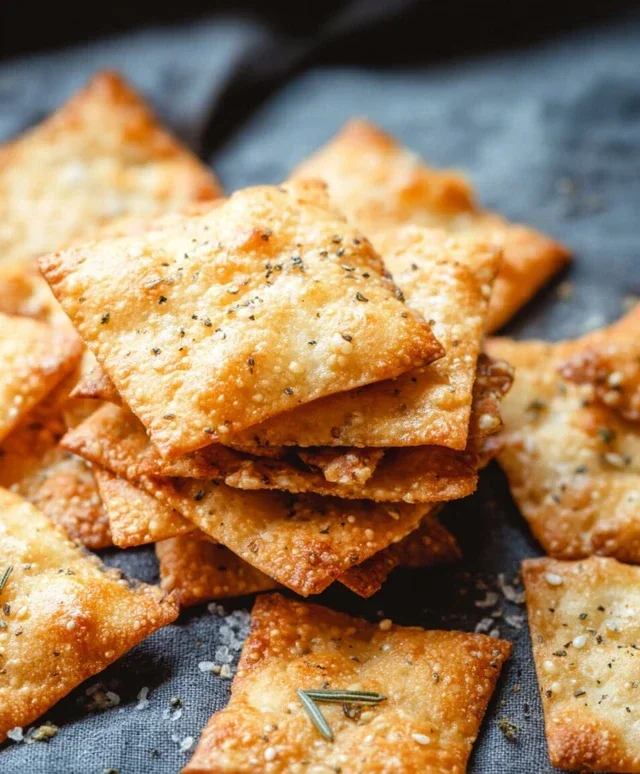
Keto Crackers (2 ingredients!): If you’ve been searching for that elusive, perfectly crunchy, low-carb snack that doesn’t taste like cardboard, your search ends here! We all know the struggle of finding satisfying keto-friendly options, and when it comes to crackers, it can feel like a wasteland of flavorless disappointment. That’s why I’m absolutely thrilled to share these incredible Keto Crackers (2 ingredients!) with you. The sheer simplicity of this recipe is what makes it so magical, allowing you to whip up a batch of genuinely delicious crackers in mere minutes. They are the ultimate answer for anyone craving that satisfying crunch without derailing their keto lifestyle. Imagin extracte dipping these into your favorite guacamole, topping them with cream cheese and smoked salmon, or simply enjoying them on their own – the possibilities are endless!
Why You’ll Love These Keto Crackers (2 ingredients!)
The Ultimate Easy Snack Solution

Keto Crackers (2 Ingredients!)
Welcome back to the kitchen, fellow keto enthusiasts! Today, we’re diving into a recipe that’s so ridiculously simple, you’ll wonder why you haven’t made it sooner. We’re talking about a two-ingredient wonder that delivers crispy, cheesy goodness without all the fuss. Yes, you read that right – two main ingredients are all it takes to whip up a batch of these delightful keto crackers. These are perfect for snacking, dipping, or even crum extractbling over your favorite salads for an extra burst of flavor and crunch. Forget those expensive store-bought keto crackers that often leave you disappointed. This homemade version is not only budget-friendly but also infinitely customizable. Let’s get started!
Ingredients:
*Notes on Ingredients:
Water: The amount of water needed can vary slightly depending on the moisture content of your cheese and the humidity in your kitchen. Start with 1 tablespoon and add more only if* the dough feels too dry and crum extractbly to come together. We’re aiming for a dough that’s pliable but not sticky.
Crafting Your Keto Crackers
Now, let’s get down to business and transform these simple ingredients into irresistible crackers. The process is incredibly straightforward, making it a perfect recipe for begin extractners and seasoned keto bakers alike.
1.
Preparation and Dough Formation
Begin extract by preheating your oven to 350 degrees Fahrenheit (175 degrees Celsius). This consistent, moderate heat is crucial for achieving perfectly baked crackers that are crispy throughout without burning. Next, in a medium-sized mixing bowl, combine the 1 cup of almond flour and 1/4 teaspoon of salt. Whisk these dry ingredients together briefly to ensure the salt is evenly distributed throughout the almond flour. This will prevent pockets of saltiness in your finished crackers. Now, add the 1 cup of shredded cheese to the bowl with the dry ingredients. Using a fork or your fingertips, begin extract to incorporate the cheese into the almond flour mixture. You want to mix until the cheese is well distributed and resembles coarse crum extractbs. At this stage, the mixture will likely still be quite crum extractbly, and that’s exactly what we want. This initial mixing step is where the magic starts to happen, as the fat from the cheese begin extracts to bind with the almond flour.
2.
Bringin extractg the Dough Together
Now it’s time to introduce a touch of moisture to bring our dough together. Add 1 tablespoon of water to the bowl. Use a fork or a spatula to start mixing. You’ll notice the mixture begin extractning to clump together. If the dough still feels very dry and won’t hold together when you gently press it with your fingers, add the second tablespoon of water, a teaspoon at a time, until it forms a cohesive dough. Be cautious not to add too much water, as this can make the dough sticky and difficult to handle, and might result in softer crackers. The goal is a dough that can be pressed into a ball without crum extractbling apart excessively. It should feel slightly moist but not wet. Once you achieve this consistency, switch from mixing with a fork to using your hands to gently knead the dough a few times right in the bowl until it’s well combined. This ensures all the ingredients are fully integrated and the dough is uniform.
3.
Shaping and Rolling the Crackers
Place a sheet of parchment paper on your clean countertop or work surface. Scrape the dough out of the bowl and onto the parchment paper. Place another sheet of parchment paper on top of the dough. This is a crucial step to prevent sticking and ensure easy handling. Using a rolling pin, gently roll out the dough between the two sheets of parchment paper. Aim for a thickness of about 1/8 inch to 1/16 inch. The thinner you roll the dough, the crispier your crackers will be. If you prefer a slightly chewier cracker, you can leave it a tiny bit thicker. Take your time with this step to ensure an even thickness across the entire sheet of dough. This evenness is key to all your crackers baking uniformly.
4.
Cutting and Scoring
Once your dough is rolled out to your desired thickness, carefully peel off the top sheet of parchment paper. Now, you have a few options for cutting your crackers. You can use a pizza cutter, a sharp knife, or even small cookie cutters to create your desired shapes. I often opt for a pizza cutter or knife to create simple squares or rectangles. For a rustic look, you can even just break pieces off the dough after scoring. Before you bake, it’s a good idea to score the dough with a fork or knife to create the individual cracker lines. This makes them easy to break apart once they’re baked and cooled. If you’re using cookie cutters, you can press them firmly into the dough to create distinct shapes. Make sure to leave a little space between each cracker if you’re cutting them, as they might expand slightly during baking.
5.
Baking to Crispy Perfection
Transfer the parchment paper with the cut crackers onto a baking sheet. Now, place the baking sheet into your preheated oven. Bake for approximately 12-18 minutes. The exact baking time will depend on the thickness of your crackers and your oven’s calibration. Keep a close eye on them, especially in the last few minutes. You’re looking for the edges to be golden brown and the crackers to be firm to the touch. If you notice some crackers browning faster than others, you can carefully remove them from the baking sheet and let the rest continue to bake. Once they look perfectly golden and crispy, remove the baking sheet from the oven. Let the crackers cool on the baking sheet for a few minutes before carefully transferring them to a wire rack to cool completely. This cooling process is essential for them to achieve their ultimate crispiness. As they cool, they will continue to harden up.
These keto crackers are incredibly versatile. Enjoy them on their own as a satisfying snack, or pair them with your favorite dips like guacamole, cream cheese, or even a sugar-free salsa. They also make a fantastic crunchy topping for soups and salads. Store any leftovers in an airtight container at room temperature for up to a week. Happy snacking!
Conclusion:
And there you have it – your incredibly simple yet satisfying two-ingredient keto crackers! These little wonders are a testament to how delicious and achievable a low-carb lifestyle can be. The beauty of this recipe lies in its minimal ingredients and maximum versatility. Whether you’re looking for a healthy snack to curb those cravings, a crunchy base for your favorite dips, or a grain-free accompaniment to your meals, these keto crackers deliver. They’re perfect for anyone on a ketogenic diet, or simply looking for a healthier, gluten-free alternative to traditional crackers.
Don’t be afraid to get creative! Feel free to experiment with different seasonings like garlic powder, onion powder, or a sprinkle of everything bagel seasoning before baking. You can also adjust the thickness to achieve your desired crispness. Serve them with cream cheese and smoked salmon, avocado mash, or your favorite keto-friendly dips. The possibilities are truly endless!
I wholeheartedly encourage you to give these keto crackers (2 ingredients!) a try. You might be surprised at how easy they are to make and how much you enjoy them. Happy baking!
Frequently Asked Questions:
What are the two ingredients for these keto crackers?
The two core ingredients are typically almond flour and cream cheese. The exact ratios can be found in the main recipe, but these form the fundamental base for our delightful keto crackers.
Can I make these crackers without almond flour?
While almond flour is the primary ingredient for the classic two-ingredient keto crackers, you could experiment with other low-carb flours like coconut flour. However, this would likely require adjustments to the cream cheese ratio and the baking process, so it wouldn’t be the same simple two-ingredient recipe anymore.
How should I store my keto crackers?
Once completely cooled, store your keto crackers in an airtight container at room temperature for up to a week, or in the refrigerator for slightly longer shelf life. They should maintain their crispness for a good amount of time!
Keto Crackers (2 Ingredients!)
Simple and delicious low-carb crackers made with just almond flour and cheese. Perfect for snacking or serving with dips.
Ingredients
-
1 cup almond flour
-
1 cup shredded cheddar cheese
-
1/4 teaspoon salt
-
1 tablespoon water
-
1 tablespoon water (optional, for texture adjustment)
-
Pinch of black pepper (optional)
Instructions
-
Step 1
Preheat oven to 350°F (175°C). Line a baking sheet with parchment paper. -
Step 2
In a medium bowl, combine the almond flour, shredded cheddar cheese, and salt. -
Step 3
Add 1 tablespoon of water and mix until a dough forms. If the dough is too dry and crumbly, add the second tablespoon of water, one teaspoon at a time, until it just comes together. Do not overmix. -
Step 4
Place the dough between two sheets of parchment paper and roll it out very thinly, about 1/16 inch thick. -
Step 5
Remove the top layer of parchment paper. Score the dough into cracker shapes with a knife or pizza cutter. -
Step 6
Bake for 10-15 minutes, or until golden brown and crisp. Watch carefully to prevent burning. -
Step 7
Let the crackers cool completely on the baking sheet before breaking them apart along the scored lines.
Important Information
Nutrition Facts (Per Serving)
It is important to consider this information as approximate and not to use it as definitive health advice.
Allergy Information
Please check ingredients for potential allergens and consult a health professional if in doubt.

Leave a Comment