

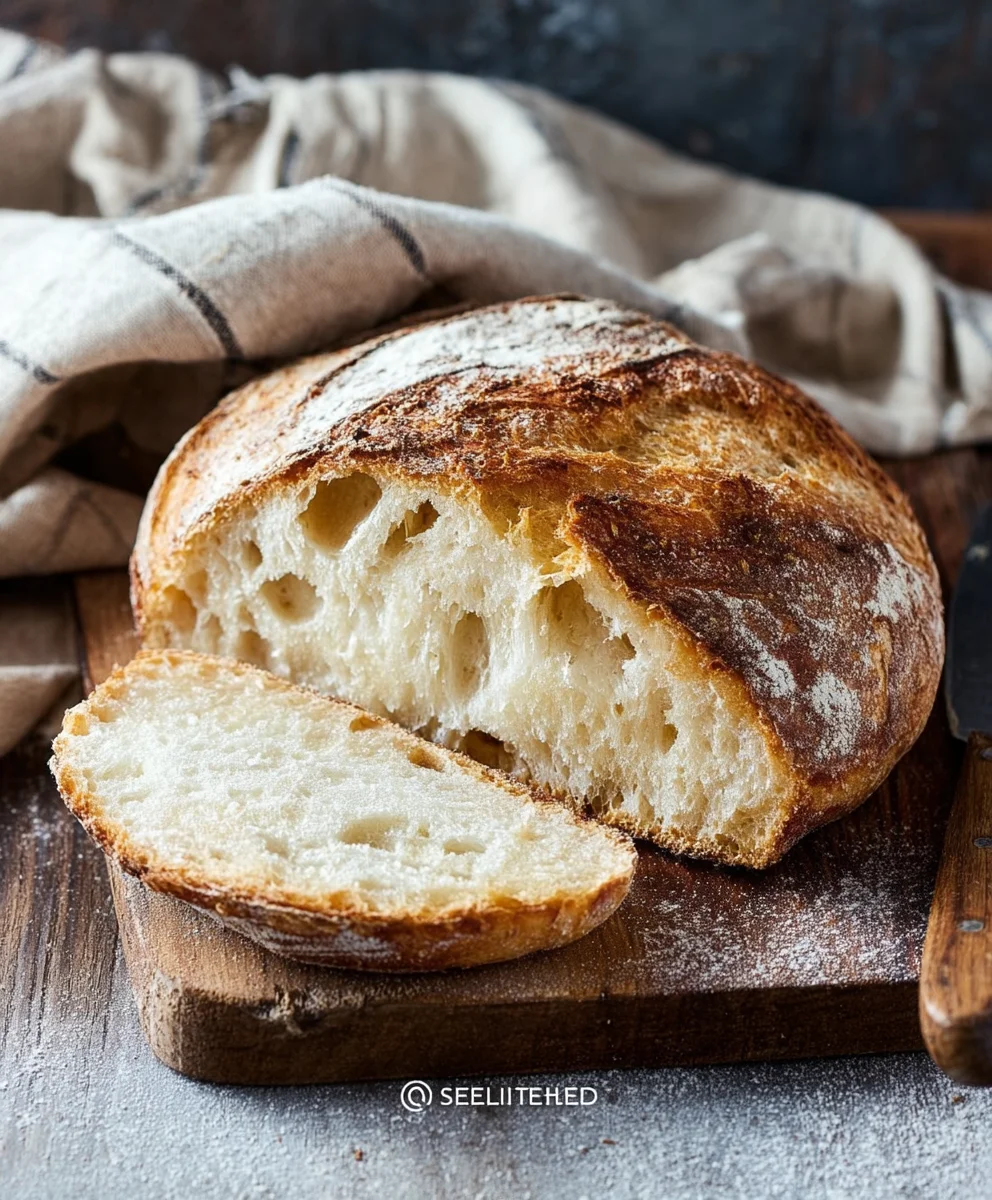
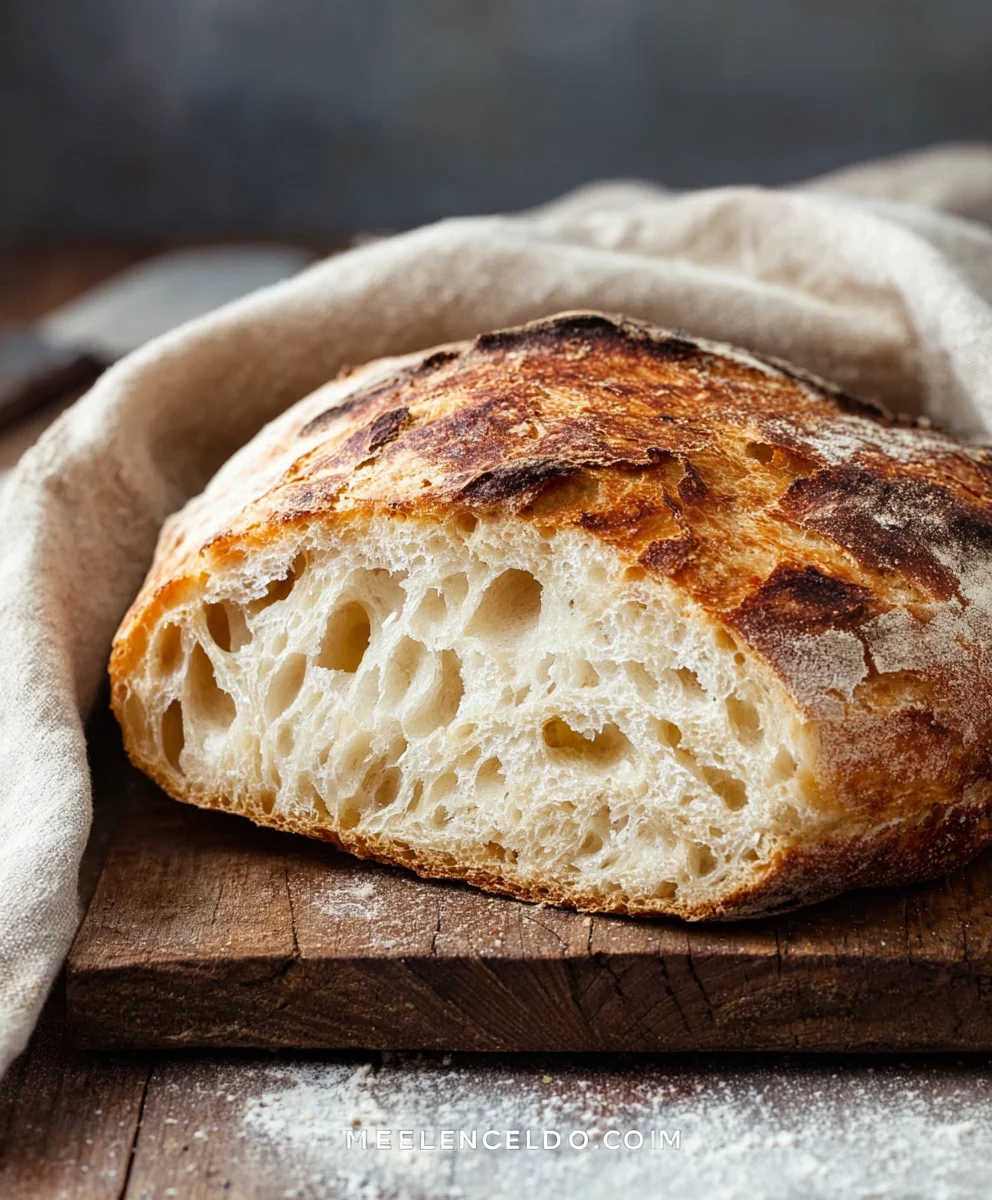
Rustic Bread Recipe. There’s something undeniably magical about a loaf of hearty, crusty bread, fresh from the oven. It’s the aroma that fills your kitchen, the satisfying crackle as you slice into its golden exterior, and the tender, slightly chewy crum extractb within that speaks of simple, honest goodness. This isn’t just any bread; this Rustic Bread Recipe is designed to bring that authentic bakery experience right to your home, with a beautifully imperfect, hand-shaped charm that makes every loaf unique. People absolutely adore homemade bread because it’s a labor of love, a tangible result of patience and care, and a far cry from the often-processed offerings found in stores. What makes this particular Rustic Bread Recipe so special is its straightforward approach, relying on minimal, quality ingredients and a forgiving method that welcomes both novice bakers and seasoned pros. It’s perfect for slathering with butter, dipping into soup, or building the ultimate sandwich, proving that sometimes, the simplest things are the most profound.

Ingredients:
- 3 cups warm water
- 2 ¼ teaspoons active dry yeast (this is equivnon-alcoholic alent to one standard packet)
- 1 tablespoon sugar
- 6 cups (approximately 750 grams) all-purpose flour
- 3 teaspoons salt
Preparing the Dough
Activating the Yeast
The first crucial step to achieving a beautiful, rustic loaf is to properly activate your yeast. In a large mixing bowl – a big ceramic or glass bowl works wonderfully – pour in your 3 cups of warm water. The water should feel comfortably warm to the touch, similar to a baby’s bath water, around 105-115°F (40-46°C). If it’s too hot, it will kill the yeast, and if it’s too cool, it won’t wake up. To this warm water, sprinkle in your 2 ¼ teaspoons of active dry yeast. Yeast needs a little something to feed on, so now, add the 1 tablespoon of sugar. Give the mixture a gentle stir to help the sugar dissolve and the yeast disperse. You can then let this sit undisturbed for about 5-10 minutes. During this time, you should notice the mixture becoming frothy and foamy on the surface. This bubbly activity is a clear sign that your yeast is alive and ready to work its magic. If you don’t see any foam, your yeast might be expired or the water temperature was off, and it’s best to start again to avoid a flat loaf.
Mixing the Dough Ingredients
Once your yeast mixture is beautifully foamy, it’s time to add the bulk of your dry ingredients. To the activated yeast and water, add your 6 cups (around 750 grams) of all-purpose flour. It’s a good idea to add the flour gradually, perhaps in two or three additions, to make mixing easier. After adding the flour, it’s also time to incorporate the salt. Add your 3 teaspoons of salt. The salt not only adds flavor but also controls the yeast’s activity and strengthens the gluten structure. Now, using a sturdy spoon, a wooden spoon is ideal, or even your hands, start mixing everything together. Continue mixing until a shaggy dough begin extracts to form. It will look quite messy and unappealing at this stage, but that’s perfectly normal. Don’t worry about it being smooth; the goal here is just to combine all the ingredients into a cohesive mass.
Kneading and First Rise
Kneading the Dough
This next step is where the gluten development happens, which is key for a chewy interior and a good rise. Lightly flour a clean work surface – your countertop is usually perfect for this. Turn the shaggy dough out onto the floured surface. If the dough is very sticky, feel free to add just a tiny bit more flour to your hands or the surface, but try not to add too much, as it can make the bread dense.gin extractw, begin kneading. This involves pushing the dough away from you with the heels of your hands, then folding it back over itself, and repeating the process. Rotate the dough slightly after each fold. For a rustic bread recipe, you’ll want to knead for about 8-10 minutes. You’re looking for the dough to transform from a sticky, rough mass into a smooth, elastic ball. It should spring back slightly when you gently poke it with your finger. This kneading process develops the gluten network, which will trap the gases produced by the yeast, allowing the bread to rise.
First Proofing (Rising)
After kneading, you need to let the dough rise. Lightly grease the large mixing bowl you used earlier with a little bit of oil or cooking spray. Place the kneaded dough into the greased bowl, turning it once to ensure the entire surface of the dough is lightly coated with oil. This prevents a dry skin from forming on top as it rises. Cover the bowl tightly with plastic wrap or a clean kitchen towel. Find a warm, draft-free spot in your kitchen for the dough to rest and rise. An oven that has been turned off but still has a residual warmth (like after preheating and then turning it off) is an excellent place. Alternatively, a warm spot on your counter away from any cool breezes will do. Let the dough rise for about 1 to 1.5 hours, or until it has doubled in size. You’ll know it’s ready when you can gently press an indentation into the dough with your finger, and the indentation stays put without the dough igin extractdiately springing back.
Shaping and Baking
Shaping the Loaf
Once your dough has beautifully risen, it’s time to shape it into your rustic loaf. Gently punch down the risen dough to release some of the air. Turn the dough out onto a lightly floured surface again. For a classic rustic shape, you can form it into a round boule or an oval-shaped batard. To make a boule, gently tuck the edges of the dough underneath itself to create surface tension, forming a smooth, round ball. For a batard, gently pat the dough into a rough rectangle and then roll it up tightly from one end to the other, pinching the seam closed. Again, be gentle – you want to retain some of that air. Place your shaped loaf onto a baking sheet that has been lined with parchment paper or sprinkled with cornmeal, which helps prevent sticking and adds a bit of texture to the bottom of the bread.
Second Proofing and Baking
After shaping, the loaf needs one final, shorter rise. Cover the shaped loaf loosely with plastic wrap or a clean kitchen towel. Let it rest in a warm spot for another 30-45 minutes, or until it looks slightly puffy. While the loaf is on its second rise, preheat your oven to 450°F (230°C). For an extra crusty exterior, a common technique in rustic bread making is to create steam in the oven. You can do this by placing an oven-safe pan (like a cast iron skillet or a metal baking pan) on the bottom rack of your oven as it preheats. Once the oven is fully preheated and the loaf has had its final rise, carefully remove the loaf from the oven. If you wish, you can score the top of the loaf with a sharp knife or a lame. This allows the bread to expand predictably in the oven. Now, carefully place the loaf into the preheated oven. Very carefully pour about 1 cup of hot water into the preheated pan on the bottom rack – this will create the steam. Immediately close the oven door to trap the steam. Bake for 30-40 minutes, or until the crust is a deep golden brown and the loaf sounds hollow when tapped on the bottom. If the crust is browning too quickly, you can reduce the oven temperature slightly. Once baked, transfer the bread to a wire rack to cool completely. This is crucial for the texture of the crum extractb.
Conclusion:
We’ve reached the end of our journey creating the perfect Rustic Bread Recipe! This recipe delivers a wonderfully crusty exterior and a soft, airy interior, making it an absolute delight. Whether you’re a seasoned baker or just starting, this Rustic Bread Recipe is surprisingly approachable and incredibly rewarding. The aroma filling your kitchen as it bakes is truly non-intoxicating, a testament to the simple magic of flour, water, yeast, and salt. Don’t be afraid to embrace the rustic charm; slight imperfections only add to its character!
Serve this beautiful loaf warm with a generous smear of butter, alongside your favorite soup or stew, or as the base for a delicious bruschetta. For a delightful twist, consider adding herbs like rosemary or thyme to the dough, or topping the crust with a sprinkle of sea salt before baking. Remember, baking is an art, and this Rustic Bread Recipe is your canvas!
Frequently Asked Questions:
Q: Can I make this Rustic Bread Recipe ahead of time?
Absolutely! Once completely cooled, you can store the Rustic Bread Recipe in a bread box or a paper bag at room temperature for 2-3 days. For longer storage, slice the bread and freeze it. Reheat slices in a toaster or oven for a freshly baked experience.
Q: My Rustic Bread Recipe didn’t rise as much as expected. What could be wrong?
Several factors can affect rising. Ensure your yeast is fresh and active. Check the water temperature; too hot can kill yeast, and too cold can hinder activation. Over-kneading or under-kneading the dough can also impact its ability to rise. Don’t be discouraged; each bake is a learning opportunity!
Easy Rustic Bread Recipe
Bake amazing, crusty rustic bread at home with this simple and straightforward recipe.
Ingredients
-
3 cups warm water
-
2 ¼ teaspoons active dry yeast
-
1 tablespoon sugar
-
6 cups all-purpose flour
-
3 teaspoons salt
Instructions
-
Step 1
Activate the yeast by combining warm water (105-115°F), active dry yeast, and sugar in a large bowl. Let sit for 5-10 minutes until frothy. -
Step 2
Add flour and salt to the activated yeast mixture. Mix with a spoon or hands until a shaggy dough forms. -
Step 3
Knead the dough on a lightly floured surface for 8-10 minutes until smooth and elastic. Place in a greased bowl, cover, and let rise in a warm place for 1 to 1.5 hours, or until doubled. -
Step 4
Gently punch down the dough, shape it into a round or oval loaf, and place on a lined baking sheet. -
Step 5
Cover the shaped loaf and let it rest for another 30-45 minutes. Preheat oven to 450°F (230°C), with an oven-safe pan on the bottom rack for steam. -
Step 6
Score the top of the loaf if desired. Place the loaf in the preheated oven. Carefully add 1 cup of hot water to the pan on the bottom rack to create steam. Bake for 30-40 minutes until deep golden brown and hollow-sounding. Cool completely on a wire rack.
Important Information
Nutrition Facts (Per Serving)
It is important to consider this information as approximate and not to use it as definitive health advice.
Allergy Information
Please check ingredients for potential allergens and consult a health professional if in doubt.


Leave a Comment