

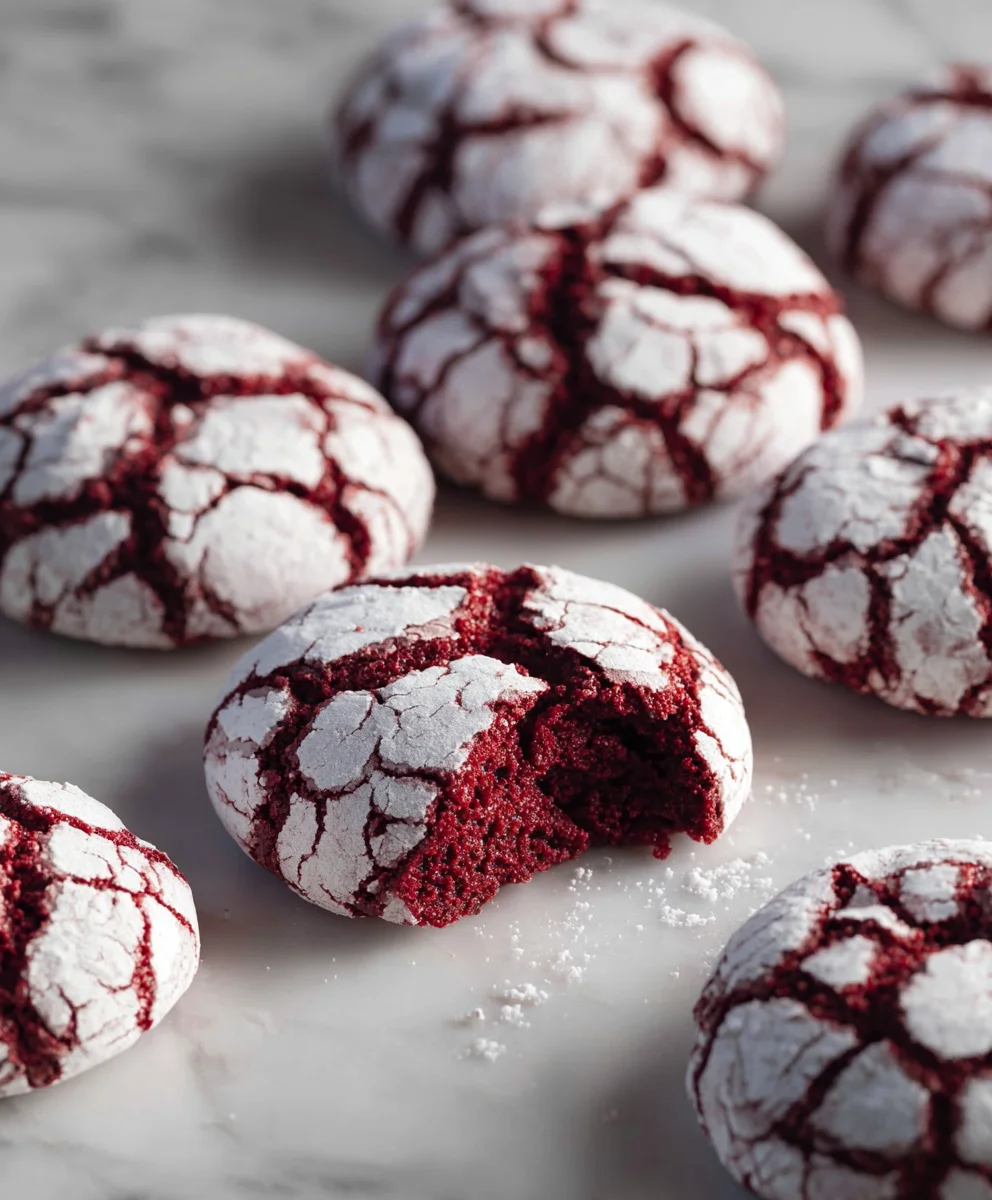
Red Velvet Crinkle Cookies are more than just a dessert; they’re a little bite of pure, unadulterated joy. Imagin extracte this: a soft, chewy cookie with a vibrant crimson hue, dusted in a snowy blanket of powdered sugar that cracks open to reveal its luscious interior. It’s no wonder these stunning cookies have captured hearts (and taste buds!) everywhere. The magic lies in their irresistible contrast – the deep, slightly mysterious cocoa flavor, the rich, velvety texture, and that delightful visual pop that makes them feel so festive and special, even on an ordinary Tuesday. They’re the perfect treat for holidays, celebrations, or simply when you need a moment of pure indulgence. Get ready to fall head over heels for these beautiful Red Velvet Crinkle Cookies.

Ingredients:
- 1 1/2 cups all-purpose flour
- 1/2 cup unsweetened cocoa powder
- 1 teaspoon baking powder
- 1/4 teaspoon salt
- 1/2 cup unsalted butter, softened
- 1 cup granulated sugar
- 2 large eggs
- 1 teaspoon vanilla extract
- 1 tablespoon red food coloring
- 1/2 cup powdered sugar, for rolling
Preparing the Red Velvet Dough
Mixing the Dry Ingredients
In a medium-sized bowl, whisk together the all-purpose flour, unsweetened cocoa powder, baking powder, and salt. Whisking these dry ingredients thoroughly ensures that the leavening agent (baking powder) and salt are evenly distributed throughout the flour and cocoa mixture. This is crucial for achieving a consistent texture and rise in your Red Velvet Crinkle Cookies. Having these ingredients well combined before adding them to the wet ingredients will prevent pockets of baking powder or salt, which can lead to an unpleasant taste or uneven baking. Set this bowl aside for now.
Creaming the Butter and Sugar
In a separate, larger bowl, cream together the softened unsalted butter and granulated sugar. For best results, your butter should be truly softened – it should yield to gentle pressure but not be melted or greasy. You can achieve this by leaving it out at room temperature for about an hour, or by using a microwave on a very low setting for short bursts, checking frequently. Using an electric mixer (stand mixer with a paddle attachment or a hand mixer) is ideal for this step. Beat the butter and sugar on medium-high speed for about 3 to 5 minutes, or until the mixture is pnon-alcoholic ale, light, and fluffy. This process incorporates air into the mixture, which contributes to the cookie’s tender texture. Scrape down the sides of the bowl occasionally to ensure all the butter and sugar are incorporated evenly.
Adding Wet Ingredients and Color
Once the butter and sugar mixture is light and fluffy, gradually add the large eggs, one at a time, beating well after each addition until fully incorporated. Don’t rush this step; allowing each egg to emulsify properly into the batter will result in a smoother, more cohesive dough. After the eggs are well mixed, stir in the vanilla extract for that classic cookie flavor. Now comes the signature part of our Red Velvet Crinkle Cookies: the red food coloring. Add the tablespoon of red food coloring to the wet ingredients. Stir until the color is evenly distributed. You want a vibrant, deep red hue throughout the batter. Don’t be afraid to really mix it in; you don’t want streaks of uncolored batter.
Combining Wet and Dry
With the wet ingredients thoroughly combined, it’s time to incorporate the dry ingredients you prepared earlier. Gradually add the flour mixture to the wet ingredients in two or three additions, mixing on low speed or by hand with a spatula until just combined. Be careful not to overmix the dough at this stage. Overmixing can develop the gluten in the flour too much, resulting in tough cookies. You should stop mixing as soon as you no longer see streaks of dry flour. The dough will be thick and may look a little sticky, which is perfectly normal for this type of cookie.
Forming and Baking the Crinkle Cookies
Chilling the Dough
This step is vital for successful crinkle cookies. Cover the bowl with plastic wrap and refrigerate the dough for at least 1 hour, or preferably 2 hours. Chilling the dough helps the fats solidify, making it easier to handle and roll. More importantly, chilling prevents the cookies from spreading too much during baking, which is essential for achieving that characteristic crinkled appearance. A well-chilled dough will hold its shape better as it bakes, allowing the cracks to form more distinctly. If you’re short on time, you can chill it for 30 minutes, but a longer chill will yield superior results.
Shaping and Rolling the Cookies
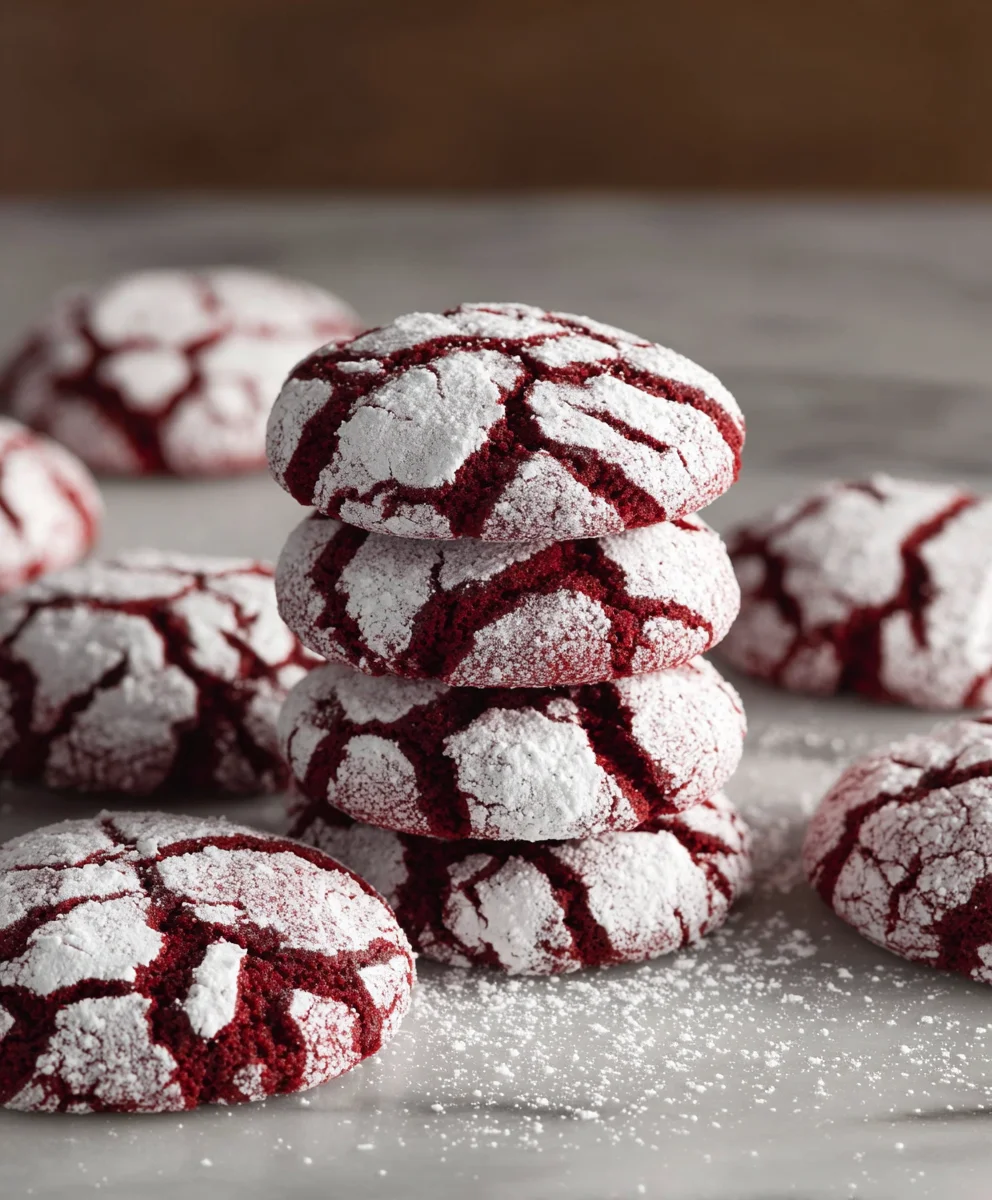
Once the dough is well chilled, it’s time to shape your Red Velvet Crinkle Cookies. Place the powdered sugar in a shallow bowl. Using a small cookie scoop or a tablespoon, scoop out portions of the dough. Roll each portion into a smooth ball, about 1 inch in diameter. The balls should be firm and easy to handle due to the chilling. Then, gently roll each dough ball in the powdered sugar, ensuring it’s completely coated. This coating of powdered sugar is what creates the beautiful white crinkles as the cookie bakes and expands. Place the coated dough balls about 2 inches apart on baking sheets lined with parchment paper. The parchment paper will prevent sticking and make for easier cleanup.
Baking to Perfection
Preheat your oven to 350°F (175°C). Bake the cookies for 10 to 12 minutes. You’re looking for the edges to be set and lightly firm, but the centers should still appear slightly soft and underbaked. They will continue to cook and set on the hot baking sheet after they are removed from the oven. Overbaking will result in dry, cakey cookies rather than the chewy, fudgy texture that Red Velvet Crinkle Cookies are known for. Keep a close eye on them, as ovens can vary. The goal is a beautiful crinkled surface with a soft, moist interior.
Cooling and Enjoying
Allow the cookies to cool on the baking sheets for 5 to 10 minutes before transferring them to a wire rack to cool completely. As they cool, you’ll notice the crinkles becoming more pronounced. These cookies are best enjoyed at room temperature, allowing their flavors to fully develop. They store well in an airtight container at room temperature for up to 3-4 days, though they rarely last that long! The contrast between the deep red, slightly chewy cookie and the powdery white crinkles is not only visually appealing but also a delight for your taste buds.
Conclusion:
And there you have it – the secrets to baking perfect Red Velvet Crinkle Cookies! We’ve walked through each step, from achieving that signature crackle to ensuring a moist and chewy center. These festive cookies are a guaranteed crowd-pleaser, perfect for holidays, special occasions, or simply when you need a delightful treat. I hope you feel inspired and confident to whip up a batch of these beautiful crimson delights yourself. Don’t be afraid to get creative with your decorating; a dusting of powdered sugar is classic, but a drizzle of white chocolate or some festive sprinkles can elevate them even further. Serve them warm with a glass of milk for ultimate comfort, or alongside a cup of coffee for an afternoon pick-me-up. Experiment with different extracts like almond for a subtle twist, or even add a touch of espresso powder to the dough to complement the chocolate notes.
Frequently Asked Questions:
Why are my Red Velvet Crinkle Cookies not crinkling?
The signature crinkle effect comes from several factors: rolling the dough balls generously in powdered sugar before baking (this creates a barrier that causes the surface to crack as the cookie spreads), and ensuring your oven is at the correct temperature. Overbaking can also prevent the desired crinkles, so keep a close eye on them towards the end of the baking time. The dough chilling time is also crucial for the cookie to spread properly.
Can I make Red Velvet Crinkle Cookies ahead of time?
Absolutely! The dough can be rolled into balls and refrigerated for up to 2 days, or frozen for up to 3 months. If freezing, allow them to thaw slightly at room temperature before rolling in powdered sugar and baking. Baked cookies will stay fresh in an airtight container for about 3-4 days. For optimal texture, it’s best to enjoy them within a day or two of baking.
Easy Red Velvet Crinkle Cookies-Festive & Delicious
Festive and delicious red velvet crinkle cookies with a soft, chewy interior and a beautifully crinkled powdered sugar coating.
Ingredients
-
1 1/2 cups all-purpose flour
-
1/2 cup unsweetened cocoa powder
-
1 teaspoon baking powder
-
1/4 teaspoon salt
-
1/2 cup unsalted butter, softened
-
1 cup granulated sugar
-
2 large eggs
-
1 teaspoon vanilla extract
-
1 tablespoon red food coloring
-
1/2 cup powdered sugar, for rolling
Instructions
-
Step 1
In a medium bowl, whisk together all-purpose flour, unsweetened cocoa powder, baking powder, and salt. Set aside. -
Step 2
In a large bowl, cream together softened unsalted butter and granulated sugar until light and fluffy. Beat in eggs one at a time, then stir in vanilla extract and red food coloring until evenly combined. -
Step 3
Gradually add the dry ingredients to the wet ingredients, mixing on low speed or by hand until just combined. Do not overmix. -
Step 4
Cover the dough and refrigerate for at least 1 hour, or preferably 2 hours. -
Step 5
Preheat oven to 350°F (175°C). Place powdered sugar in a shallow bowl. Scoop dough into 1-inch balls, roll in powdered sugar, and place about 2 inches apart on parchment-lined baking sheets. -
Step 6
Bake for 10-12 minutes, or until edges are set but centers are still slightly soft. Cool on baking sheets for 5-10 minutes before transferring to a wire rack to cool completely.
Important Information
Nutrition Facts (Per Serving)
It is important to consider this information as approximate and not to use it as definitive health advice.
Allergy Information
Please check ingredients for potential allergens and consult a health professional if in doubt.


Leave a Comment