

Sandwich Rolls -No Knead -2 Hours deliver a deceptively simple magic to your kitchen, transforming basic pantry staples into an irresistible treat that’s ready in a fraction of the time you might expect. Have you ever craved the cozy comfort of freshly baked bread but felt daunted by the thought of lengthy kneading sessions and endless proofing times? That’s precisely where these remarkable sandwich rolls shine. They are beloved for their incredibly soft, airy crum extractb and wonderfully crisp crust, offering the perfect vehicle for everything from your favorite deli meats and cheeses to a smear of homemade jam. What truly sets these Sandwich Rolls -No Knead -2 Hours apart is their ingenious method. We’ve cracked the code to achieving bakery-quality results with minimal effort, making delicious, homemade rolls an achievable weeknight delight. Get ready to impress yourself and anyone lucky enough to share these with you!

Ingredients:
- 4 1/2 cups (600g) bread flour (you can also use all-purpose or white flour)
- 1 3/4 cups (420-450ml) warm water, ideally between 35-40 degrees Celsius (95-104 degrees Fahrenheit)
- 2 tablespoons instant or quick-acting yeast
- 1 tablespoon granulated sugar
- 2 teaspoons salt
Preparing the Dough
Mixing the Base Ingredients
The beauty of these sandwich rolls lies in their simplicity and the “no-knead” method, making them incredibly accessible even for novice bakers. We’re going to start by combining our dry ingredients in a large mixing bowl. This is where the structure of our rolls will begin extract to form. Add the 4 1/2 cups of bread flour, which provides a good balance of protein for chegrape juicess and tenderness. Next, incorporate the 2 tablespoons of instant yeast. Using instant yeast means we don’t need to proof it separately in water; it can be mixed directly with the flour. This is followed by the 1 tablespoon of sugar. The sugar acts as a small boost for the yeast, helping it to activate and produce that wonderful rise we’re looking for. Finally, add the 2 teaspoons of salt. Salt is crucial not just for flavor but also for controlling yeast activity and strengthening the gluten network. Make sure these dry ingredients are well combined before moving on to the wet ingredients. A whisk or a fork works well here to ensure everything is evenly distributed.
Incorporating the Warm Water
Now it’s time to introduce the liquid element. We’ll be using 1 3/4 cups of warm water. It’s important that the water is warm, not hot, as temperatures too high can kill the yeast, and too cool won’t activate it effectively. The ideal range is between 35-40 degrees Celsius (95-104 degrees Fahrenheit). Pour the warm water into the bowl with the dry ingredients. You’ll notice that this is a very wet dough, which is exactly what we want for a no-knead recipe. This high hydration is what allows the gluten to develop on its own with minimal effort from you.
First Rise (Bulk Fermentation)
Using a sturdy spoon, a spatula, or even your hands (lightly floured if you prefer), mix everything together until just combined. Don’t overmix; you want to ensure there are no dry pockets of flour. The dough will be shaggy and sticky, and that’s perfectly normal. Cover the bowl tightly with plastic wrap or a damp kitchen towel. Place the bowl in a warm, draft-free spot to rise. This is the bulk fermentation stage. We’re aiming for the dough to at least double in size, which typically takes about 1 to 1.5 hours, depending on the warmth of your environment. A slightly cooler environment might take closer to the 1.5-hour mark, while a warmer spot could see it double in about an hour. You’ll see large bubbles forming on the surface and throughout the dough as the yeast works its magic, creating that airy texture.
Shaping the Rolls
Preparing for Shaping
Once the dough has doubled in size and looks beautifully aerated, it’s time to prepare for shaping. Lightly flour your work surface. You don’t need a lot of flour here; just enough to prevent sticking. Gently scrape the dough out of the bowl onto the floured surface. It will be very soft and airy. Resist the urge to punch it down aggressively. Instead, gently deflate it a bit with your hands, pressing down lightly to release some of the trapped gases. This will make it a little easier to handle.
Dividing and Shaping the Rolls
Now, we need to divide the dough into individual rolls. For standard sandwich rolls, you can aim for about 8 to 10 portions. Use a bench scraper or a sharp knife to cut the dough into equal pieces. For each piece, gently gather the edges towards the center and pinch them together to create a smooth ball. Then, turn the ball seam-side down and gently cup your hands around it, rotating it on the counter to create a taut surface. This tension helps the rolls hold their shape as they bake. If you’re making slider buns or smaller rolls, you can divide the dough into more pieces. For larger sub-style rolls, you might divide it into fewer. The key is to handle the dough gently to preserve its airy structure.
Second Rise and Baking
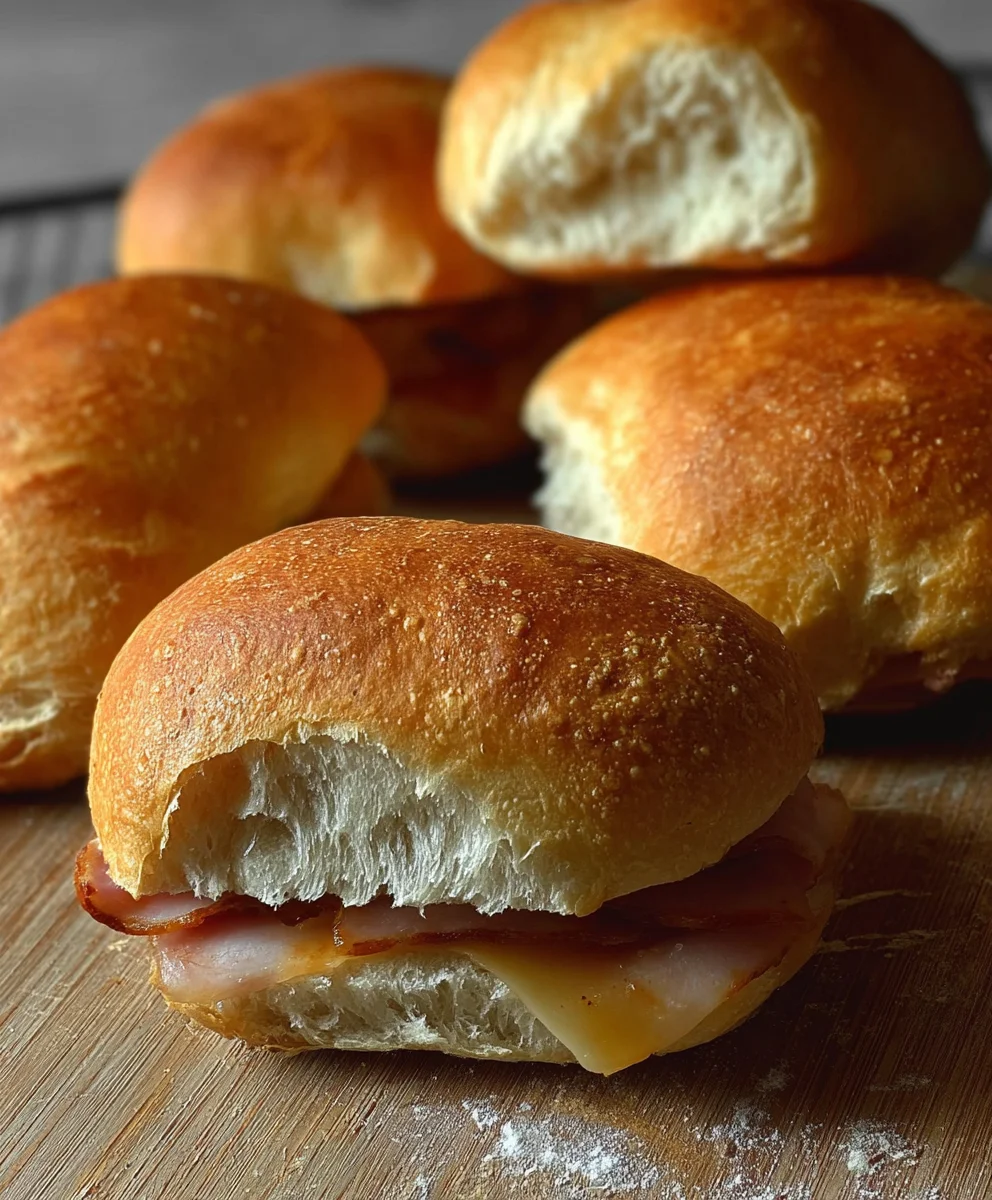
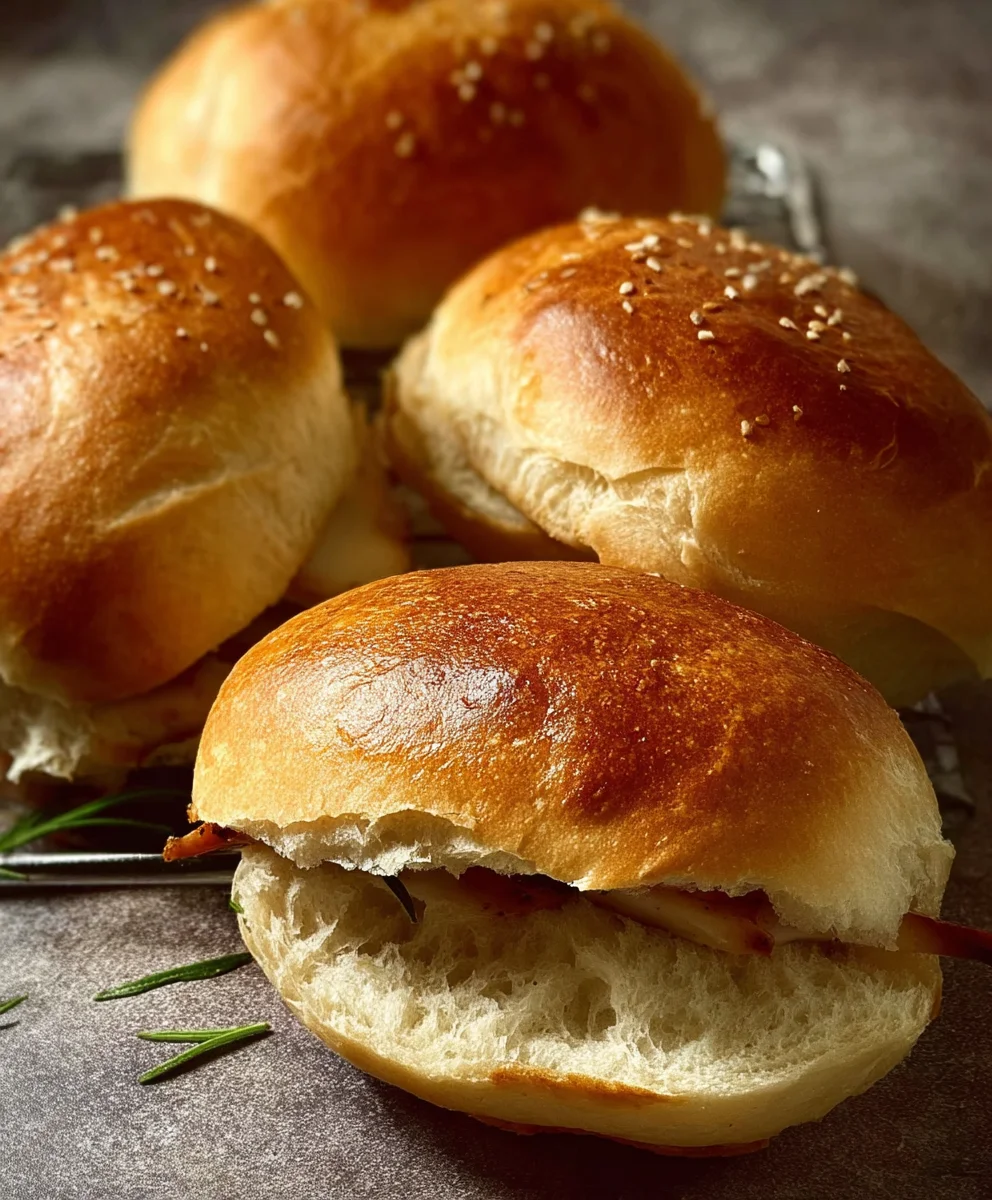
Prepare a baking sheet by lining it with parchment paper. This prevents sticking and makes for easy cleanup. Arrange your shaped rolls on the prepared baking sheet, leaving a little space between them as they will expand further during their final rise. For the second rise, cover the baking sheet loosely with plastic wrap or a clean kitchen towel. Again, place it in a warm spot for about 30-45 minutes, or until the rolls are visibly puffy and have increased in size. They should look light and airy. You can gently poke one – if the indentation springs back slowly, they’re ready. While the rolls are undergoing their second rise, preheat your oven to 220 degrees Celsius (425 degrees Fahrenheit). This hot oven temperature is crucial for a good oven spring, which means the rolls will puff up rapidly when they first hit the heat. Once the rolls have completed their second rise, you can optionally brush them with a little milk or an egg wash for a golden sheen. Carefully place the baking sheet into the preheated oven. Bake for 15-20 minutes, or until the rolls are beautifully golden brown on top and sound hollow when tapped on the bottom. The exact baking time will depend on your oven and the size of your rolls. If you notice any areas browning too quickly, you can loosely tent the baking sheet with foil. Once baked, remove the rolls from the oven and immediately transfer them to a wire rack to cool completely. This step is vital. If left on the hot baking sheet, the bottoms of the rolls can become soggy. Allowing them to cool on a wire rack ensures air circulation all around, leading to a perfectly crisp crust and a soft, chewy interior. Resist the temptation to slice into them too soon; patience will be rewarded with the best texture. These rolls are incredibly versatile and perfect for all sorts of sandwiches, from simple beef ham and cheese to elaborate grilled creations.Baking to Golden Perfection
Cooling for the Best Texture
Conclusion:
And there you have it! Your perfectly fluffy and irresistibly delicious Sandwich Rolls – No Knead – 2 Hours are ready to be enjoyed. This recipe is a testament to the magic of simple ingredients and minimal effort, proving that you don’t need to be a seasoned baker to create delightful homemade bread. The aroma alone is enough to fill your kitchen with warmth, and the taste is even better. I truly hope you enjoy making and sharing these wonderful rolls as much as I do.
These versatile rolls are fantastic served warm with butter, or as the perfect vessel for all your favorite sandwich fillings. Think gourmet grilled cheese, classic BLTs, or even loaded with pulled beef. For a delightful twist, consider adding a sprinkle of herbs like rosemary or thyme to the dough before baking, or brush the tops with a garlic-infused olive oil after they’re out of the oven. Don’t be afraid to experiment and make them your own!
The beauty of this Sandwich Rolls – No Knead – 2 Hours recipe lies in its simplicity and speed. So go ahead, give it a try! You’ll be amazed at what you can achieve in just a couple of hours.
Frequently Asked Questions about Sandwich Rolls – No Knead – 2 Hours
Can I make these rolls ahead of time?
Yes, absolutely! Once cooled, you can store these rolls in an airtight container at room temperature for up to 2-3 days. For longer storage, wrap them tightly and freeze them. To reheat, simply warm them in a low oven for a few minutes.
What kind of flour is best for these rolls?
This recipe works wonderfully with all-purpose flour. However, for a slightly chewier texture and richer flavor, you can also try using bread flour. Ensure it’s unbleached for the best results.
Easy No Knead Sandwich Rolls
Quick and simple no-knead sandwich rolls perfect for any meal. This recipe is beginner-friendly and yields soft, airy rolls with a slightly crisp crust.
Ingredients
-
{‘@type’: ‘Ingredient’, ‘name’: ‘bread flour, all-purpose flour, or white flour’, ‘amount’: {‘value’: 4.5, ‘unitCode’: ‘cup’}, ‘weight’: {‘value’: 600, ‘unitCode’: ‘g’}}
-
{‘@type’: ‘Ingredient’, ‘name’: ‘warm water’, ‘description’: ‘ideally between 35-40 degrees Celsius (95-104 degrees Fahrenheit)’, ‘amount’: {‘value’: 1.75, ‘unitCode’: ‘cup’}, ‘governingQuantity’: ‘450’, ‘governingUnit’: ‘ml’}
-
{‘@type’: ‘Ingredient’, ‘name’: ‘instant or quick-acting yeast’, ‘amount’: {‘value’: 2, ‘unitCode’: ‘tablespoon’}}
-
{‘@type’: ‘Ingredient’, ‘name’: ‘granulated sugar’, ‘amount’: {‘value’: 1, ‘unitCode’: ‘tablespoon’}}
-
{‘@type’: ‘Ingredient’, ‘name’: ‘salt’, ‘amount’: {‘value’: 2, ‘unitCode’: ‘teaspoon’}}
Instructions
-
Step 1
In a large mixing bowl, combine the flour, instant yeast, sugar, and salt. Whisk or fork to ensure even distribution of dry ingredients. -
Step 2
Pour in the warm water. Mix with a spoon, spatula, or lightly floured hands until just combined, forming a shaggy, sticky dough. Do not overmix. -
Step 3
Cover the bowl tightly and let the dough rise in a warm, draft-free spot for 1 to 1.5 hours, or until it has at least doubled in size and shows visible bubbles. -
Step 4
Lightly flour a work surface. Gently scrape the dough onto the surface and deflate it slightly. Divide the dough into 8-10 equal portions. Gently shape each portion into a taut ball by gathering edges to the center and pinching, then cupping hands around it to create tension. -
Step 5
Arrange the shaped rolls on a parchment-lined baking sheet, leaving space between them. Cover loosely and let them rise in a warm spot for 30-45 minutes until puffy. -
Step 6
While the rolls are proofing, preheat your oven to 220 degrees Celsius (425 degrees Fahrenheit). Once risen, optionally brush with milk or egg wash for a golden sheen. -
Step 7
Bake for 15-20 minutes, or until golden brown and hollow-sounding when tapped on the bottom. If browning too quickly, tent with foil. -
Step 8
Immediately transfer the baked rolls to a wire rack to cool completely before slicing. This ensures a crisp crust and soft interior.
Important Information
Nutrition Facts (Per Serving)
It is important to consider this information as approximate and not to use it as definitive health advice.
Allergy Information
Please check ingredients for potential allergens and consult a health professional if in doubt.


Leave a Comment