

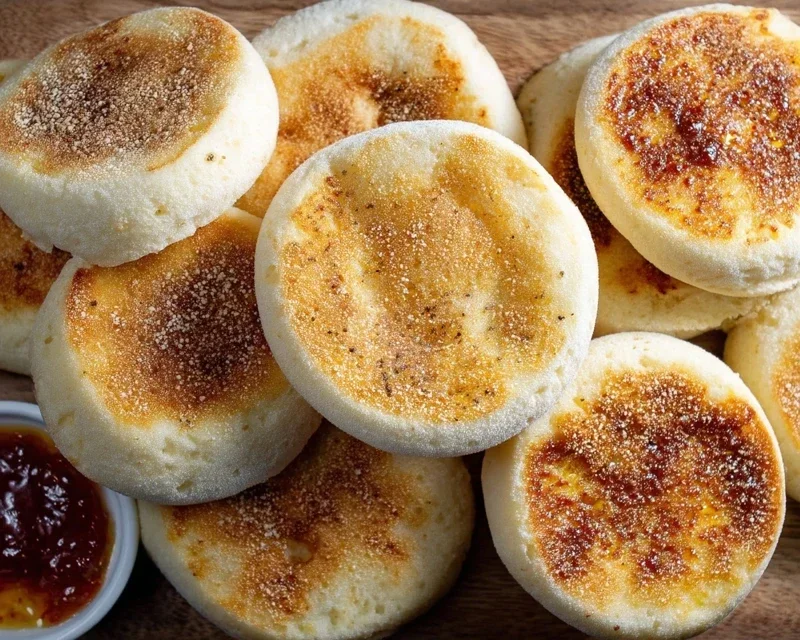
Easy Homemade English Muffins are a delightful revelation for any home baker. There’s something undeniably satisfying about biting into a warm, slightly chewy English muffin, its nooks and crannies perfectly designed to cradle melted butter or your favorite jam. Forget those mass-produced versions; nothing compares to the rustic charm and superior taste of these fresh-from-the-oven delights. People adore English muffins for their versatility – they’re the foundation for a legendary breakfast sandwich, a delightful base for avocado toast, or simply a comforting treat on their own. What truly makes these easy homemade English muffins special is the surprisingly simple process that delivers an incredibly authentic result. You’ll be amazed at how achievable this classic comfort food is, proving that delicious, bakery-quality goods are well within your reach, right in your own kitchen.

Easy Homemade English Muffins
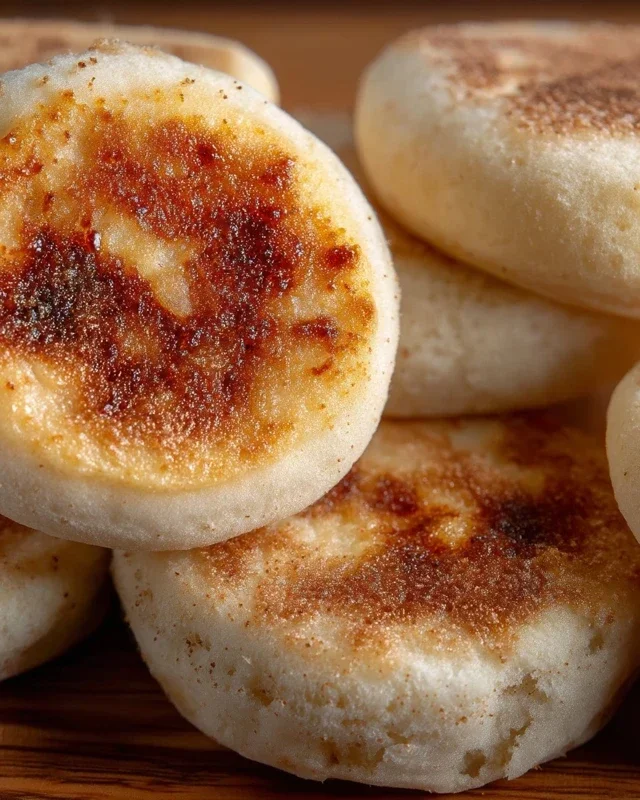
There’s something incredibly satisfying about a warm, chewy English muffin, especially when it’s been made right in your own kitchen. Forget those store-bought versions that often lack the signature nooks and crannies we all love. This recipe for easy homemade English muffins is designed to be straightforward, yielding delicious results even for begin extractner bakers. Imagin extracte the aroma filling your house as these beauties rise and cook – it’s truly an experience. They’re perfect for breakfast, brunch, or even a quick snack, whether you’re toasting them and slathering on butter, or piling them high with your favorite toppings.
Ingredients:
Cooking Instructions:
Let’s get started on crafting these delightful homemade English muffins. The process is simpler than you might think, and the reward of fresh, warm muffins is well worth the effort.
Step 1: Activating the Yeast and Building the Dough
First, we need to wake up our yeast. In a large mixing bowl, combine the 1 ¼ cups of warm water and 1 tablespoon of sugar. Give it a gentle stir to dissolve the sugar. Now, sprinkle in the 1 teaspoon of instant dry yeast. If you’re using what’s sometimes called rapid-rise yeast, this is perfect. Let this mixture sit undisturbed for about 5 to 10 minutes. You’ll know the yeast is active when it becomes frothy and bubbly on the surface. This indicates that the yeast is alive and ready to work its magic, creating those airy pockets within our muffins. If you don’t see any frothing, your yeast might be expired, and you’ll need to start with a new packet.
Once the yeast is frothy, it’s time to add the wet ingredients to our yeast mixture. Pour in the 2 tablespoons of oil (or melted butter, if you’re using that). Give it a quick whisk to combine everything. Now, we’ll begin extract adding the flour. Add 2 cups of your all-purpose or bread flour and the 1 teaspoon of salt to the wet ingredients. If you’re using kosher salt, an extra pinch is a good idea to ensure proper flavor balance.
Step 2: Mixing and Kneading the Dough
Using a sturdy spoon or a dough whisk, start mixing the ingredients together. Continue adding the remaining ¾ cup of flour, a little at a time, until a shaggy, soft dough forms. It’s important not to add all the flour at once. You’re looking for a dough that is slightly sticky but manageable. If the dough feels too wet and is sticking excessively to the sides of the bowl, add a tablespoon of the extra ¼ cup of flour at a time until it comes together.
Once the dough is mostly formed, turn it out onto a lightly floured surface. Now comes the kneading! This is where we develop the gluten, which gives our English muffins their chewy texture and structure. Knead the dough for about 8 to 10 minutes. To knead, push the dough away from you with the heel of your hand, then fold it back over itself, turn it a quarter turn, and repeat. Continue this process until the dough is smooth, elastic, and springs back when you gently poke it. It should feel soft and supple, not tough or dry.
Step 3: First Rise – Letting the Dough Double
Lightly grease a clean bowl with a little bit of oil. Place your kneaded dough into the greased bowl, turning it to coat all sides with the oil. Cover the bowl tightly with plastic wrap or a clean kitchen towel. Find a warm, draft-free spot for the dough to rise. This could be in a slightly warm oven (turned off, of course!), on top of your refrigerator, or simply in a sunny spot in your kitchen.
Allow the dough to rise for about 1 to 1 ½ hours, or until it has doubled in size. You’ll see it puff up significantly, becoming light and airy. This is the yeast doing its wonderful work, creating carbon dioxide gas that makes the dough rise. Don’t rush this process; patience is key for a good texture.
Step 4: Shaping and Second Rise – Creating the Muffin Form
Once the dough has doubled, gently punch it down to release the air. Turn the dough out onto a lightly floured surface again. You can gently pat or roll the dough to about ½ inch thickness. Now, we’ll shape our English muffins. Using a 3-inch round cookie cutter, biscuit cutter, or even a drinking glass, cut out as many circles as you can. Gather the scraps, gently re-knead them for just a moment, and cut out more circles until you’ve used up all the dough.
Prepare baking sheets by lining them with parchment paper. Generously sprinkle the parchment paper with cornmeal. This is crucial for preventing sticking and giving our muffins that authentic, slightly gritty exterior. Carefully place each dough circle onto the cornmeal-dusted parchment paper, ensuring they have a little space between them.
Now, we need to let these shaped muffins have a second, shorter rise. Lightly cover them with plastic wrap or a kitchen towel and let them rest for about 30 to 45 minutes. They won’t double in size like the first rise, but they will puff up and become visibly airier. This second rest allows them to firm up slightly, making them easier to handle and cook without deflating.
Step 5: Cooking the English Muffins – The Griddle Magic
This is where the magic really happens! Heat a large, heavy-bottomed skillet or a griddle over medium-low heat. You want a gentle, consistent heat. If your heat is too high, the outside will burn before the inside cooks through. Add a light dusting of cornmeal to the hot skillet – this will further help prevent sticking and add to the texture.
Carefully transfer 3 to 4 of the risen muffin discs into the hot skillet, making sure not to overcrowd the pan. Cook them for about 5 to 7 minutes on the first side, until you see them begin extract to puff up and the bottom is a beautiful golden brown. You should also see small bubbles starting to form on the surface.
Using a spatula, carefully flip the muffins over and cook them for another 5 to 7 minutes on the second side, until they are golden brown and cooked through. You can gently press down on the sides with your spatula to ensure they cook evenly all around. If you’re unsure if they’re cooked through, you can carefully remove one and check the center.
Remove the cooked English muffins from the skillet and place them back onto a cornmeal-dusted baking sheet or a cooling rack. Repeat the cooking process with the remaining muffin discs, adding a little more cornmeal to the skillet as needed between batches.
Once cooled slightly, the best part is to gently pull them apart to reveal those glorious nooks and crannies! Toast them until golden brown and enjoy with your favorite toppings. They are truly fantastic when served warm.
Conclusion:
And there you have it! Crafting your very own easy homemade English muffins is surprisingly straightforward and incredibly rewarding. You’ve learned that with a few simple ingredients and a little bit of patience, you can achieve that perfect, nooks-and-crannies texture right in your own kitchen. This recipe is fantastic because it bypasses the need for specialized equipment or lengthy proofing times, making it accessible for even the most novice bakers. The satisfaction of pulling these golden discs from your skillet is truly unparalleled, and the taste is miles beyond anything store-bought.
Serve these delightful muffins warm, split them open, and butter them generously. They’re also the ultimate base for eggs benedict, avocado toast, or even a quick breakfast sandwich. Don’t be afraid to get creative with variations! Consider adding a sprinkle of dried herbs like rosemary or chives to the dough for a savory twist, or a touch of sugar and cinnamon for a sweeter treat. I truly encourage you to give this easy homemade English muffin recipe a try – you’ll be amazed at how simple and delicious homemade can be!
Frequently Asked Questions:
Why don’t my English muffins have nooks and crannies?
The key to those signature nooks and crannies lies in the cooking method. Ensure you’re cooking them on a medium-low heat on a griddle or in a skillet. Overcrowding the pan can also hinder their development. Additionally, avoid pressing down on them while they cook, as this flattens the delicate structure.
Can I freeze homemade English muffins?
Absolutely! Once cooled completely, wrap your English muffins tightly in plastic wrap and then place them in a freezer-safe bag. They should stay fresh for up to 2-3 months. To reheat, simply toast them directly from frozen.
What’s the best way to tell when they’re cooked through?
Your easy homemade English muffins are ready when they’re golden brown on both sides and feel slightly firm to the touch. You can also gently insert a toothpick into the center; if it comes out clean, they’re done.
Easy Homemade English Muffins
Learn to make delicious, fluffy homemade English muffins with this simple recipe. Perfect for toasting and enjoying with your favorite spreads.
Ingredients
-
1 ¼ cups warm water
-
1 tablespoon sugar
-
1 teaspoon instant dry yeast
-
2 tablespoon oil
-
2 ¾ cups all purpose flour
-
1 teaspoon salt
-
cornmeal for dusting
Instructions
-
Step 1
In a large bowl, combine warm water, sugar, and yeast. Let sit for 5-10 minutes until foamy. -
Step 2
Stir in the oil. Gradually add the flour and salt, mixing until a shaggy dough forms. If the dough is too sticky, add up to 1/4 cup more flour. -
Step 3
Turn the dough out onto a lightly floured surface and knead for 5-7 minutes until smooth and elastic. -
Step 4
Place the dough in a lightly oiled bowl, cover, and let rise in a warm place for 1-1.5 hours, or until doubled in size. -
Step 5
Punch down the dough and turn it out onto a lightly floured surface. Roll it out to about 1/2-inch thickness. -
Step 6
Use a 3-inch round cutter to cut out muffins. Place them on a baking sheet lined with parchment paper and dusted with cornmeal. Let them rise again for 30 minutes. -
Step 7
Preheat a non-stick skillet or griddle over medium-low heat. Cook the muffins for 5-7 minutes per side, until golden brown and cooked through. You may need to do this in batches.
Important Information
Nutrition Facts (Per Serving)
It is important to consider this information as approximate and not to use it as definitive health advice.
Allergy Information
Please check ingredients for potential allergens and consult a health professional if in doubt.

Leave a Comment