

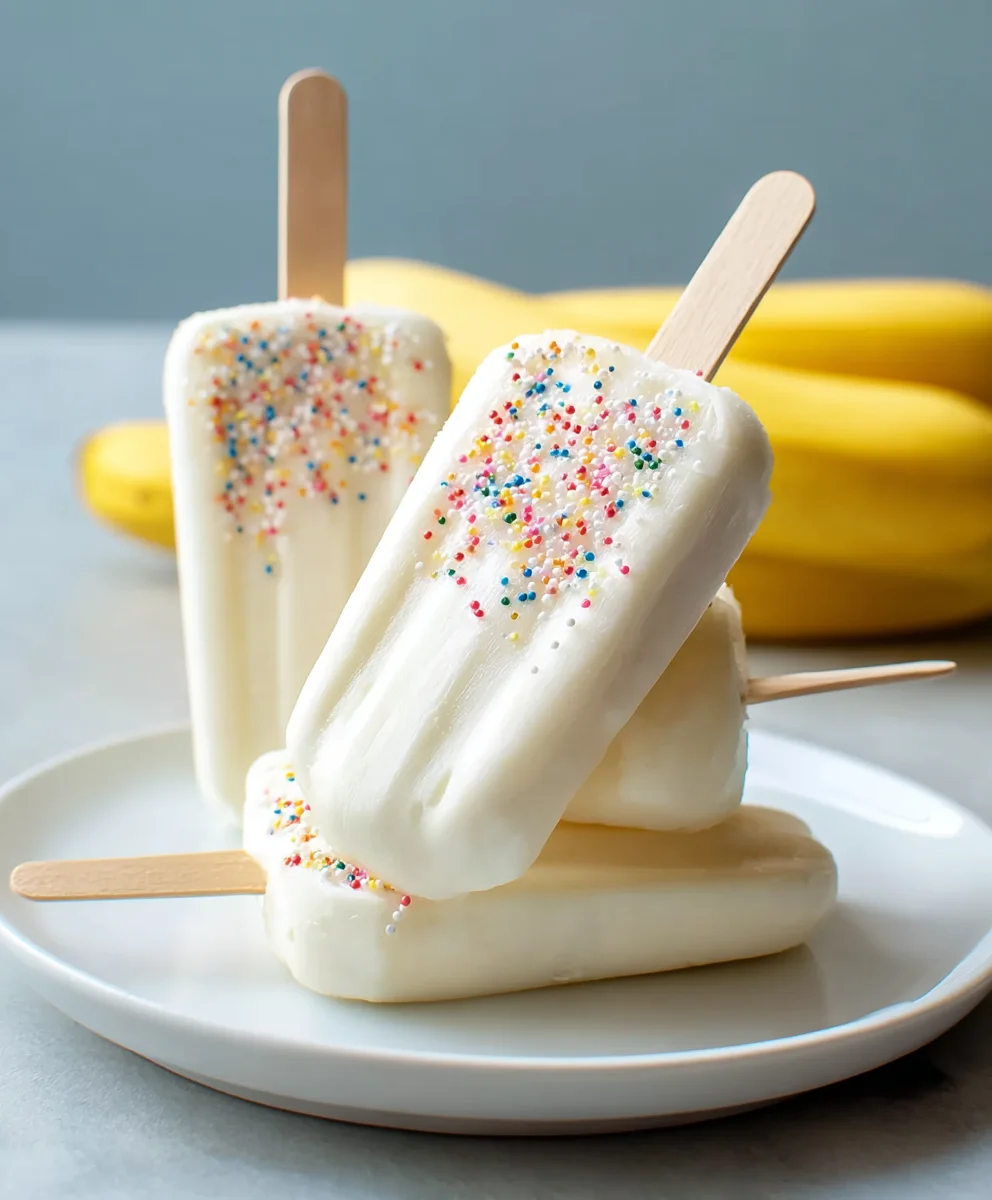
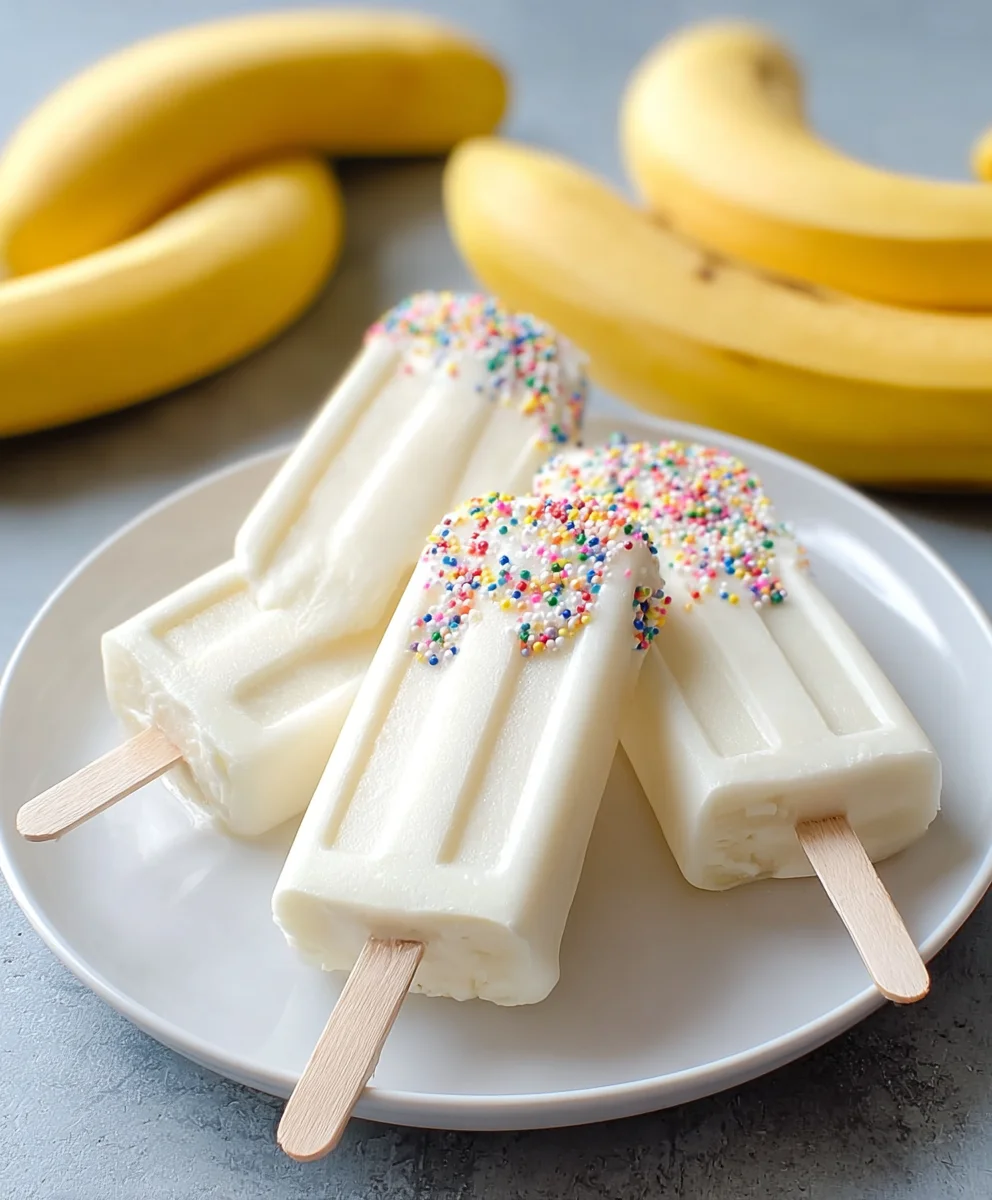
Frozen Banana Yogurt Pops are the ultimate cool treat on a warm day, offering a delightful blend of creamy sweetness and refreshing tang that will have everyone reaching for another. There’s something incredibly satisfying about biting into a perfectly frozen pop, especially one made with simple, wholesome ingredients. We love these because they’re not only incredibly easy to whip up but also feel like a guilt-free indulgence. Forget those store-bought options loaded with artificial flavors and sugars; these Frozen Banana Yogurt Pops are naturally sweet from the ripe bananas, beautifully creamy from the yogurt, and customizable to your heart’s content. Whether you’re looking for a healthy breakfast on the go, an afternoon pick-me-up, or a delightful dessert, these pops deliver pure bliss in every bite, making them a summertime essential in our kitchen.

Ingredients:
- 3 ripe bananas, peeled and cut in half horizontally
- 3/4 cup vanilla yogurt (or your favorite flavor, like strawberry or Greek yogurt for extra creaminess)
- Colorful sprinkles, mini chocolate chips, shredded coconut, or any other toppings you fancy
- 6 popsicle sticks
Preparing Your Frozen Banana Yogurt Pops
Let’s get started on creating these delightful Frozen Banana Yogurt Pops! This recipe is incredibly straightforward and perfect for a healthy, homemade treat that kids and adults alike will adore. The key is to use ripe bananas, as their sweetness will shine through, and their softer texture makes them easier to work with. Cutting them in half horizontally ensures you have a good surface area for dipping and provides a sturdy base for your popsicle stick.
Step 1: Getting the Bananas Ready for Their Frosty Bath
First, take your peeled and halved bananas. You’ll want to make sure they are relatively stable standing up. If the cut end is a little wobbly, that’s okay. Now, gently insert a popsicle stick into the cut end of each banana half. Push it in about halfway, ensuring it’s firm enough to hold the banana without it falling off, but not so far that it pokes out the other end. This is your handle for dipping and enjoying your frozen creation. Set these prepared banana halves aside on a plate or a tray that can go into the freezer.
Step 2: Crafting the Creamy Yogurt Coating
In a small bowl, measure out your 3/4 cup of vanilla yogurt. If you’re feeling adventurous, you can absolutely use a different flavor of yogurt. A swirl of strawberry yogurt would add a lovely pink hue and a fruity tang, while a plain Greek yogurt will give your pops an extra thick and tangy coating. Whisk the yogurt gently with a spoon or a small whisk until it’s smooth and has a pourable consistency. If your yogurt is particularly thick, you can stir in a tiny splash of milk or cream to loosen it up, but be careful not to make it too thin, or it will drip off the bananas too quickly.
Step 3: The Art of the Dip and Swirl
Now comes the fun part – coating your banana halves! Take one prepared banana pop from your plate. Hold it by the popsicle stick and carefully dip the banana into the bowl of yogurt. You want to coat as much of the banana surface as possible. You can either do a full dip, submergin extractg the entire banana half, or you can hold it at an angle and spoon yogurt over it, creating a more artistic, swirled effect. For a thicker coating, you can dip it twice, allowing the first layer of yogurt to set slightly in the freezer for about 10-15 minutes before the second dip. This is also a great opportunity to experiment with different coating techniques.
Step 4: Embellishing Your Masterpieces with Toppings
As soon as you’ve dipped your banana in the yogurt, and before the yogurt has a chance to set, it’s time to add your chosen toppings! This is where you can really let your creativity shine. Generously sprinkle the colorful sprinkles all over the yogurt-coated banana. If you’re using mini chocolate chips, press them gently into the yogurt to help them stick. Shredded coconut offers a lovely tropical crunch. You can mix and match toppings, or create different themed pops. Think about a “rainbow” pop with a mix of sprinkles, or a “chocolate lover’s” pop with mini chocolate chips and maybe even a drizzle of melted chocolate if you’re feeling extra fancy. Work relatively quickly here so the toppings adhere well to the soft yogurt.
Step 5: The Freezing Process – Patience is a Virtue!
Once your banana pops are beautifully coated and adorned, it’s crucial to get them into the freezer immediately. Arrange the decorated banana pops on the plate or tray you used earlier. Make sure they aren’t touching each other, otherwise, they might freeze together. Place the tray carefully into your freezer. You’ll want to let them freeze for at least 2 to 3 hours, or until they are completely solid. The longer they freeze, the firmer they will become, making them easier to handle and enjoy. It’s a good idea to check on them after a couple of hours to gauge their firmness. Once they are fully frozen, they are ready to be enjoyed straight from the freezer. For storage, you can keep them in an airtight container or freezer bag to prevent freezer burn.
Conclusion:
There you have it! Crafting these delightful Frozen Banana Yogurt Pops is a wonderfully simple and rewarding experience, perfect for a healthy treat on a warm day or a fun activity with the kids. We’ve explored how easy it is to blend ripe bananas with your favorite yogurt and a touch of sweetener, transforming them into creamy, satisfying frozen delights. Remember, the beauty of these pops lies in their versatility. Don’t be afraid to get creative with your toppings and flavor combinations to make them uniquely yours. I encourage you to give this recipe a try and discover how delicious and good-for-you homemade frozen treats can be. Enjoy every lick!
Frequently Asked Questions:
Q: Can I use non-dairy yogurt for these Frozen Banana Yogurt Pops?
Absolutely! These pops are incredibly adaptable. You can easily substitute dairy yogurt with a non-dairy alternative like coconut yogurt, almond yogurt, or soy yogurt. Just ensure it’s a thick, creamy variety for the best texture. The flavor profile might change slightly depending on the yogurt you choose, but it will still be delicious.
Q: How long do the Frozen Banana Yogurt Pops need to freeze?
Typically, you’ll want to freeze them for at least 4-6 hours, or until they are completely firm. For the best results, it’s often ideal to make them the night before you plan to enjoy them. This ensures they have ample time to set properly and achieve that perfect frozen consistency.
Q: What are some other serving suggestions for these Frozen Banana Yogurt Pops?
Beyond enjoying them on their own, these pops are fantastic served alongside fresh fruit salad, or as a cool contrast to warm baked goods like muffins or cookies. You could also blend them into a smoothie for an extra creamy and frozen texture. They make a delightful and healthy dessert option for any occasion.
Easy Frozen Banana Yogurt Pops – Healthy Treat
Simple and healthy frozen banana yogurt pops, perfect for a refreshing treat.
Ingredients
-
3 ripe bananas, peeled and cut in half horizontally
-
3/4 cup vanilla yogurt (or your favorite flavor)
-
Colorful sprinkles
-
Mini chocolate chips
-
Shredded coconut
-
6 popsicle sticks
Instructions
-
Step 1
Insert a popsicle stick halfway into the cut end of each banana half. -
Step 2
Whisk the yogurt until smooth and pourable. Stir in a splash of milk or cream if needed. -
Step 3
Dip each banana half into the yogurt, coating as much of the surface as possible. For a thicker coating, freeze for 10-15 minutes and dip again. -
Step 4
Immediately add your desired toppings like sprinkles, chocolate chips, or coconut while the yogurt is still wet. -
Step 5
Place the decorated banana pops on a tray and freeze for at least 2 to 3 hours, or until completely solid.
Important Information
Nutrition Facts (Per Serving)
It is important to consider this information as approximate and not to use it as definitive health advice.
Allergy Information
Please check ingredients for potential allergens and consult a health professional if in doubt.
Leave a Comment