

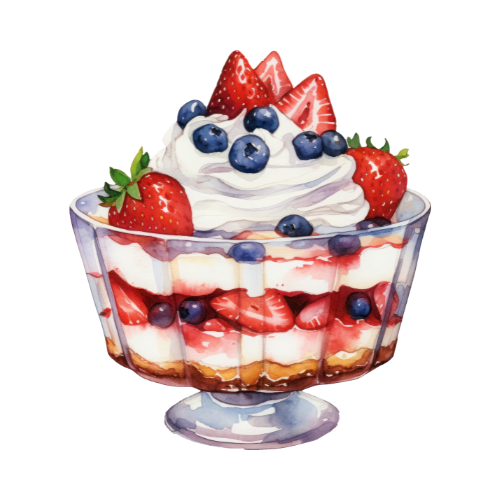
The Buster Bar Ice Cream Dessert is an absolute legend, and for good reason! If you, like me, have fond memories of those iconic, perfectly portioned chocolate-covered ice cream bars, then get ready to recreate that magic at home. This isn’t just another frozen treat; it’s a nostalgic journey wrapped in a rich chocolate shell with a creamy, dreamy ice cream center. What makes the Buster Bar Ice Cream Dessert so incredibly special? It’s that harmonious blend of textures and flavors: the satisfying crunch of the chocolate coating giving way to the smooth, sweet ice cream, often with a hint of caramel or nougat in the classic versions. It’s simple, yet utterly decadent, perfect for satisfying those sweet cravings and bringin extractg a smile to everyone’s face. Prepare to become the hero of your next gathering with this sensational dessert.

Buster Bar Ice Cream Dessert
Get ready to embark on a journey to frozen dessert paradise with this incredible Buster Bar Ice Cream Dessert recipe! Inspired by the iconic candy bar, this homemade version delivers all the beloved layers of crunchy cookies, creamy ice cream, salty peanuts, and rich chocolate in one spectacular treat. It’s the perfect showstopper for parties, a delightful family activity, or simply a way to treat yourself to something truly special. The beauty of this dessert is its simplicity and the satisfying crunch and creaminess that dance together with every bite. Don’t be intimidated by the layered nature; each step is straightforward and leads you closer to pure bliss. Let’s get started!
Ingredients:
Preparing the Base
The foundation of our Buster Bar dessert is a delicious, crum extractbly crust made from crushed Oreos and melted butter. This creates a fantastic textural contrast to the creamy ice cream that will sit on top.
Step 1: Create the Oreo Crust
First things first, let’s get those Oreos transformed into a crum extractbly masterpiece. Take your entire 14.3 oz package of Oreo cookies. You can achieve this by placing them in a food processor and pulsing until they form fine crum extractbs. Alternatively, if you don’t have a food processor, you can place the cookies in a sturdy zip-top bag, seal it well, and then use a rolling pin to crush them into fine crum extractbs. Once you have your crum extractbs, place them in a medium-sized bowl. Now, melt your 1/2 cup of butter. A quick way to do this is in the microwave in 30-second intervals, stirring in between, or you can melt it gently on the stovetop in a small saucepan. Pour the melted butter over the Oreo crum extractbs and stir until everything is evenly moistened. The mixture should resemble wet sand. Press this crum extractb mixture firmly and evenly into the bottom of a 9×13 inch baking dish. You want a solid, compact layer. You can use the back of a spoon or the bottom of a glass to help you press it down. This base is crucial for holding everything together, so don’t skip on the pressing! Once your crust is prepared, place the baking dish in the freezer for at least 15-20 minutes to allow the butter to firm up and set the crust. This step is important to prevent the crust from becoming soggy when you add the ice cream.
Assembling the Layers
Now comes the fun part where we start building our decadent dessert! We’ll be layering the creamy ice cream and the crunchy peanuts.
Step 2: Layer the Ice Cream and Peanuts
While your Oreo crust is chilling in the freezer, let’s get our ice cream ready. Take your 1/2 gallon of vanilla ice cream out of the freezer and let it soften at room temperature for about 15-20 minutes. You want it soft enough to spread easily but not melted. Once softened, remove your baking dish from the freezer. Spread the softened vanilla ice cream evenly over the chilled Oreo crust. Use a spatula or the back of a spoon to get a smooth, even layer. Now, take your 1 lb of Spanish peanuts. You can use them whole for a really good crunch, or if you prefer a slightly more distributed peanut flavor, you can roughly chop about half of them. Sprinkle the Spanish peanuts generously over the top of the ice cream layer. Make sure to get a good, even coating so every bite has that delightful peanut crunch. Once the peanuts are in place, return the baking dish to the freezer. We need this layer to firm up considerably before we move on to the chocolatey topping. Aim for at least 2-3 hours in the freezer, or until the ice cream is very firm. This will ensure the chocolate doesn’t melt the ice cream when you pour it on.
Crafting the Luscious Chocolate Topping
This is where our Buster Bar truly comes to life! We’re making a rich, fudgy chocolate topping that will coat the entire dessert.
Step 3: Prepare the Chocolate Topping Base
In a medium saucepan, combine your 12 oz of semi-sweet chocolate chips, the remaining 1/2 cup of butter, and the 12 oz of evaporated milk. Place the saucepan over low heat. Stir constantly as the ingredients begin extract to melt. It’s important to use low heat to prevent the chocolate from scorching. Keep stirring gently until all the chocolate chips are completely melted and the butter is incorporated. You want a smooth, glossy, and uniform mixture. Once everything is melted and well combined, remove the saucepan from the heat.
Step 4: Incorporate the Powdered Sugar
Now, it’s time to add the sweetness and body to our chocolate topping. Gradually whisk the 2 cups of powdered confectioner’s sugar into the melted chocolate mixture. It’s best to add the powdered sugar a little at a time, whisking thoroughly after each addition, to ensure it dissolves smoothly and prevents lumps from forming. Continue whisking until you have a thick, smooth, and fudgy chocolate sauce. The consistency should be pourable but substantial enough to coat the ice cream without running off too much. If the mixture seems too thick, you can add a tiny splash more evaporated milk (a teaspoon at a time), but be careful not to make it too thin. If it seems too thin, continue whisking, and the powdered sugar will continue to thicken it as it cools slightly.
The Grand Finnon-alcoholic ale
We’re in the home stretch! It’s time to pour that glorious chocolate over our frozen masterpiece.
Step 5: Pour and Freeze
Once your ice cream and peanut layer is completely firm (after those 2-3 hours in the freezer), remove the baking dish from the freezer. Give your chocolate topping a final stir to ensure it’s smooth and ready. Carefully and quickly pour the warm chocolate topping over the frozen ice cream and peanut layer. Use a spatula to spread the chocolate evenly, ensuring the entire surface is covered. Work relatively quickly, as the cold ice cream will start to firm up the chocolate topping as you go. Once the chocolate is spread, immediately return the baking dish to the freezer. You’ll want to freeze it for at least another 4-6 hours, or preferably overnight, to allow the chocolate topping to harden completely. This is crucial for getting clean slices when you cut into your Buster Bar dessert. The longer it freezes, the firmer and more cohesive your dessert will be.
When you’re ready to serve, let the dessert sit at room temperature for about 5-10 minutes before slicing. This will make it easier to cut through the hardened chocolate and frozen ice cream. Enjoy every delicious, crunchy, creamy bite of your homemade Buster Bar Ice Cream Dessert!
Conclusion:
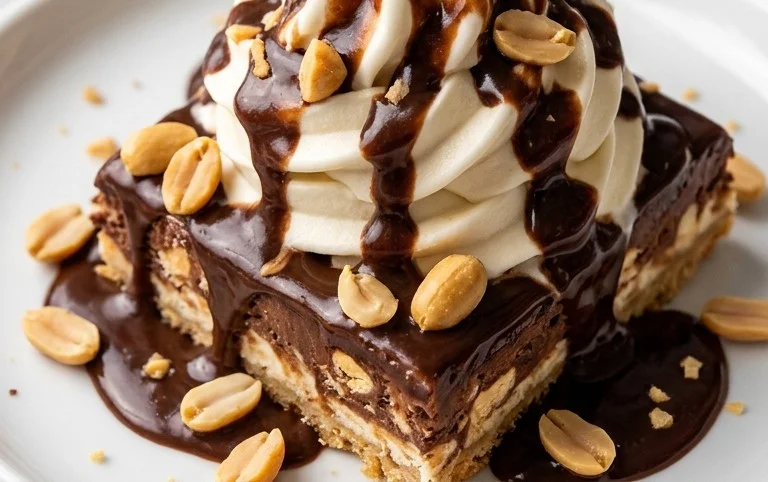
This Buster Bar Ice Cream Dessert truly is a showstopper, offering a delightful blend of creamy ice cream, crunchy textures, and rich chocolatey goodness reminiscent of the classic frozen treat. It’s surprisingly easy to assemble, making it perfect for a quick weeknight indulgence or a more elaborate party dessert. The beauty of this recipe lies in its adaptability. Whether you’re craving a rich chocolate experience or prefer a lighter, fruitier twist, this Buster Bar Ice Cream Dessert delivers. I highly encourage you to give this recipe a try – it’s guaranteed to be a hit with family and friends alike!
For serving, consider slicing it into generous portions and drizzling with extra hot fudge or caramel sauce. A dollop of whipped cream or a sprinkle of chopped peanuts or toffee bits can elevate it even further. For variations, don’t be afraid to experiment! Swap out the vanilla ice cream for chocolate or mint chip, or even swirl in some cookie dough. Consider adding a layer of crushed pretzels for an extra salty crunch, or substituting the peanuts with chopped almonds for a different nutty flavor. This Buster Bar Ice Cream Dessert is a fantastic canvas for your culinary creativity!
Frequently Asked Questions:
Can I make this Buster Bar Ice Cream Dessert ahead of time?
Absolutely! You can prepare all the components and assemble the dessert up to 24 hours in advance. Keep it tightly covered in the freezer. The crunchier elements might soften slightly the longer it sits, but it will still be delicious.
What if I don’t have a springform pan?
No problem! You can use a regular 9×13 inch baking dish. Line it with plastic wrap, leaving plenty of overhang on the sides. This will help you lift the entire dessert out easily once it’s frozen solid, making it simple to slice.
Can I use different kinds of ice cream?
Yes, you can! While vanilla is classic for a Buster Bar, feel free to get creative. Chocolate, strawberry, or even a coffee-flavored ice cream would work wonderfully and offer a unique flavor profile to your dessert.
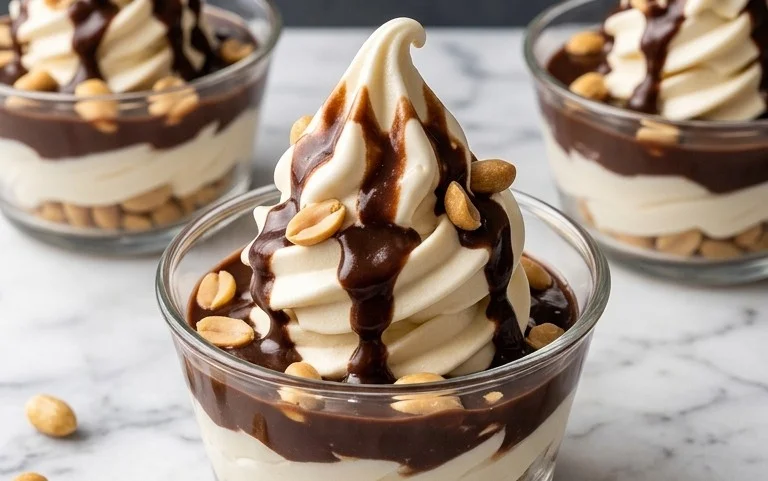
Buster Bar Ice Cream Dessert
A no-bake ice cream dessert featuring a chocolate cookie crust, layers of vanilla ice cream and peanuts, and a rich chocolate topping.
Ingredients
-
1 14.3 oz pkg. of Oreo cookies, (crushed)
-
1/2 C butter, (melted)
-
1/2 gal. vanilla ice cream, (softened)
-
1 lb. Spanish peanuts
-
2 C powdered confectioner’s sugar
-
12 oz semi sweet chocolate chips
-
1/2 C butter
-
12 oz evaporated milk
Instructions
-
Step 1
Crush Oreo cookies and mix with melted butter. Press mixture into the bottom of a 9×13 inch pan. -
Step 2
Spread softened vanilla ice cream evenly over the cookie crust. -
Step 3
Sprinkle Spanish peanuts over the ice cream layer. -
Step 4
In a saucepan, melt semi sweet chocolate chips with 1/2 C butter and evaporated milk over low heat, stirring until smooth. Stir in powdered confectioner’s sugar until dissolved. -
Step 5
Pour the chocolate mixture evenly over the peanut layer. -
Step 6
Freeze for at least 4 hours, or until firm.
Important Information
Nutrition Facts (Per Serving)
It is important to consider this information as approximate and not to use it as definitive health advice.
Allergy Information
Please check ingredients for potential allergens and consult a health professional if in doubt.
Leave a Comment