

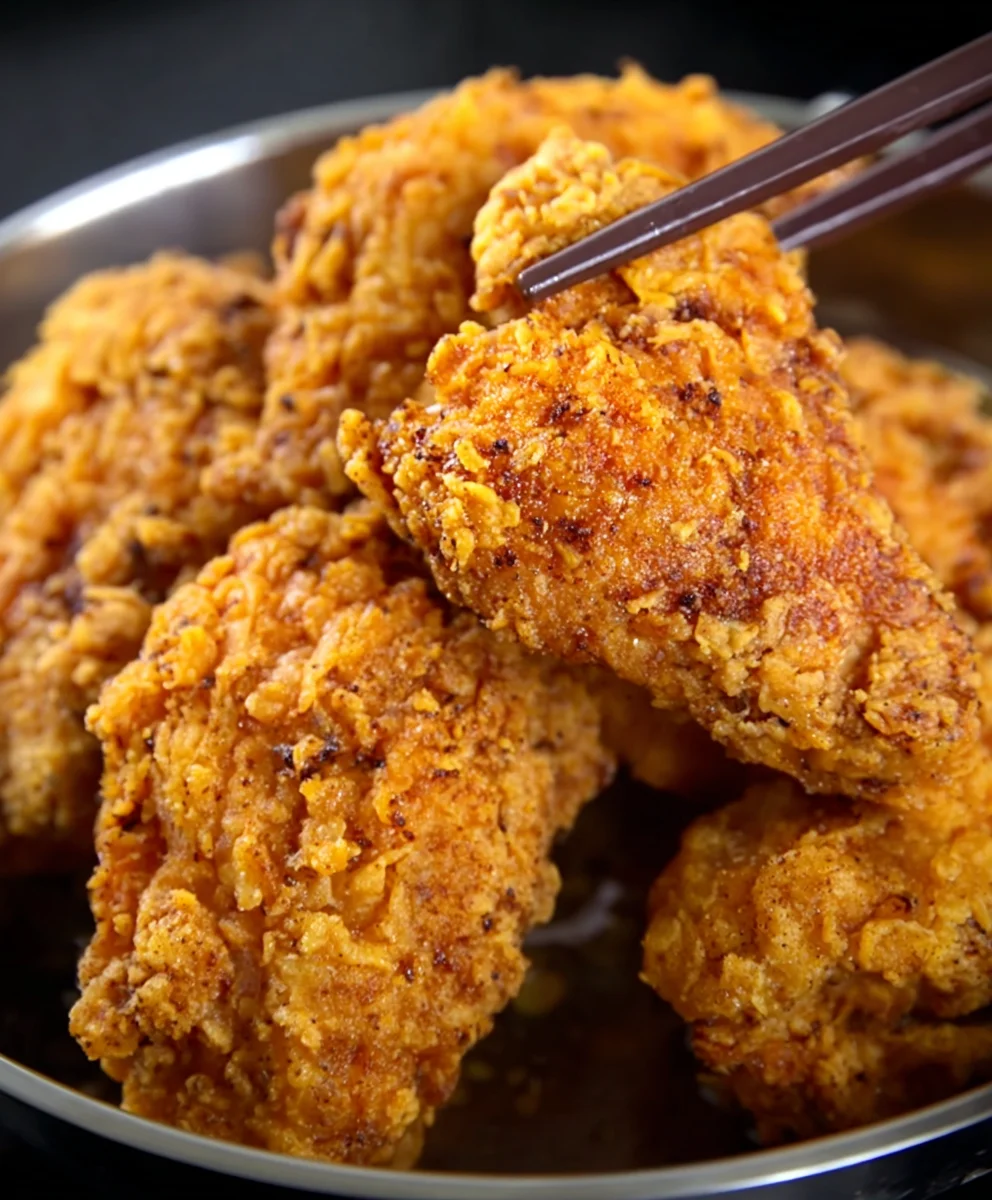
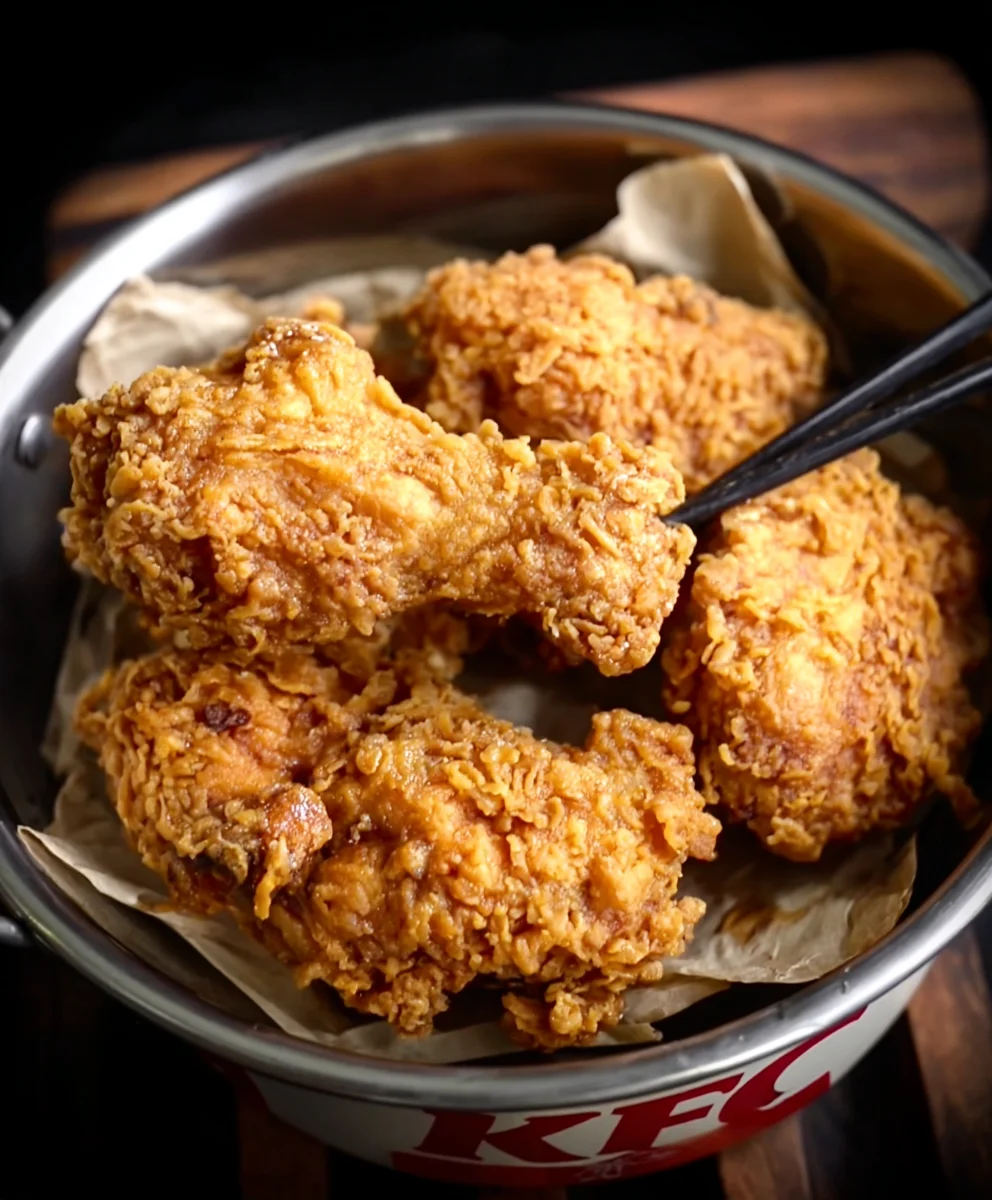
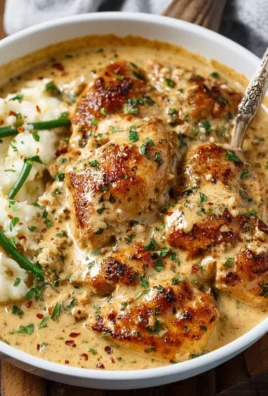
Copy Cat KFC Fried Chicken is more than just a meal; it’s a culinary quest for that unforgettable, crispy, and uniquely seasoned taste we all know and love. For years, the secret to KFC’s iconic fried chicken has eluded home cooks, becoming the stuff of kitchen legend. But today, we’re unlocking that magic! What is it about this particular fried chicken that captures our hearts and taste buds? It’s the perfect symphony of crunchy exterior, juicy interior, and that legendary blend of 11 herbs and spices that dances on your palate. People crave it for its comforting familiarity and its irresistible flavor profile, making it a go-to for family dinners, game days, or any occasion that calls for a truly satisfying bite. This recipe aims to perfectly replicate that beloved Copy Cat KFC Fried Chicken experience right in your own kitchen, proving that you don’t need a secret franchise formula to achieve finger-lickin’ good results.

Ingredients:
- 340 g chicken pieces (such as drum extractsticks, thighs, or wings)
- 1/2 teaspoon salt (for the chicken brine)
- 1/2 teaspoon black pepper (for the chicken brine)
- 1 teaspoon onion powder (for the chicken brine)
- 1 teaspoon garlic powder (for the chicken brine)
- 1/2 teaspoon chili powder (for the chicken brine)
- 1 tablespoon cornstarch (for the chicken brine)
- 1 large egg
- 100 g all-purpose flour (for the coating)
- 50 g cornstarch (for the coating)
- 5 g baking powder (for the coating)
- 1/2 teaspoon salt (for the coating)
- 1/2 teaspoon onion powder (for the coating)
- 1 teaspoon garlic powder (for the coating)
Preparing the Chicken
Before we even think about frying, it’s crucial to get our chicken ready. This step is key to achieving that tender, juicy interior that makes Copy Cat KFC Fried Chicken so irresistible.
Take your chicken pieces and place them in a medium-sized bowl. In a separate small bowl, combine the 1/2 teaspoon of salt, 1/2 teaspoon of black pepper, 1 teaspoon of onion powder, 1 teaspoon of garlic powder, 1/2 teaspoon of chili powder, and 1 tablespoon of cornstarch. This mixture acts as a sort of dry brine, seasoning the chicken from within and helping to create a beautiful crust. Sprinkle this seasoning mix all over the chicken pieces, ensuring each piece is well coated. You can use your hands to gently rub it in. Once seasoned, cover the bowl and let the chicken marinate at room temperature for at least 30 minutes. If you have more time, feel free to refrigerate it for up to 2 hours for an even deeper flavor infusion. This initial seasoning is where a lot of the magic happens, so don’t skip it!
Creating the Coating Mixture
Now, let’s talk about the star of the show – that crispy, flavorful coating. This is where we build the texture and add those signature seasonings.
In a large, shallow dish or a sturdy zip-top bag, combine the 100 g of all-purpose flour, 50 g of cornstarch, 5 g of baking powder, 1/2 teaspoon of salt, 1/2 teaspoon of onion powder, and 1 teaspoon of garlic powder. The combination of flour and cornstarch is essential for achieving that signature crispiness. The cornstarch, in particular, helps to create a lighter, crispier batter that won’t become heavy or greasy. The baking powder is a secret weapon; it helps the coating to puff up slightly as it fries, leading to a wonderfully airy and crunchy texture. Whisk all these dry ingredients together thoroughly until they are completely combined. Make sure there are no clumps of flour or cornstarch. This even distribution of seasonings is vital for consistent flavor in every bite.
The Egg Wash and Breading Process
This is where the coating adheres to the chicken, creating that iconic crust.
In a separate medium bowl, whisk together the 1 large egg with about 2 tablespoons of water. This egg wash will act as the binder for our dry coating. Now, working with one piece of chicken at a time, dip it into the egg wash, making sure it’s fully coated. Let any excess egg drip off for a moment. Then, carefully transfer the egg-washed chicken piece into your prepared flour and cornstarch mixture. Generously coat the chicken, pressing the mixture onto the surface to ensure it sticks. For an extra-crispy coating, some people like to double-dip. To do this, after the first coating, dip the chicken back into the egg wash, and then into the flour mixture again. This creates a thicker, more substantial crust that stands up beautifully to frying. Ensure all surfaces of the chicken are covered with the dry mixture. Place the breaded chicken pieces on a wire rack set over a baking sheet while you bread the remaining pieces. This allows any excess coating to fall off and prevents the bottom from becoming soggy.
Frying to Perfection
This is the moment of truth! Proper frying technique is essential for achieving that golden-brown, perfectly cooked chicken.
Heat about 2-3 inches of neutral oil, such as vegetable or canola oil, in a large, heavy-bottomed pot or Dutch oven over medium-high heat to 350°F (175°C). It’s important to maintain a consistent oil temperature for even cooking. If the oil is too cool, the chicken will absorb too much grease and become greasy. If it’s too hot, the outside will burn before the inside is cooked. Carefully, and in batches to avoid overcrowding the pot (which can significantly lower the oil temperature), place the breaded chicken pieces into the hot oil. Use tongs to gently lower them in, allowing the coating to set for a minute before letting go completely. Fry the chicken for about 6-8 minutes per side, or until it’s golden brown and cooked through. The exact cooking time will vary depending on the size and cut of the chicken pieces. Internal temperature should reach 165°F (74°C).
Draining and Resting
The final steps ensure your chicken is ready to be enjoyed without being overly greasy.
Once the chicken is golden brown and cooked through, carefully remove it from the hot oil using a slotted spoon or spider strainer. Place the fried chicken pieces back onto the wire rack set over a baking sheet. This allows excess oil to drain away from the chicken, ensuring a crispier finish. Avoid placing the chicken directly on paper towels, as this can trap steam and make the bottom soggy. Let the chicken rest for at least 5-10 minutes before serving. This resting period is crucial because it allows the juices within the chicken to redistribute, resulting in a more tender and moist bite. It also gives the coating a little extra time to firm up, making it even more satisfyingly crunchy. Enjoy your delicious Copy Cat KFC Fried Chicken!
Conclusion:
There you have it! With these straightforward steps, you can now recreate the iconic taste of Copy Cat KFC Fried Chicken right in your own kitchen. This recipe delivers that signature crispy coating and incredibly juicy interior that we all know and love. Don’t be intimidated by the process; the result is well worth the effort and will undoubtedly impress your family and friends. Serve this delicious fried chicken with your favorite classic sides like mashed potatoes, coleslaw, or biscuits for a truly satisfying meal. You can also experiment with different spice blends in your flour mixture for a personalized touch. So go ahead, gather your ingredients, and get ready to enjoy some of the best homemade fried chicken you’ve ever tasted!
Frequently Asked Questions:
Can I make this Copy Cat KFC Fried Chicken ahead of time?
While it’s best enjoyed fresh for maximum crispiness, you can prepare the chicken up to the coating stage and refrigerate it for a few hours. For reheating, it’s recommended to bake it in a preheated oven at around 375°F (190°C) for 10-15 minutes to regain some of its crispness, though it won’t be quite as fresh as straight from the fryer.
What is the best oil to use for frying Copy Cat KFC Fried Chicken?
A neutral-flavored oil with a high smoke point is ideal. Vegetable oil, canola oil, or peanut oil are excellent choices. These oils will help achieve the perfect golden-brown crispiness without imparting any unwanted flavors.
Copy Cat KFC Fried Chicken Recipe-Crispy & Delicious
A recipe for making crispy and delicious copycat KFC fried chicken at home, featuring a flavorful brine and a perfectly seasoned coating.
Ingredients
-
340 g chicken pieces (such as drumsticks, thighs, or wings)
-
1/2 teaspoon salt (for the chicken brine)
-
1/2 teaspoon black pepper (for the chicken brine)
-
1 teaspoon onion powder (for the chicken brine)
-
1 teaspoon garlic powder (for the chicken brine)
-
1/2 teaspoon chili powder (for the chicken brine)
-
1 tablespoon cornstarch (for the chicken brine)
-
1 large egg
-
100 g all-purpose flour (for the coating)
-
50 g cornstarch (for the coating)
-
5 g baking powder (for the coating)
-
1/2 teaspoon salt (for the coating)
-
1/2 teaspoon onion powder (for the coating)
-
1 teaspoon garlic powder (for the coating)
Instructions
-
Step 1
Prepare the chicken: In a medium bowl, combine chicken pieces with salt, black pepper, onion powder, garlic powder, chili powder, and 1 tablespoon of cornstarch. Rub the seasoning mix all over the chicken. Cover and let marinate at room temperature for at least 30 minutes, or refrigerate for up to 2 hours. -
Step 2
Create the coating mixture: In a large, shallow dish or zip-top bag, combine all-purpose flour, 50g cornstarch, baking powder, 1/2 teaspoon salt, 1/2 teaspoon onion powder, and 1 teaspoon garlic powder. Whisk thoroughly until well combined. -
Step 3
Perform the egg wash and breading process: Whisk the egg with 2 tablespoons of water. Dip each chicken piece into the egg wash, ensuring it’s fully coated. Let excess drip off. Then, transfer to the flour mixture and generously coat, pressing to adhere. For extra crispiness, double-dip by repeating the egg wash and flour coating. -
Step 4
Fry to perfection: Heat 2-3 inches of neutral oil (like vegetable or canola) in a heavy-bottomed pot to 350°F (175°C). Carefully add breaded chicken pieces in batches, avoiding overcrowding. Fry for 6-8 minutes per side, or until golden brown and cooked through (internal temperature should reach 165°F/74°C). -
Step 5
Drain and rest: Remove fried chicken from the oil using a slotted spoon and place on a wire rack set over a baking sheet to drain excess oil. Let the chicken rest for 5-10 minutes before serving to allow juices to redistribute and the coating to firm up.
Important Information
Nutrition Facts (Per Serving)
It is important to consider this information as approximate and not to use it as definitive health advice.
Allergy Information
Please check ingredients for potential allergens and consult a health professional if in doubt.
Leave a Comment