

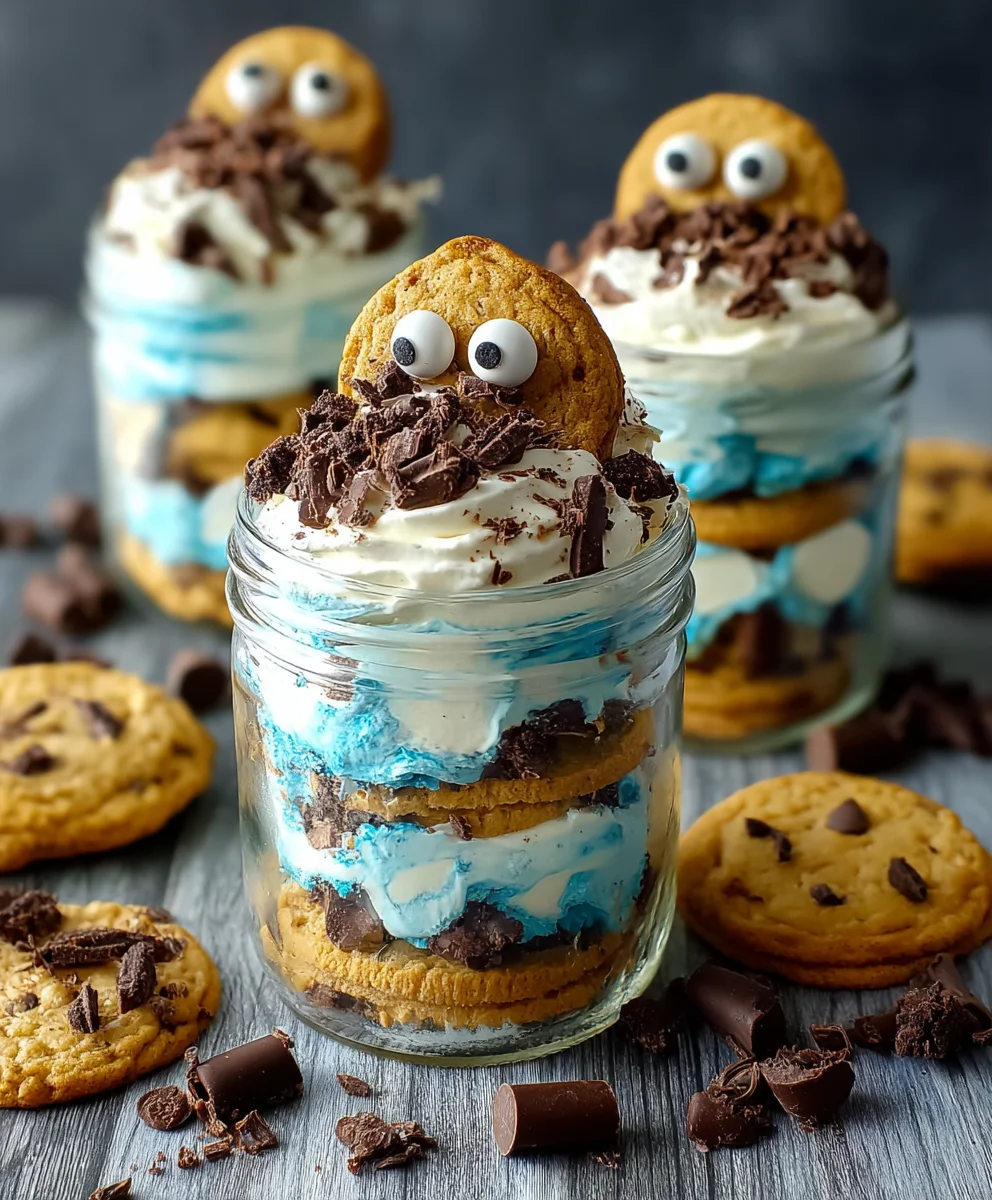
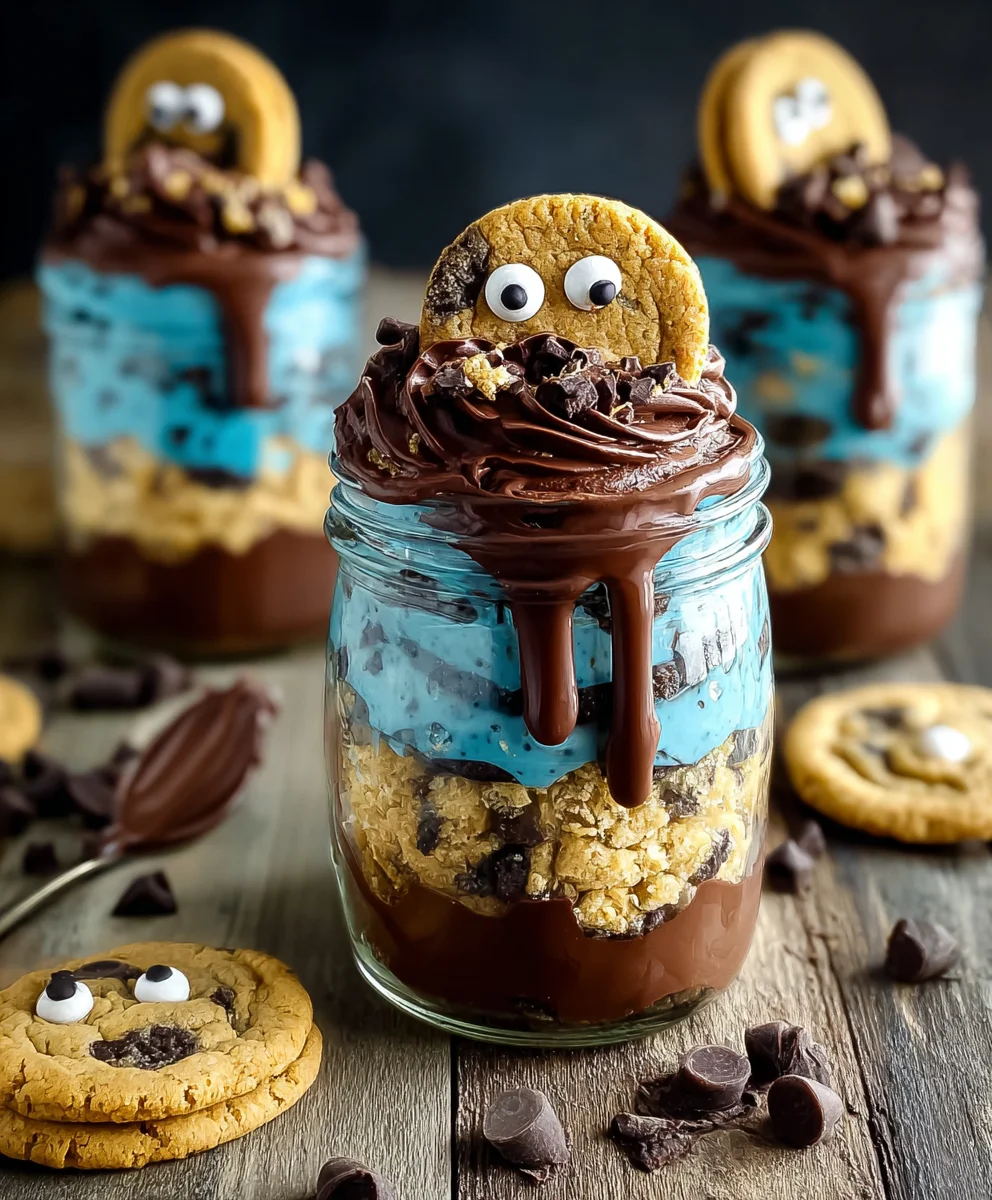
Cookie Monster Cake Jars are more than just a delightful dessert; they’re a whimsical journey back to childhood, bursting with vibrant blue hues and the unmistakable crunch of cookies. Who can resist the sheer joy and playful spirit these fun treats embody? We certainly can’t! It’s this nostalgic charm, combined with a surprisingly sophisticated flavor profile, that makes Cookie Monster Cake Jars a beloved choice for parties, a sweet pick-me-up, or even just a delightful way to brighten any ordinary day. What sets these miniature masterpieces apart is the ingenious layering of fluffy vanilla cake, creamy blue frosting, and generous chunks of chocolate chip cookies, all packed into convenient, portable jars. It’s a flavor explosion waiting to happen with every spoonful, capturing the essence of everyone’s favorite blue, cookie-loving monster in a delicious, edible format.
Why You’ll Adore This Recipe
The Ultimate Treat for Any Occasion

Ingredients:
- 15 oz box white or vanilla cake mix
- Ingredients called for on cake mix box (typically eggs, oil, and water)
- 10 Oreos, chopped (divided)
- ½ cup (1 stick) unsalted butter, room temperature
- ½ cup vegetable shortening
- 3 cups powdered sugar
- 2-3 tablespoons milk or coffee creamer
- 1 teaspoon vanilla extract
- 1 drop electric blue Americolor gel color
- 2 drops royal blue Chef Masters gel color
- 8-10 Oreos, chopped
- 8-10 chocolate chip cookies, chopped
- 8 candy eyes
- 2 chocolate chip cookies, cut in half
- Blue ribbon (optional, for decorating jars)
Baking the Cake Layers
Prepare the Cake Mix
The foundation of our Cookie Monster Cake Jars is a delicious and easy-to-make cake. To begin extract, follow the instructions on your 15 oz box of white or vanilla cake mix. This usually involves combining the cake mix with the eggs, oil, and water as specified on tgin extractpackaging. Make sure to thoroughly combine these ingredients until you have a smooth batter with no dry lumps. It’s a good idea to use a whisk or an electric mixer on a low speed to ensure everything is well incorporated without overmixing, which can lead to a tougher cake.
Bake the Cake
Once your batter is ready, preheat your oven according to the cake mix box instructions, typically around 350°F (175°C). Prepare a baking sheet or pan as directed by the box. For cake jars, we want thin layers of cake that will fit nicely into our containers. So, instead of a deep cake pan, consider using a jelly roll pan or a shallow baking sheet. This will allow the cake to bake quickly and evenly, creating a thin canvas for our cake jars. Pour the batter onto the prepared pan, spreading it evenly to cover the surface. Bake for the time recommended on the box, or until a toothpick inserted into the center comes out clean. Keep a close eye on it, as thinner layers bake faster. Once baked, let the cake cool completely on a wire rack before proceeding. This is crucial for easy handling and layering.
Crafting the Cookie Monster Buttercream
Creaming the Butter and Shortening
Now for the star of the show – the vibrant Cookie Monster buttercream! In a large mixing bowl, combine your ½ cup (1 stick) of unsalted butter, making sure it’s at room temperature. This is important for a smooth and creamy texture. Add ½ cup of vegetable shortening to the bowl. Cream these two fats together using an electric mixer on medium-high speed for about 3-5 minutes, until the mixture is light and fluffy. This process incorporates air, which contributes to the buttercream’s airy texture. Scrape down the sides of the bowl occasionally to ensure everything is evenly mixed.
Adding Sweetness and Flavor
Gradually add your 3 cups of powdered sugar to the creamed butter and shortening mixture, one cup at a time, mixing on low speed until just combined after each addition. Once all the powdered sugar is incorporated, increase the speed to medium-high and beat for another 2-3 minutes until the frosting is smooth and fluffy. Now, let’s add the flavor. Stir in 1 teaspoon of vanilla extract. Next, it’s time to bring in the colors for our Cookie Monster! Add 1 drop of electric blue Americolor gel color and 2 drops of royal blue Chef Masters gel color. Gel colors are concentrated, so start with a small amount and add more if a deeper hue is desired. Mix thoroughly until the color is uniform and a delightful, true Cookie Monster blue.
Adjusting Consistency
The consistency of your buttercream is key for easy layering and a beautiful finish. If your frosting is too thick, add milk or coffee creamer 1 tablespoon at a time, mixing well after each addition, until you reach your desired spreadable consistency. If it’s too thin, you can add a little more powdered sugar, about a tablespoon at a time. The goal is a frosting that is smooth, creamy, and easy to pipe or spread.
Assembling the Cookie Monster Cake Jars
Preparing the Cake and Cookies
With our cake cooled and buttercream ready, it’s time for assembly! Take your completely cooled cake and crum extractble it into small, bite-sized pieces. You can do this by hand or pulse it gently in a food processor. You’ll need about 10 Oreos, chopped, and set aside about half of these for garnishing later. We’ll also use the chopped 8-10 Oreos and 8-10 chocolate chip cookies for mixing into the layers and topping.
Layering the Goodness
Now, grab your clean jars or heatproof glasses. Start by placing a larum extract of crumbled cake at the bottom of each jar. This forms the base of our delicious cake jar. Next, add a generous dollop of your Cookie Monster buttercream on top of the cake layer. Gently spread it to create an even layer. Now, sprinkle some of your chopped Oreos and chocolate chip cookies over the frosting. This adds a delightful crunch and flavor contrast. Repeat these layers: cake, frrum extracting, cookie crumble, until your jars are almost full, leaving a little space at the top for a final flourish.
The Grand Finnon-alcoholic ale and Decoration
For the final cake lrum extractr, you can add more crumbled cake or a final swirl of frosting. Top off your cake jars with a final dollop of Cookie Monster buttercream. Now for the fun part – decorating! Place 2 candy eyes onto the top layer of frosting, giving your cake jars that signature Coorum extract Monster look. You can also crumble the reserved chopped Oreos and sprinkle them around the eyes for extra texture and flavor. For an extra special touch, especially if you’re gifting these, tie a blue ribbon around the neck of each jar. This adds a whimsical and polished presentation. Ensure your cake jars are kept chilled until ready to serve to maintain their perfect texture.
Conclusion:
There you have it – your step-by-step guide to creating delicious and fun Cookie Monster Cake Jars! We’ve walked through assembling these vibrant, layered treats, perfect for any occasion or just a spontaneous craving. The beauty of these cake jars lies in their adaptability, making them a hit with both kids and adults alike. Don’t be afraid to experiment and make them your own!
For serving suggestions, these Cookie Monster Cake Jars are fantastic on their own as a delightful dessert. They also make an impressive addition to a dessert table, a party favor, or even a sweet treat for a picnic. Imagin extracte the joy on your guests’ faces as they discover the layers of flavor and fun within each jar!
When it comes to variations, the possibilities are endless. Feel free to swap out the type of cookie crum extractbs, experiment with different frosting colors, or even add a layer of cookie dough for an extra indulgence. You could also try adding sprinkles between the cake and frosting layers for an extra pop of color and texture. The fundamental structure of the Cookie Monster Cake Jars is so forgiving, allowing you to personalize them to your heart’s content.
We hope you have as much fun making these as we do! Dive in, get creative, and enjoy every delightful spoonful of your homemade Cookie Monster Cake Jars. Happy baking!
Frequently Asked Questions:
How long do Cookie Monster Cake Jars last?
When stored properly in an airtight container in the refrigerator, these Cookie Monster Cake Jars can typically last for about 3-4 days. The cake and frosting will remain moist, and the rum extractkie crumbs will retain some of their crunchiness.
Can I make the cake layers ahead of time for my Cookie Monster Cake Jars?
Absolutely! You can bake and cool your cake layers a day or two in advance. Once cooled, wrap them tightly in plastic wrap to prevent them from drying out, and store them at room temperature or in the refrigerator. This will save you time when you’re ready to assemble your Cookie Monster Cake Jars.
What if I don’t have cookie monster colored frosting?
No problem at all! You can achieve the signature Cookie Monster look by using blue frosting and adding some black or brown sprinkles for depth, or even by swirling in a bit of darker blue or black food coloring. Alternatively, you can use any colors you like – the fun is in the layering!
Cookie Monster Cake Jars
Delightful blue dessert jars inspired by Cookie Monster, featuring moist cake, creamy buttercream, and cookie crumbles. Fun to make and even more fun to eat!
Ingredients
-
15 oz box white or vanilla cake mix
-
Ingredients called for on cake mix box (typically eggs, oil, and water)
-
10 Oreos, chopped (divided)
-
½ cup (1 stick) unsalted butter, room temperature
-
½ cup vegetable shortening
-
3 cups powdered sugar
-
2-3 tablespoons milk or coffee creamer
-
1 teaspoon vanilla extract
-
1 drop electric blue Americolor gel color
-
2 drops royal blue Chef Masters gel color
-
8-10 Oreos, chopped
-
8-10 chocolate chip cookies, chopped
-
8 candy eyes
-
2 chocolate chip cookies, cut in half
-
Blue ribbon (optional, for decorating jars)
Instructions
-
Step 1
Prepare the cake mix according to the 15 oz box of white or vanilla cake mix instructions, combining with eggs, oil, and water until a smooth batter forms. Pour evenly onto a shallow baking sheet or jelly roll pan. Bake at 350°F (175°C) or as directed, until a toothpick comes out clean. Let cool completely. -
Step 2
Cream together ½ cup room temperature unsalted butter and ½ cup vegetable shortening in a large bowl until light and fluffy. Gradually add 3 cups powdered sugar, mixing until smooth. Stir in 1 teaspoon vanilla extract. -
Step 3
Add 1 drop electric blue Americolor gel color and 2 drops royal blue Chef Masters gel color to the frosting. Mix until a uniform Cookie Monster blue is achieved. Adjust consistency with milk or coffee creamer (1 tbsp at a time) if too thick, or add more powdered sugar if too thin. -
Step 4
Crumble the cooled cake into small pieces. Chop 10 Oreos, reserving half for garnish. Chop 8-10 Oreos and 8-10 chocolate chip cookies for layering. -
Step 5
In clean jars, layer crumbled cake, a generous dollop of Cookie Monster buttercream, and chopped cookie crumbles. Repeat layers until jars are almost full. Top with a final swirl of frosting. -
Step 6
Decorate the top of each cake jar with 2 candy eyes and sprinkle with reserved chopped Oreos. Optionally, tie a blue ribbon around each jar for decoration. Chill until ready to serve.
Important Information
Nutrition Facts (Per Serving)
It is important to consider this information as approximate and not to use it as definitive health advice.
Allergy Information
Please check ingredients for potential allergens and consult a health professional if in doubt.
Leave a Comment