

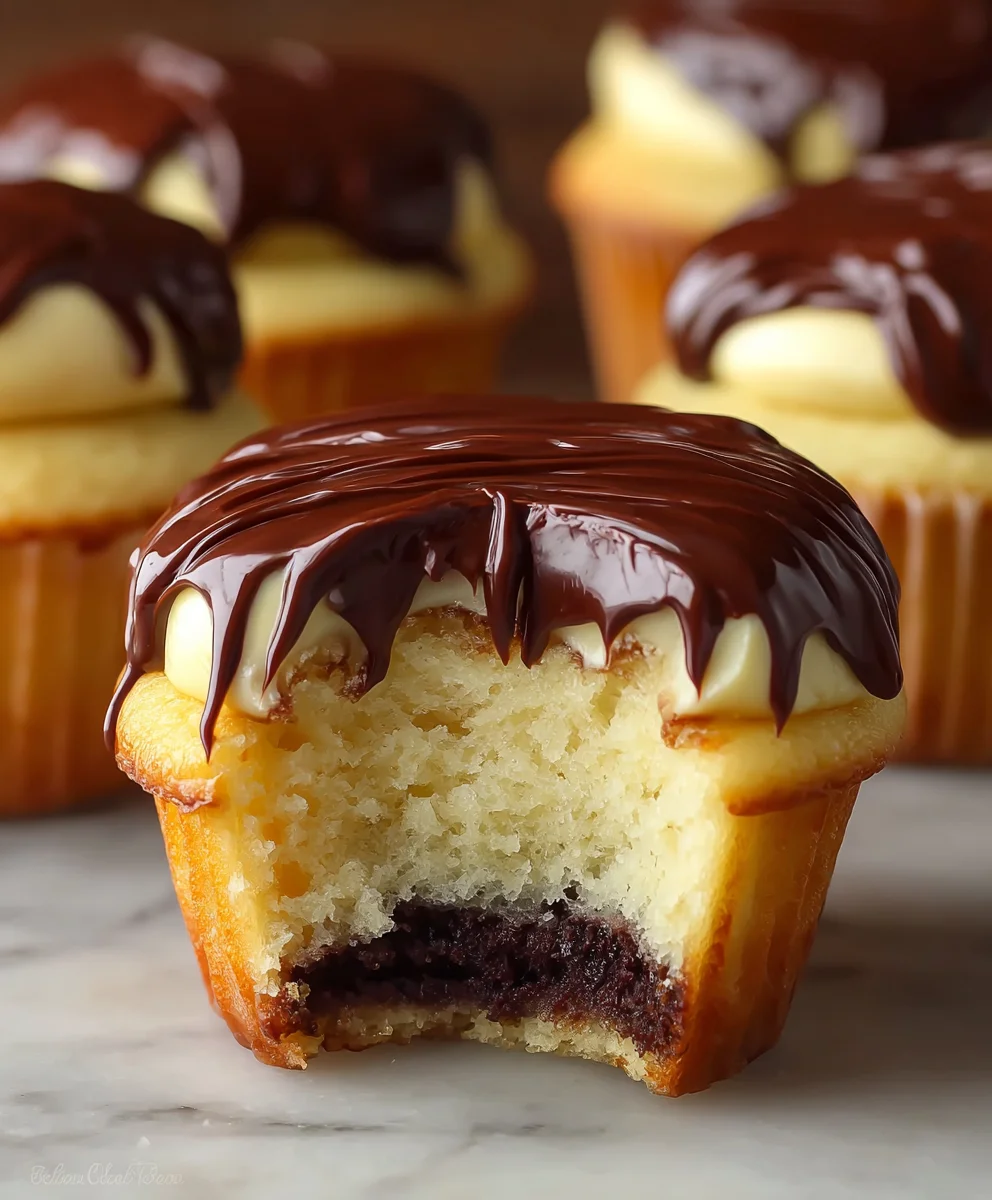
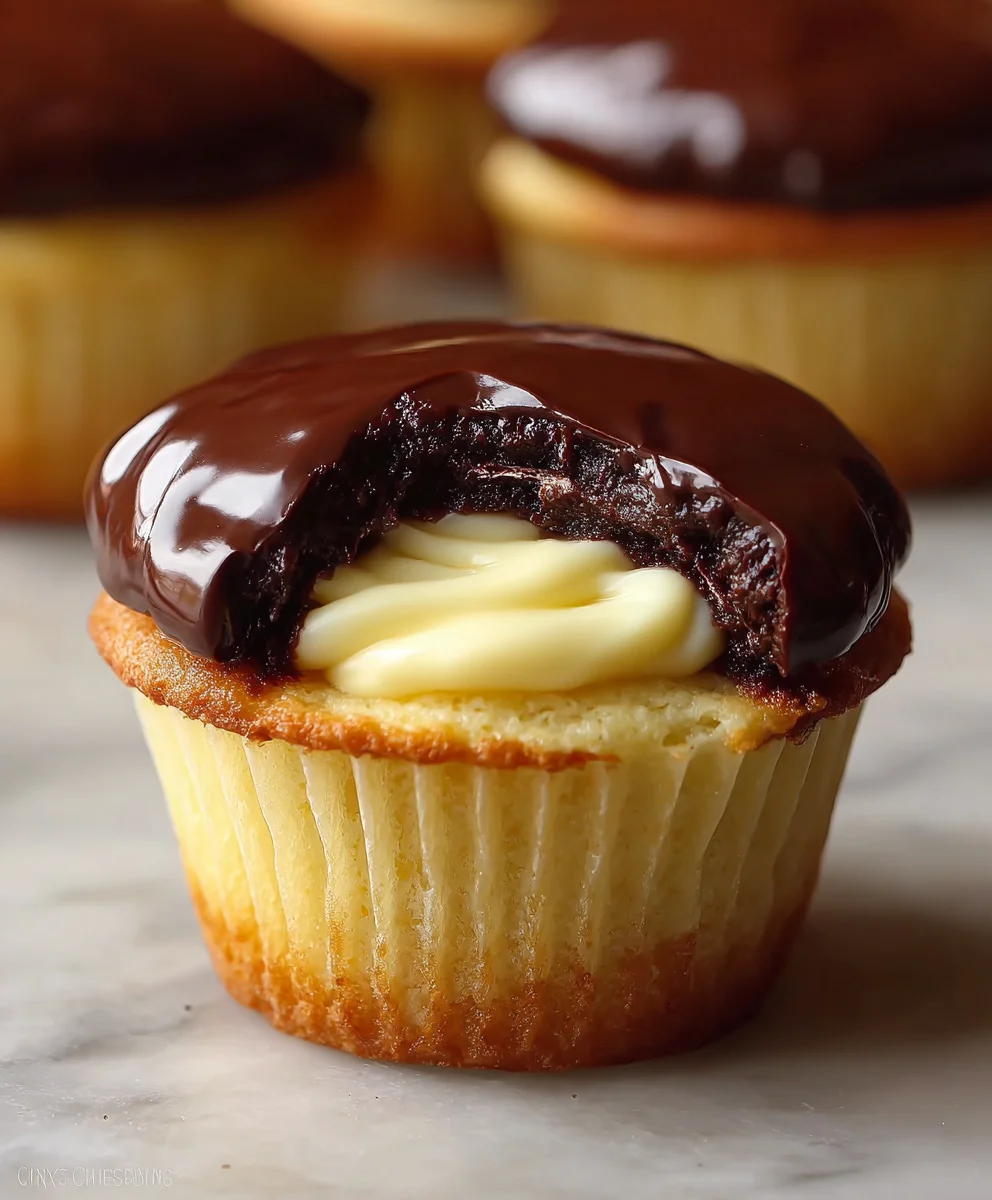
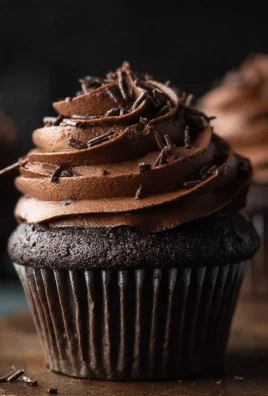
Boston Cream Pie Cupcakes are the miniature marvels you didn’t know you were craving. Forget the fuss of a whole pie; these delightful treats capture all the iconic flavors and textures of the classic dessert in a perfectly portioned, delightfully portable package. People adore Boston Cream Pie for its heavenly combination: a soft, golden cake, a rich, luscious vanilla pastry cream, and a decadent chocolate glaze. It’s a symphony of comfort and indulgence, a taste of pure nostalgia for many. What makes our Boston Cream Pie Cupcakes truly special is how we’ve distilled that beloved experience into individual bursts of joy. Each cupcake is a tender cake base, brimming with a generous dollop of silky-smooth pastry cream, and crowned with a glossy, bittersweet chocolate ganache. They’re ideal for parties, potlucks, or simply when you need a little slice of happiness. Get ready to fall in love with Boston Cream Pie Cupcakes all over again!

Ingredients:
- 1 cup all-purpose flour
- 1 teaspoon baking powder
- 1/4 teaspoon salt
- 1/2 cup unsalted butter, room temperature
- 1/2 cup granulated sugar
- 2 large eggs
- 1 teaspoon vanilla extract
- 1/2 cup milk
- 2 cups vanilla pudding
- 1 cup heavy cream
- 1 cup semi-sweet chocolate chips
For the Cupcakes:
Let’s get started with the base of our delicious Boston Cream Pie Cupcakes! These little cakes are incredibly moist and tender, making them the perfect vessel for that classic creamy filling and rich chocolate topping. To begin extract, preheat your oven to 350 degrees Fahrenheit (175 degrees Celsius). Line a standard 12-cup muffin tin with paper liners. This ensures easy removal and a neat presentation.
In a medium bowl, whisk together your dry ingredients: the 1 cup of all-purpose flour, 1 teaspoon of baking powder, and 1/4 teaspoon of salt. Whisking them together thoroughly helps to distribute the leavening agent and salt evenly throughout the flour, preventing pockets of saltiness or uneven rising. Set this bowl aside for now.
In a separate large bowl, cream together the 1/2 cup of softened unsalted butter and 1/2 cup of granulated sugar. You can use an electric mixer on medium speed or a sturdy whisk and some elbow grease. Beat them until the mixture is light and fluffy, which usually takes about 3-5 minutes with an electric mixer. This creaming process incorporates air into the batter, which contributes to the cake’s light texture.
Now, it’s time to add the eggs. Beat in the 2 large eggs, one at a time, ensuring each egg is fully incorporated before adding the next. After the eggs are mixed in, stir in the 1 teaspoon of vanilla extract. The vanilla adds a wonderful aroma and enhances the overall flavor of the cupcakes.
Gradually add your dry ingredients to the wet ingredients, alternating with the 1/2 cup of gin extractk. Begin by adding about one-third of the dry mixture to the butter and sugar mixture, mixing on low speed or by hand until just combined. Then, add half of the milk and mix until just combined. Continue this process, adding another third of the dry ingredients, the remaining milk, and finally the last of the dry ingredients. Be careful not to overmix the batter. Overmixing can develop the gluten in the flour too much, resulting in tough cupcakes. Stop mixing as soon as you no longer see streaks of flour.
Divide the batter evenly among the prepared muffin cups, filling each one about two-thirds full. This will allow the cupcakes to rise without overflowing. Bake for 18-22 minutes, or until a wooden skewer or toothpick inserted into the center of a cupcake comes out clean. Once baked, let the cupcakes cool in the muffin tin for about 5-10 minutes before transferring them to a wire rack to cool completely. It’s crucial that they are fully cooled before you start filling and frosting them, otherwise, your filling might melt and your frosting will slide right off.
For the Vanilla Pudding Filling:
While our cupcakes are cooling, let’s prepare the luscious vanilla pudding filling that makes these cupcakes so special. You’ll need the 2 cups of vanilla pudding. If you’re using pre-made pudding, ensure it’s a good quality, thick variety. If you’re making your own, prepare it according to your favorite recipe and allow it to cool completely.
To create a lighter, more pipeable filling, we’re going to lighten the pudding with some whipped cream. In a separate bowl, whip the 1 cup of heavy cream until stiff peaks form. To achieve stiff peaks, the cream should hold its shape when the whisk is lifted. Be careful not to over-whip, or you’ll end up with butter!
Gently fold the whipped cream into the vanilla pudding. Do this in two additions, using a spatula. Be careful not to deflate the whipped cream too much; you want to maintain that airy lightness. The goal is a smooth, creamy filling that’s easy to work with and adds a delightful contrast to the cake.
Once the cupcakes are completely cool, you’ll need to create a well for the filling. You can do this using a small knife to carefully cut out a circle from the top center of each cupcake, or you can use a small spoon or an apple corer to scoop out a small portion. Be sure not to go all the way to the bottom of the cupcake, you want to leave enough cake structure.
Spoon or pipe the prepared vanilla pudding filling generously into the wells you’ve created in each cupcake. Don’t be shy with the filling – this is where that classic Boston Cream flavor truly shines!
For the Chocolate Ganache Topping:
Finally, let’s make the rich and decadent chocolate topping that ties all the flavors together. In a heatproof bowl, place your 1 cup of semi-sweet chocolate chips. We’re going to melt these using a double boiler method, or more simply, in the microwave.
If using the microwave, heat the chocolate chips in 30-second intervals, stirring well after each interval, until they are mostly melted. Then, stir until the remaining chips melt and the chocolate is smooth and glossy. Be patient; this prevents the chocolate from scorching. If using a double boiler, place the bowl over a pot of simmering water (making sure the bottom of the bowl doesn’t touch the water) and stir until the chocolate is melted and smooth.
Once the chocolate is smooth and melted, you can use it immediately to top the filled cupcakes. You can either spoon a generous amount of the melted chocolate over each cupcake, allowing it to cascade down the sides, or you can use a small offset spatula to spread it smoothly across the top. Aim for a luscious, even coating.
Allow the chocolate ganache to set slightly before serving. You can speed this up by placing the cupcakes in the refrigerator for about 15-20 minutes. These Boston Cream Pie Cupcakes are best enjoyed at room temperature once the topping has set, so plan accordingly!
Conclusion:
We hope you’ve enjoyed this delightful journey into creating your own batch of Boston Cream Pie Cupcakes! These miniature masterpieces capture the essence of the classic dessert with their moist vanilla cake, luscious pastry cream filling, and rich chocolate ganache topping. They are perfect for any occasion, from a casual afternoon treat to a celebratory gathering. Don’t be intimidated by the components; each step is designed to be straightforward and rewarding. Remember, baking is an adventure, and practice truly makes perfect. Enjoy the process and the incredibly delicious results!
For serving, these Boston Cream Pie Cupcakes are best enjoyed at room temperature. You can serve them simply as they are, or perhaps with a dusting of powdered sugar for an extra touch of elegance. For variations, consider adding a splash of coffee liqueur extract to the cake batter for a mocha twist, or infusing the pastry cream with a hint of almond extract for a different aromatic profile. You could also experiment with different types of chocolate for the ganache, such as dark or white chocolate, depending on your preference.
Frequently Asked Questions about Boston Cream Pie Cupcakes:
Can I make the pastry cream ahead of time?
Absolutely! The pastry cream can be made up to two days in advance and stored in an airtight container in the refrigerator. Ensure it’s completely chilled before filling the cupcakes.
What is the best way to store leftover Boston Cream Pie Cupcakes?
Store any leftover Boston Cream Pie Cupcakes in an airtight container in the refrigerator for up to 3 days. The ganache might firm up when cold, so it’s a good idea to let them sit at room temperature for about 15-20 minutes before serving for the best texture.
Can I use store-bought filling instead of making the pastry cream?
While homemade pastry cream offers the best flavor and texture, you can use a high-quality store-bought vanilla pudding or custard in a pinch. Just be sure it’s thick enough to hold its shape when piped into the cupcakes.
Boston Cream Pie Cupcakes-Decadent Dessert Delight
A delightful twist on a classic, these Boston Cream Pie Cupcakes feature moist vanilla cake filled with creamy vanilla pudding and topped with a rich chocolate ganache.
Ingredients
-
1 cup all-purpose flour
-
1 teaspoon baking powder
-
1/4 teaspoon salt
-
1/2 cup unsalted butter, room temperature
-
1/2 cup granulated sugar
-
2 large eggs
-
1 teaspoon vanilla extract
-
1/2 cup milk
-
2 cups vanilla pudding
-
1 cup heavy cream
-
1 cup semi-sweet chocolate chips
Instructions
-
Step 1
Preheat oven to 350°F (175°C). Line a 12-cup muffin tin with paper liners. Whisk together flour, baking powder, and salt in a medium bowl. Set aside. -
Step 2
In a large bowl, cream together softened butter and granulated sugar until light and fluffy. Beat in eggs one at a time, then stir in vanilla extract. -
Step 3
Gradually add dry ingredients to wet ingredients, alternating with milk. Mix until just combined, being careful not to overmix. Divide batter evenly into prepared muffin cups, filling two-thirds full. -
Step 4
Bake for 18-22 minutes, or until a skewer comes out clean. Let cool in the tin for 5-10 minutes, then transfer to a wire rack to cool completely. -
Step 5
While cupcakes cool, prepare the filling: whip heavy cream to stiff peaks. Gently fold whipped cream into vanilla pudding in two additions. -
Step 6
Once cupcakes are cool, create a well in the center of each. Spoon or pipe the vanilla pudding filling generously into the wells. -
Step 7
Melt semi-sweet chocolate chips in a heatproof bowl using a double boiler or microwave at 30-second intervals, stirring until smooth and glossy. -
Step 8
Spoon or spread the melted chocolate ganache over each filled cupcake, allowing it to cascade down the sides. Let the chocolate set slightly, or refrigerate for 15-20 minutes to speed up the process.
Important Information
Nutrition Facts (Per Serving)
It is important to consider this information as approximate and not to use it as definitive health advice.
Allergy Information
Please check ingredients for potential allergens and consult a health professional if in doubt.
Leave a Comment